
F 350 4WD Super Duty V8-6.4L DSL Turbo (2008)
9.
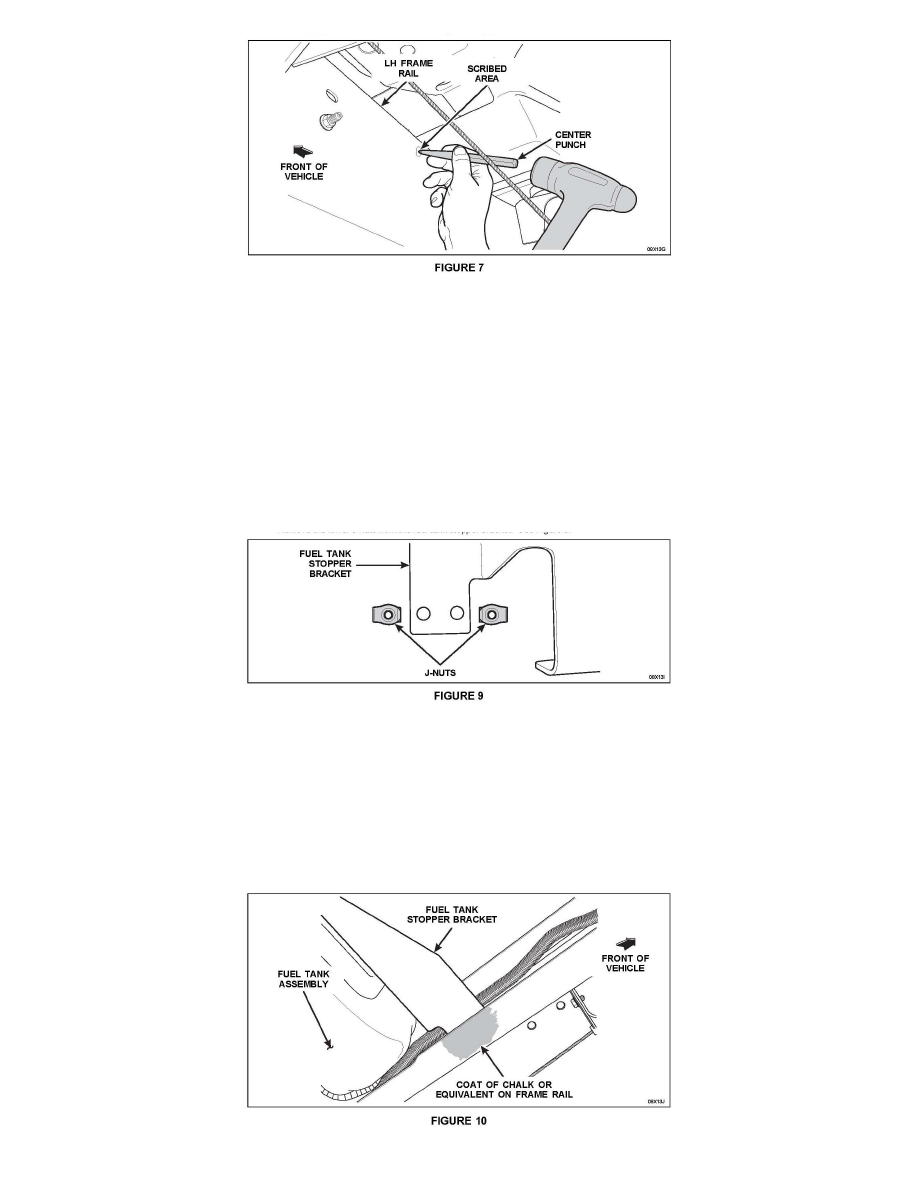
Position a center punch or equivalent and center a dimple into the frame rail in both of the scribed areas in preparation for the frame rail drilling.
See Figure 7.
10.
NOTICE: Caution MUST be taken not to damage the fuel tank assembly during the frame rail drilling process. It is recommended to use a drill bit
stop when drilling into the frame rail. Position the drill bit stop 25 mm (1.0 in) from the tip of the drill bit.
NOTICE:
For correct alignment of the fuel tank stopper bracket, the holes must be drilled straight into the frame rail using an angle-head drill motor.
Position an angle-head drill motor with a 5.5 mm (7/32 in) drill bit into the dimple and drill a pilot hole. See Figure 8.
12.
NOTE: The removal of the fuel tank stopper bracket J-nuts is necessary for the alignment and scribing process of the 2 lower fuel tank stopper
bracket holes.
Remove the lower J-nuts from the fuel tank stopper bracket. See Figure 9.
13.
NOTE: It is recommended when installing the supplied bolts and flag nuts, to install the rearward position bolt and flag nut first and then the
forward position bolt and flag nut. Snug the bolts so that the fuel tank stopper bracket is secure in preparation for scribing the 2 lower fuel tank
stopper bracket holes.
Reposition the fuel tank stopper bracket onto the frame rail. Secure the fuel tank stopper bracket and install the 2 supplied bolts through the
outside of the fuel tank stopper bracket and the frame rail. Confirm the distance of 19 mm (0.75 in) from the fuel tank stopper bracket (fuel tank
side) to the fuel tank assembly. If necessary, adjust the fuel tank stopper bracket.