
F 450 4WD Super Duty V10-6.8L (2009)
follow these instructions may result in engine damage.
NOTE: Do not allow the valve keepers to fall off the valve or the valve may drop into the cylinder. If a valve drops into the cylinder, the cylinder
head must be removed. For additional information, refer to Cylinder Head See: Cylinder Head Assembly/Service and Repair/Removal and
Replacement/Cylinder Head - Removal.
NOTE: It may be necessary to push the valve down while compressing the spring.
Using the Valve Spring Compressor, remove only the 3 designated camshaft roller followers from the previous step.
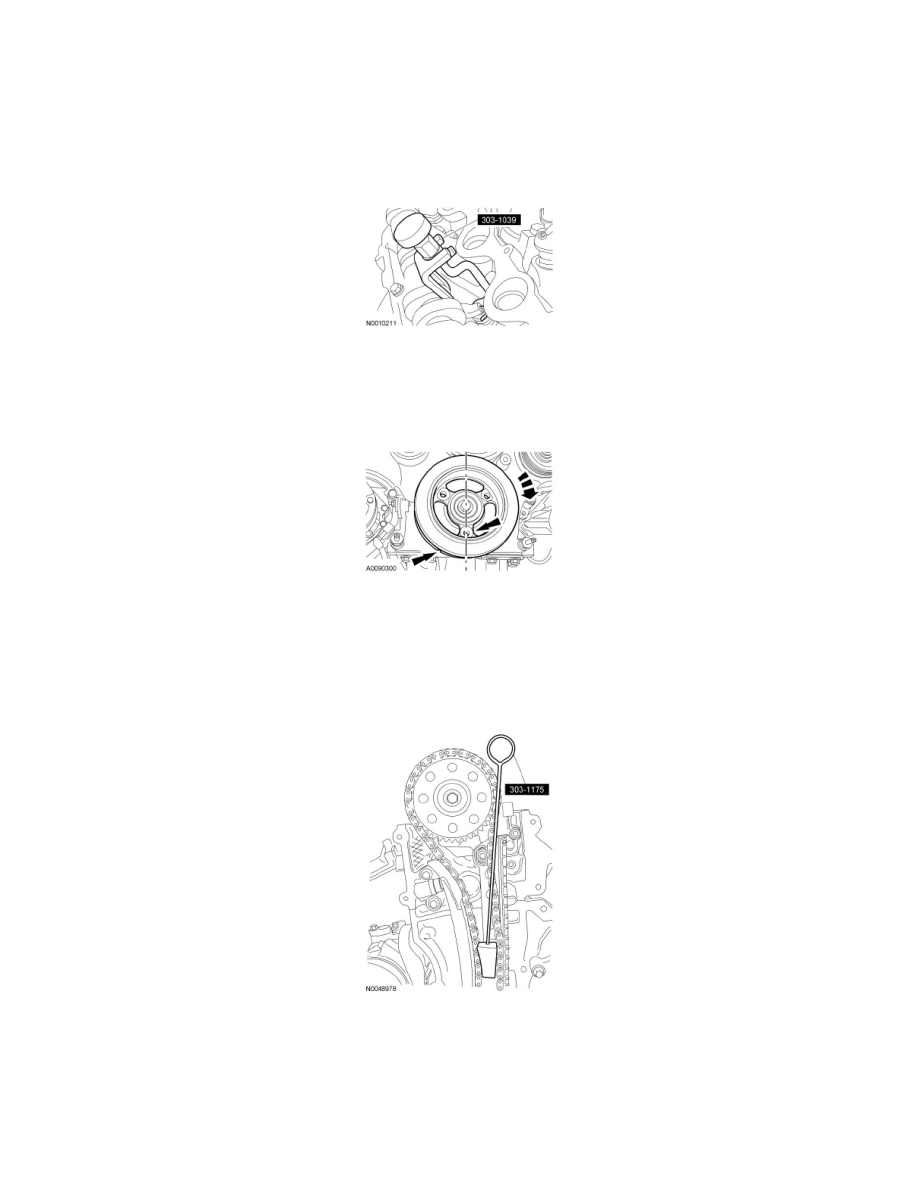
9. NOTICE: The crankshaft cannot be moved past the 6 o'clock position once set. Failure to follow this instruction may result in engine
damage.
Rotate the crankshaft clockwise, as viewed from the front, positioning the crankshaft damper spoke at the 6 o'clock position and the timing mark
indentation at the 7 o'clock position.
10. NOTICE: Engine is not freewheeling. Camshaft procedure must be followed exactly or damage to valves and pistons will result.
NOTE: The Timing Chain Locking Tool must be installed square to the timing chain and the engine block.
NOTE: Front cover removed for clarity.
Install the Timing Chain Locking Tool in the RH timing chain as shown.
11. NOTICE: Do not remove the timing chain wedge tool at any time during assembly. If the Timing Chain Locking Tool is removed or out
of placement, the engine front cover must be removed and the engine must be retimed. For additional information, refer to Timing Drive
Components See: Timing Components/Service and Repair/Removal and Replacement.
NOTICE: The timing chain must be installed in its original position onto the camshaft sprocket using the scribed marks, or damage to
valves and pistons will result.
Scribe a location mark on the timing chain and the camshaft sprocket assembly.