
Flex AWD V6-3.5L (2009)
1. Remove the RDU.
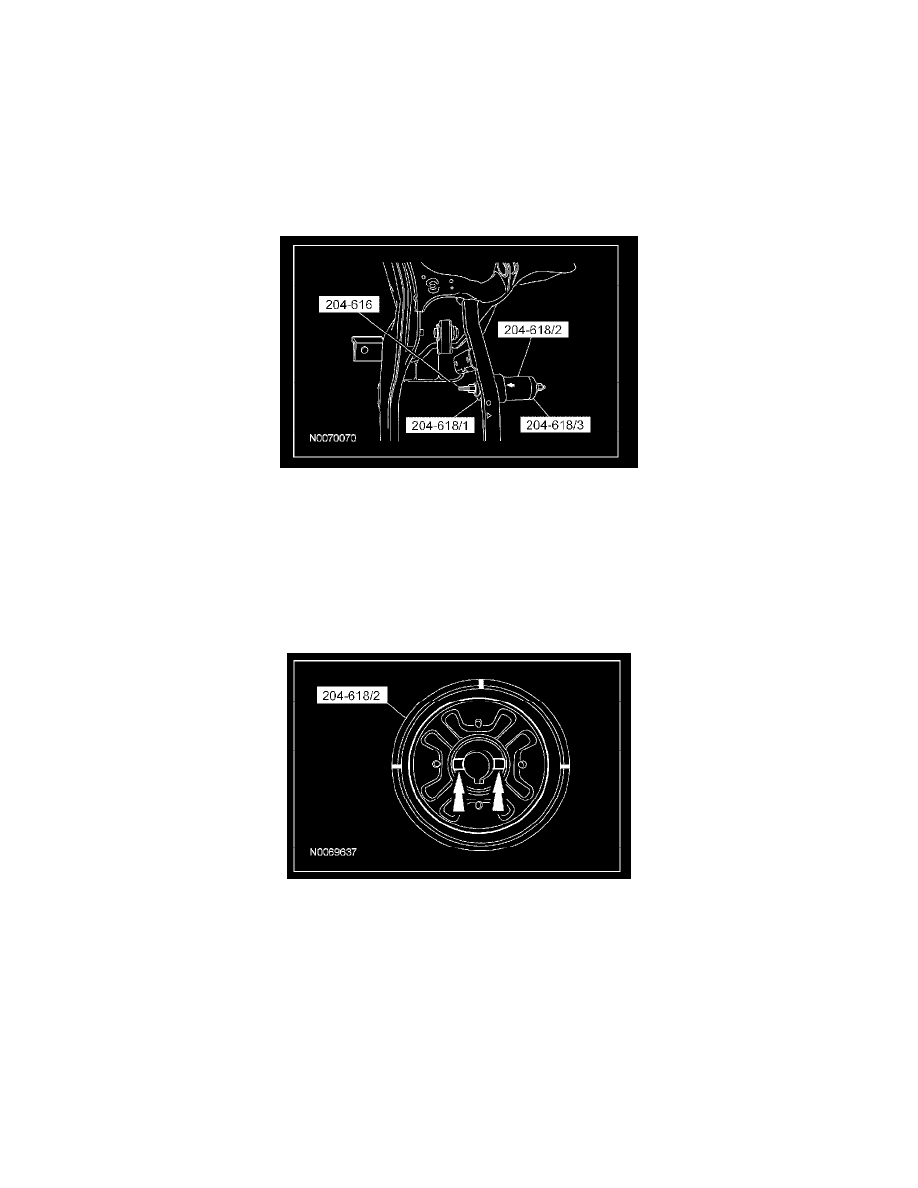
2. NOTE:
-
Make sure the Rear Drive Unit (RDU) Bushing (65 mm) Remover/Installer 204-618/2 is positioned with the larger opening toward the bushing
to act as the receiver cup.
-
Make sure the arrow on the Rear Drive Unit (RDU) Bushing (70 mm) Remover/Installer 204-616/2 is pointed toward the rear subframe when
removing the bushing.
Assemble the Rear Drive Unit (RDU) Bushing (65 mm) Remover/Installer 204-618 and Rear Drive Unit (RDU) Bushing (70 mm)
Remover/Installer 204-616 to the rear subframe and press out the bushing.
Installation
NOTE: There are 2 RDU front bushings in the subframe. This procedure shows how to install one bushing. The procedure for the remaining RDU
bushing is identical.
1. NOTE: Make sure the alignment marks on the Rear Drive Unit (RDU) Bushing (70 mm) Remover/Installer 204-616/2 are aligned with the
anti-rotation tabs on the RDU bushing.
Install the RDU bushing into the Rear Drive Unit (RDU) Bushing (70 mm) Remover/Installer 204-616/2.
2. NOTE: Make sure the alignment marks are properly aligned on both Rear Drive Unit (RDU) Bushing (70 mm) Remover/Installer 204-616/1 and
Rear Drive Unit (RDU) Bushing (70 mm) Remover/Installer 204-616/2 and the anti-rotation tabs are properly seated in the Rear Drive Unit
(RDU) Bushing (70 mm) Remover/Installer 204-616.
Install the Rear Drive Unit (RDU) Bushing (70 mm) Remover/Installer 204-616/2 onto the RDU bushing.