
Focus L4-2.0L DOHC VIN 5 (2003)
^
are installed on vehicles built from Job # 1 2003 through May 31, 2003.
This repair also applies to both lower seat cushion and seat back heater element pads that:
^
are completely folded together or are damaged.
CAUTION:
When adhering the heater element pad to the foam, be sure to position the pad so it is straight and free of any wrinkles that may show through
the material once the cover is reinstalled.
1.
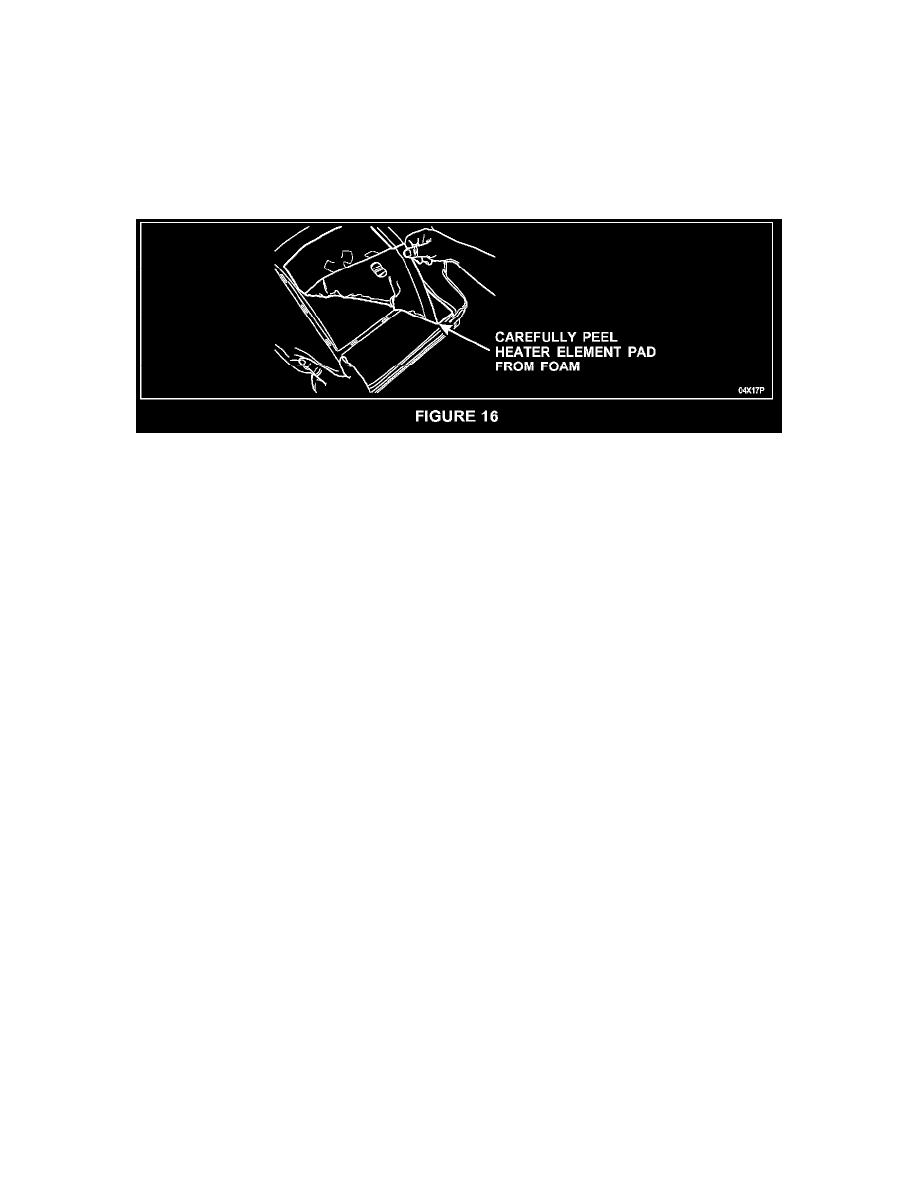
SLOWLY AND CAREFULLY peel the heater element pad adhesive strip from the foam. If the foam begins to tear or if the adhesive is not
separating cleanly from the foam, stop and try to separate the other end of the adhesive strip from the foam. If necessary, use a razor or other sharp
knife to trim the pad from the foam. See Figure 16.
2.
For seat back heater element pad removal, detach the heater element pad harness from the seat frame harness retainer, then remove the heater
element pad from the seat assembly.
3.
Position the new heater element pad onto the foam, feeding the wire harness through the hole in the foam. Be sure the pad is properly positioned
(straight and in the same footprint as the original).
4.
CAUTION: Apply only enough adhesive to properly bond the pad to the foam. Applying too much adhesive can result in adhesive bleeding
through to the seat trim cover. Apply the adhesive in a strip no more than 25-mm (1-inch) wide along the outer edges of the heater mat and on the
mating surfaces of the foam to ensure no adhesive is applied under the heater element wire.
Neatly apply Motorcraft Trim and Weather Strip Adhesive (part number TA- 14 or CTA-14 for Canadian dealers) to all four (4) edges of the
heater element pad and the mating surface on the foam. Press the edges down while smoothing the heater element pad down to avoid wrinkling or
puckering. Allow the adhesive to dry for five (5) minutes before assembling the seat. Test the edges to make sure they adhere well enough to avoid
pulling the heater element pad up when the trim cover is reinstalled.
5.
Proceed to the Seat Cushion and Seat Back Reassembly procedure in this Attachment III.
HEATER ELEMENT PAD ADHESION REINFORCEMENT
NOTE:
This repair applies to both seat cushion and seat back assemblies that:
^
show no signs of damage.
^
do not require any parts replacement.
^
are not subject to any other repair.
CAUTION:
When adhering the heater element pad to the foam, be sure to position the pad so it is straight and free of any wrinkles that may show through
the material once the cover is reinstalled.
1.
CAUTION: Apply only enough adhesive to properly bond the pad to the foam. Applying too much adhesive can result in adhesive bleeding
through to the seat trim cover. Apply the adhesive in a strip no more than 25-mm (1-inch) wide along the outer edges of the heater mat and on the
mating surfaces of the foam to ensure no adhesive is applied under the heater element wire. Also, DO NOT apply adhesive to an existing adhesive
strip on the pad itself. Poor adhesion will result.