
Fusion FWD L4-2.5L Hybrid (2010)
Oil Pan: Service and Repair
Oil Pan
Oil Pan
Removal
1. With the vehicle in NEUTRAL, position it on a hoist. For additional information, refer to Vehicle Jacking and Lifting.
2. Drain the engine oil, then install the drain plug.
-
Tighten to 28 Nm (21 lb-ft).
3. Remove the engine front cover. For additional information, refer to Engine Front Cover See: Timing Components/Timing Cover/Service and
Repair.
4. Remove the 4 oil pan-to-bellhousing bolts.
5. Remove the 13 bolts and the oil pan.
Installation
1. NOTICE: Do not use metal scrapers, wire brushes, power abrasive discs or other abrasive means to clean the sealing surfaces. These tools
cause scratches and gouges, which make leak paths. Use a plastic scraping tool to remove traces of sealant.
Clean and inspect all mating surfaces.
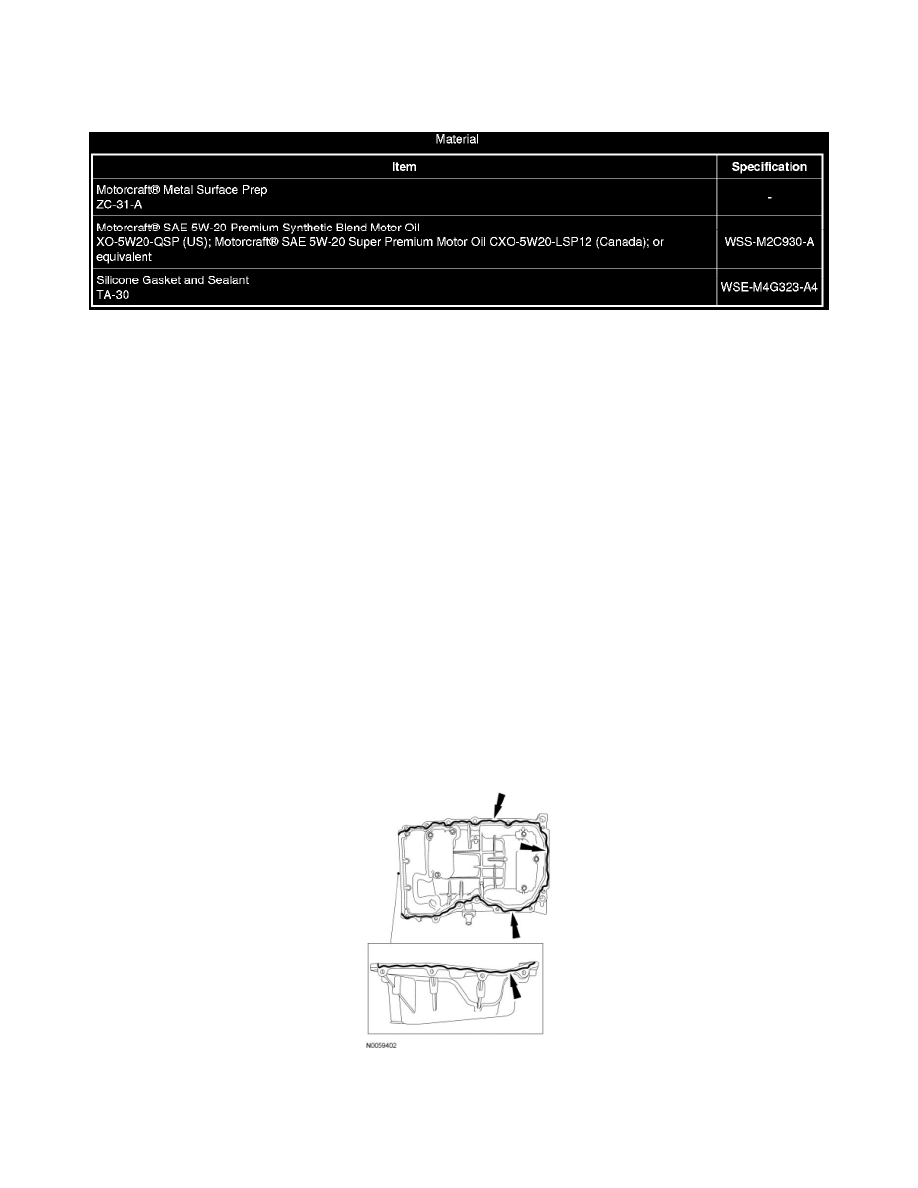
2. NOTE: If the oil pan is not secured within 4 minutes of sealant application, the sealant must be removed and the sealing area cleaned with metal
surface prep. Allow to dry until there is no sign of wetness, or 4 minutes, whichever is longer. Failure to follow this procedure can cause future oil
leakage.
Apply a 2.5 mm (0.09 in) bead of silicone gasket and sealant to the oil pan.
3. Position the oil pan and install the 2 rear oil pan bolts finger-tight.
4. Using a suitable straightedge, align the front surface of the oil pan flush with the front surface of the engine block.