
Fusion FWD V6-3.0L (2009)
-
To install, tighten the new bolt and flagnut to 115 Nm (85 lb-ft) with the suspension at the bushing fastener tightening position.
10. Remove and discard the toe link outboard bolt.
-
To install, tighten the new bolt to 110 Nm (81 lb-ft) with the suspension at the bushing fastener tightening position.
AWD vehicles
11. Remove the wheel speed sensor harness bracket nut and position aside the bracket.
-
To install, tighten to 23 Nm (17 lb-ft).
12. Remove the toe link. For additional information, refer to Toe Link See: Rear Knuckle Alignment Link/Service and Repair.
13. Remove the 4 trailing arm-to-wheel knuckle nuts and the trailing arm toe link bracket.
-
Discard the nuts.
-
To install, tighten the new nuts to 100 Nm (74 lb-ft).
All vehicles
14. Remove the 2 trailing arm-to-frame bolts, cone washers and the trailing arm.
-
Discard the bolts.
-
To install, tighten the new bolts to 125 Nm (92 lb-ft).
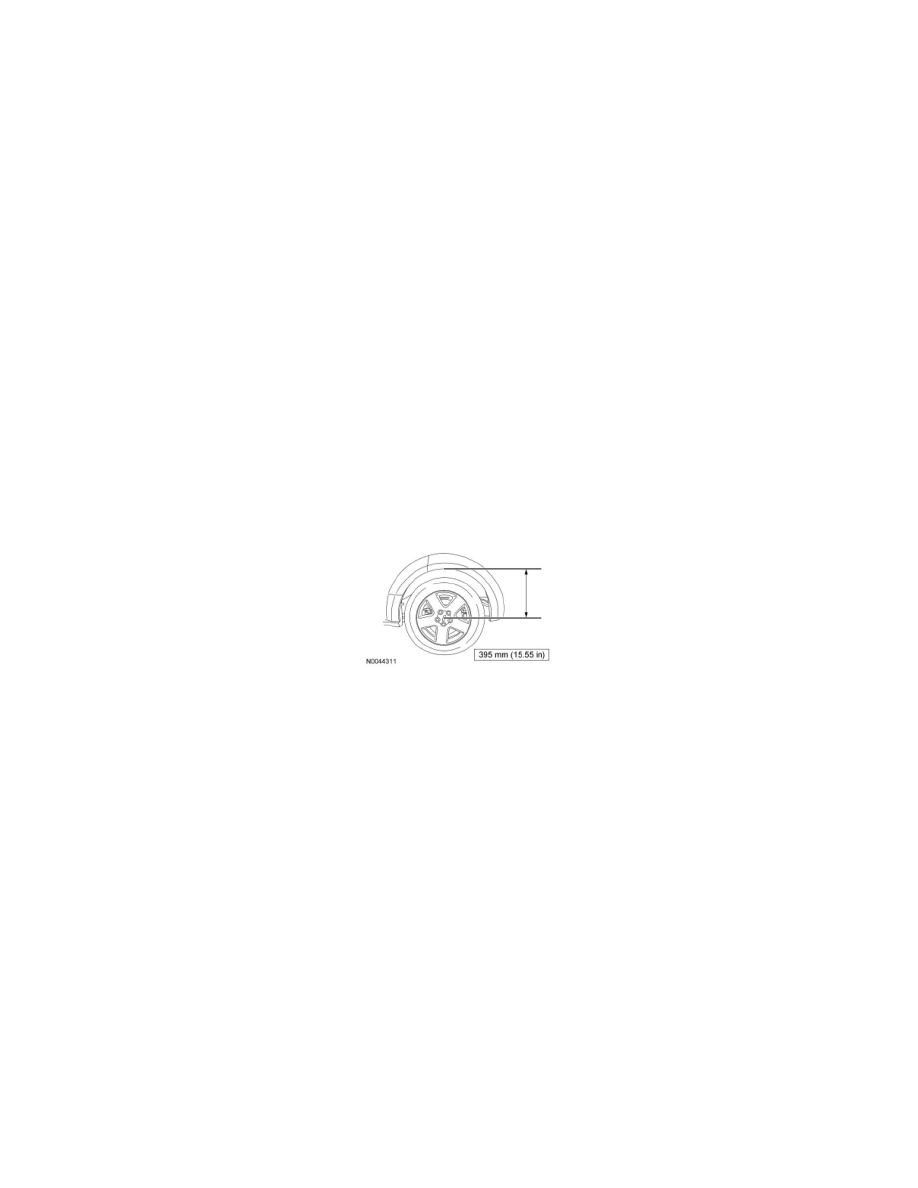
15. NOTICE: Before tightening any suspension bushing fasteners, the suspension must be at the bushing fastener tightening position. Use a
suitable jack to raise the suspension until the distance between the center of the hub and the lip of the fender is equal to 395 mm (15.55
in). This will prevent incorrect clamp load and bushing damage.
To install, reverse the removal procedure.
16. Check and, if necessary, align the rear end.