
Fusion FWD V6-3.5L (2010)
serious engine damage.
NOTE: If the valve cover is not installed and the fasteners tightened within 4 minutes, the sealant must be removed and the sealing area cleaned.
To clean the sealing area, use silicone gasket remover and metal surface prep. Failure to follow this procedure can cause future oil leakage.
Apply an 8 mm (0.31 in) bead of Motorcraft High Performance Engine RTV Silicone to the engine front cover-to-LH cylinder head joints.
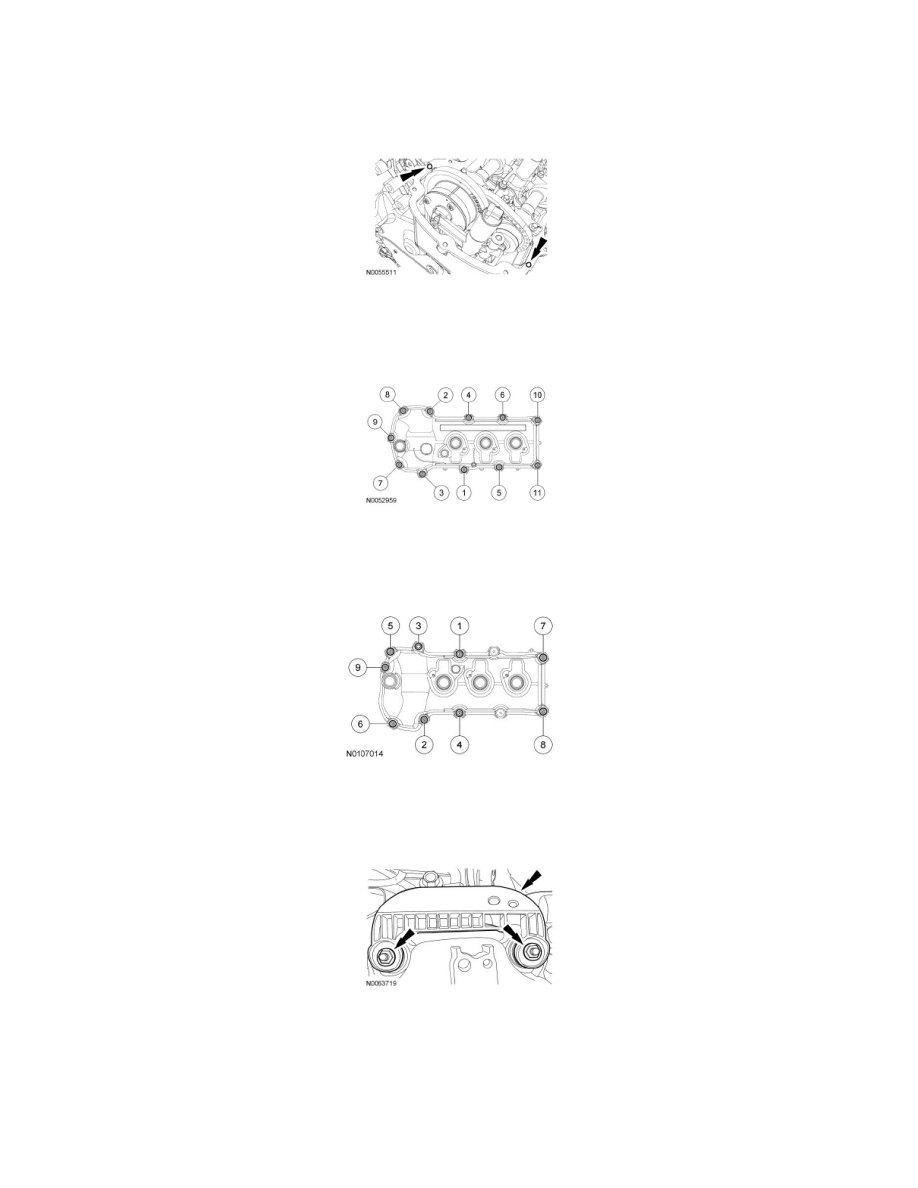
Early build vehicles
19. Using a new gasket, install the LH valve cover and 11 stud bolts.
-
Tighten in the sequence shown to 10 Nm (89 lb-in).
Late build vehicles
20. Using a new gasket, install the RH valve cover and tighten the 9 stud bolts.
-
Tighten in the sequence shown to 10 Nm (89 lb-in).
All vehicles
21. Install the wiring harness retaining bracket and the 2 nuts.
-
Tighten to 4 Nm (35 lb-in).
22. Install the Power Steering Pressure (PSP) hose bracket and nut.
-
Tighten to 9 Nm (80 lb-in).