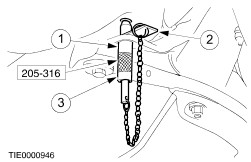
| Removal and Installation Special Tool(s) | | Alignment Pins, Subframe 205-316 (15-097A) | General Equipment Removal All Vehicles | | -
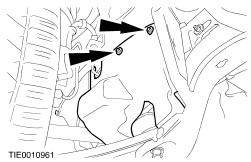
Support the radiator on both sides using suitable pins. | | | -
Remove the radiator splash shield. - Remove the bolts.
- Detach from the clips.
| | | -
Detach the bumper support brackets. | Vehicles with air conditioning | | -
Detach the air conditioning condenser from the subframe. | Vehicles with manual transaxle | | -
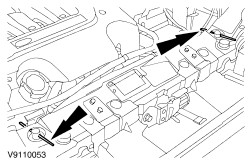
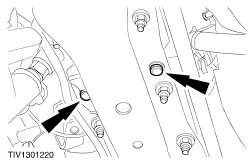
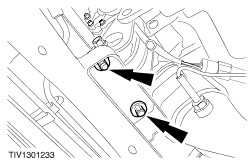
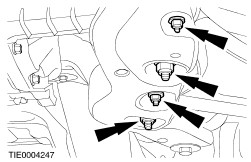
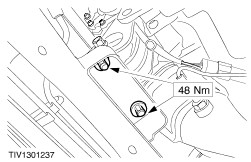
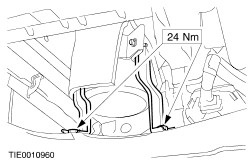
Remove the engine right-hand support insulator center bolt. | Vehicles with automatic transaxle | | -
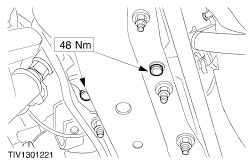
Remove the engine right-hand support insulator retaining bolts. | All Vehicles | | -
Remove the engine left-hand support insulator retaining bolts. | | | -
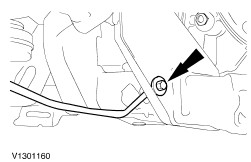
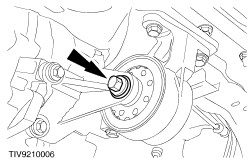
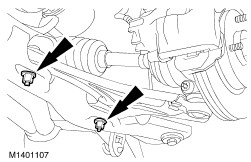
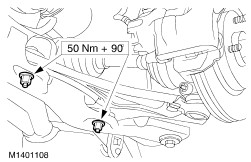
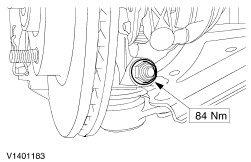
Remove the lower arm to wheel knuckle joint pinch bolt and nut. | | | -
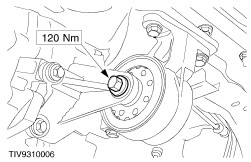
CAUTION:Protect the ball joint seal using a soft cloth to prevent damage. Detach the lower arm ball joint from the wheel knuckle. | | | -
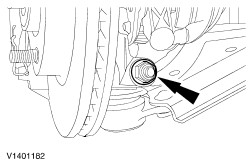
Remove the crankshaft front shield. | | | -
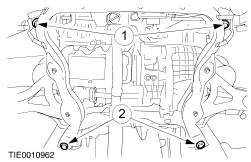
Using a suitable transmission jack, support the subframe. | | | -
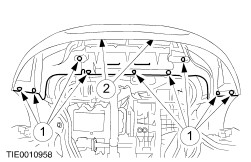
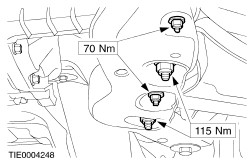
Remove the subframe front bolts. - Remove the front bolts.
- Loosen the rear bolts.
| | | -
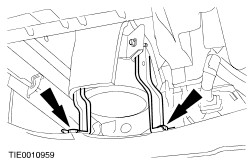
Lower the subframe to gain access to the lower arm bolts. | Lower arms with vertical bushings | | -
Remove the lower arm. - Remove the two lower arm nuts and bolts.
| Lower arms with horizontal bushings | | -
Remove the lower arm. - Remove the four lower arm nuts and bolts.
| Installation Lower arms with vertical bushings | | -
CAUTION:Make sure the bolt heads are uppermost. Install the lower arm. | Lower arms with horizontal bushings | | -
CAUTION:Make sure the bolt heads are uppermost. Install the lower arm. | All Vehicles | | -
Using the special tools align the subframe. - Push the guide pins through the subframe aligning holes (one each side).
- Engage the locking pins.
- Tighten the guide pin sleeve.
| | | -
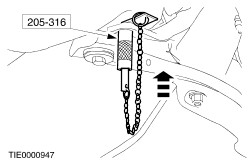
CAUTION:Make sure the radiator engages the mounting brackets. Raise the subframe, engaging the special tools into the alignment holes. | | | -
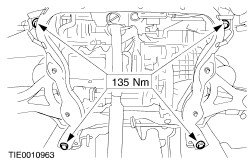
Install the subframe retaining bolts. | | | -
Remove the special tools. | | | -
Install the crankshaft front shield. | | | -
Attach the lower arm ball joint to the wheel knuckle. | | | -
Install the engine left-hand support insulator retaining bolts. | Vehicles with manual transaxle | | -
Install the engine right-hand support insulator center bolt. | Vehicles with automatic transaxle | | -
Install the engine right-hand support insulator retaining bolts. | Vehicles with air conditioning | | -
Attach the air conditioning condensor to the subframe. | All Vehicles | | -
Install the radiator splash shield. | | | -
Remove the radiator supports. | |