| Removal and Installation Removal All Vehicles | | -
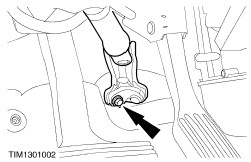
Disconnect the steering column shaft from the flexible coupling. - Remove the bolt and rotate the clamp plate.
| Vehicles built up to 1/1999 | | -
CAUTION:When removing the floor seal, do not damage the sealing clips. Remove the floor seal from the bulkhead. - Release the lower retaining clips.
- Disconnect the upper retaining clip.
- Remove the floor seal.
| | | -
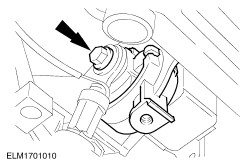
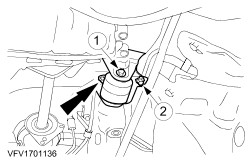
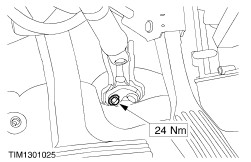
Remove the steering column flexible coupling. | Vehicles built 1/1999 onwards | | -
Remove the steering column flexible coupling. | All Vehicles | | -
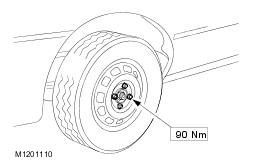
Loosen the front wheel nuts (both sides). | | | -
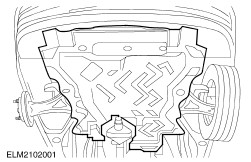
Remove the engine undershield (if equipped). | | | -
Remove the radiator lower cover. - Remove the bolts.
- Detach from the clips.
| | | -
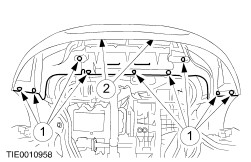
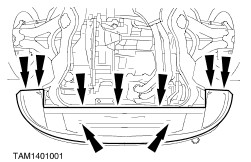
Detach the bumper brackets from the subframe. | | | -
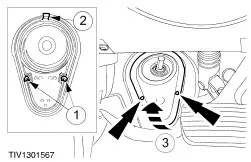
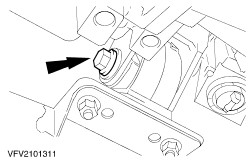
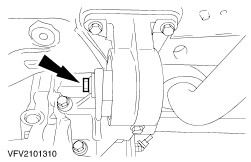
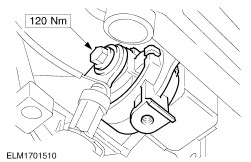
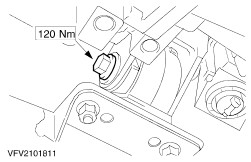
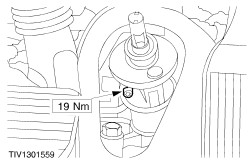
Remove the front support insulator center bolt. | Vehicles with manual transaxle | | -
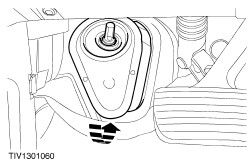
Remove the rear support insulator center bolt. | Vehicles with automatic transaxle | | -
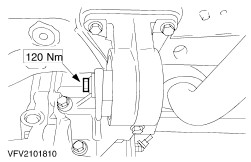
Remove the rear support insulator center bolt. | All Vehicles | | -
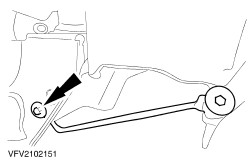
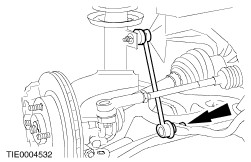
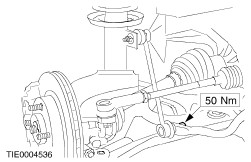
Detach the connecting links from the stabilizer bar. | | | -
Remove the drive belt lower guard. | | | -
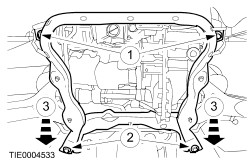
Lower the subframe assembly. - Loosen the front bolts.
- Remove the rear bolts.
- Lower the rear of the subframe assembly.
| | | -
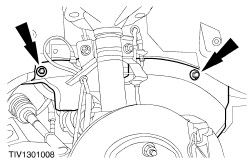
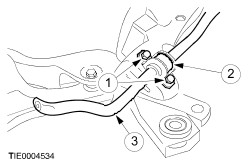
Remove the stabilizer bar (two bolts each side). - Remove the bolts.
- Remove the clamp.
- Remove the stabilizer bar.
| Installation All Vehicles | | -
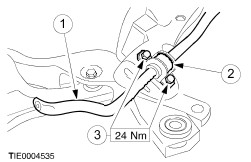
Install the stabilizer bar. - Position the stabilizer bar.
- Install the clamps.
- Install the bolts.
| | | -
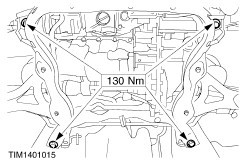
Install the subframe rear bolts and tighten the subframe front bolts. | | | -
Install the drive belt lower guard. | | | -
Connect the connecting links to the stabilizer bar. | Vehicles with automatic transaxle | | -
CAUTION:Make sure the support insulator is central to the mounting bracket. If the rear support insulator is not central to the mounting bracket, refer to steps 6, 7 and 8. Install the rear support insulator center bolt. | | | -
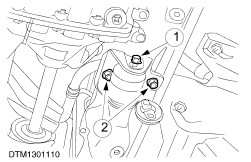
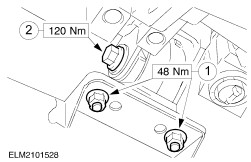
Remove the resonator and bracket assembly. - Remove the center bolt.
- Remove the nuts.
| | | -
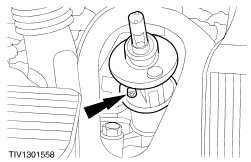
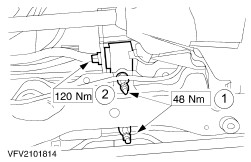
Centre the rear support insulator. - Loosen the bolts, center the support insulator and tighten the bolts.
- Tighten the support insulator center bolt.
| | | -
Install the resonator and bracket assembly. - Install the center bolt.
- Install the nuts.
| Vehicles with manual transaxle | | -
CAUTION:Make sure the support insulator is central to the mounting bracket. If the rear support insulator is not central to the mounting bracket, refer to step 10. Install the rear support insulator center bolt. | | | -
Centre the rear support insulator. - Slacken the bolts, center the rear support insulator and tighten the bolts.
- Tighten the support insulator center bolt.
| All Vehicles | | -
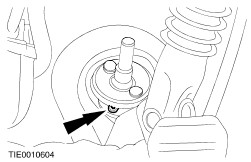
CAUTION:Make sure the support insulator is central to the mounting bracket. If the front support insulator is not central to the mounting bracket, refer to step 12. Install the front support insulator center bolt. | | | -
Center the front support insulator. - Slacken the nuts, center the front support insulator and tighten the bolts.
- Tighten the support insulator center bolt.
| | | -
Attach the bumper support bracket to the subframe assembly. | | | -
Install the radiator lower cover. | | | -
Install the engine undershield (if equipped). | | | -
Install the front wheels. | | | -
WARNING:Install a new pinch bolt. Failure to follow this instruction may result in personal injury. Install the steering column flexible coupling. | | | -
WARNING:Install a new pinch bolt. Failure to follow this instruction may result in personal injury. Connect the steering column shaft to the flexible coupling. | |