| Removal and Installation Special Tool(s) | | Expander, Teflon seal 13-015 | | | Guide pins, subframe 15-097A | | | Gauge, engine alignment 21-172 | Removal All Vehicles | | -
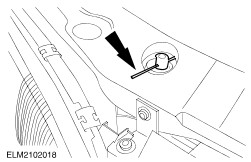
Detach the steering column shaft from the flexible coupling. - Rotate the clamp plate to disengage.
| | | -
Support the radiator on both sides with suitable Tommy bars. | | | -
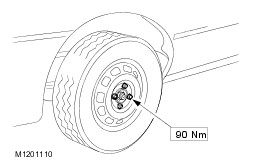
Slacken the front road wheel nuts and raise the vehicle. | Manual transmission vehicles | | -
Disconnect the shift linkage. | All vehicles | | -
Detach the catalytic converter assembly from the exhaust rear pipe. - Discard the gasket and the nuts.
| | | -
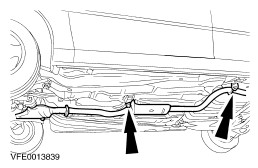
Detach the exhaust rear pipe and position it to one side. | | | -
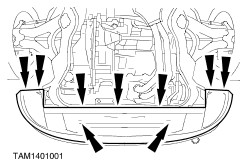
Remove the front lower radiator cover (five bolts and four push-in clips). | | | -
Remove the radiator support brackets (two bolts each side). | | | -
Remove the front road wheels. | Vehicles with air conditioning | | -
Remove the air conditioning accumulator retaining bolts. | Vehicles with manual transmission | | -
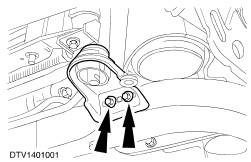
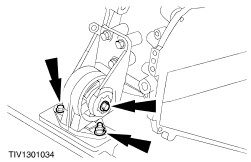
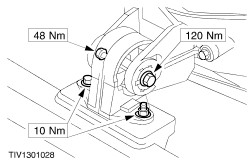
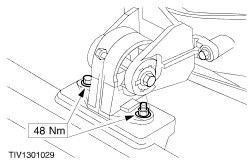
Remove the front roll restrictors. | | | -
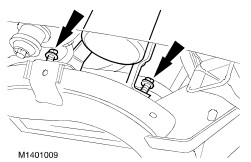
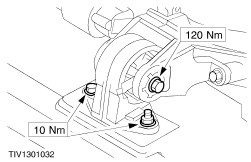
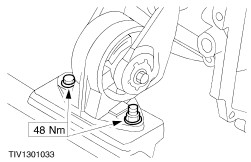
Remove the rear roll restrictor. | Vehicles with automatic transmission | | -
Remove the front roll restrictor. | | | -
Remove the rear roll restrictor. | All vehicles | | -
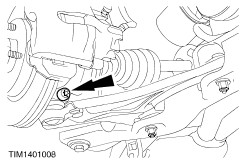
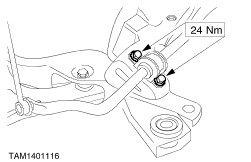
Detach the connecting links from the stabilizer unit assemblies (one nut each side). | | | -
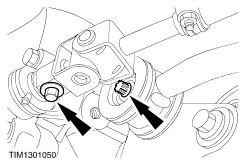
Remove the lower arm to spindle carrier pinch bolts and nuts (one each side). | | | -
CAUTION:Protect the ball joint seals to prevent damage. Detach the lower arms from the spindle carriers. | | | -
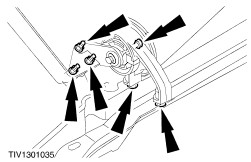
Remove the power steering pipe retaining bracket from the subframe. | | | -
Detach the fluid cooler pipes from the subframe. | | | -
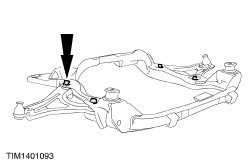
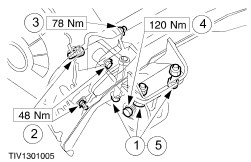
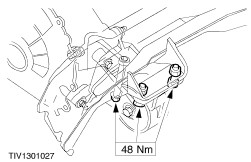
Loosen the subframe by five turns and lower the rear of the subframe to gain access to the steering gear retaining bolts. | | | -
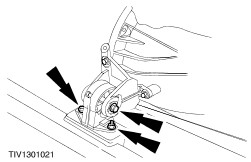
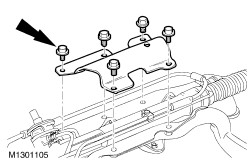
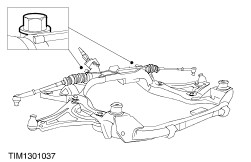
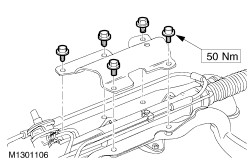
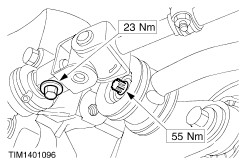
Remove the steering gear cover plate. | | | -
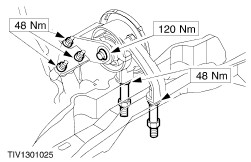
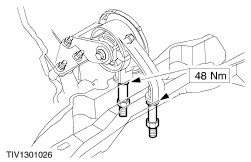
CAUTION:Ensure that the pressure check valve does not fall out of the valve body pressure port when the steering gear assembly is being removed. Remove the steering gear (subframe shown removed for clarity). | | | -
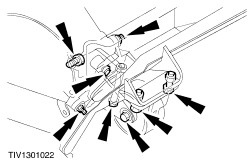
Remove the stabilizer bar (two bolts each side). | Installation All Vehicles | | -
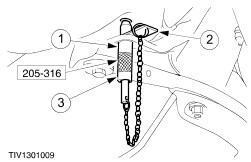
NOTE:If the steering gear is being renewed the unions that are supplied fitted to the steering gear should be removed and saved for future use. Renew the union sealing rings. - Push the new sealing ring onto the tool.
- Locate the tool on the union and push on the new sealing ring.
| | | -
NOTE:When refitting the lower arms ensure that the bolt heads are on top. Refit the lower arms. | | | -
Refit the remaining components in reverse order. | | | -
Fit the subframe guide pins. - Push the guide pins through the subframe aligning holes.
- Slide the locking plates into the locking grooves.
- Tighten the guide pin sleeves.
| | | -
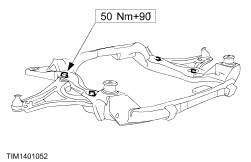
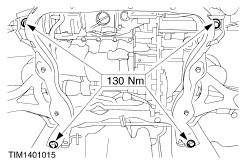
NOTE:When raising the subframe ensure that the flexible coupling locates correctly. Raise the subframe engaging the guide pins into the alignment holes. | NOTE:Fit the gold colored mounting bolts to the front and the silver colored ones to the rear. | | -
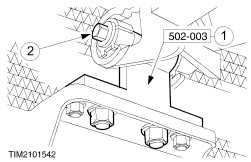
Check the alignment of the powertrain. - Fit the alignment gauge in place of the front roll restrictor.
- Fit and slightly tighten the center bolt.
- If the alignment gauge cannot be fitted easily check to the powertrain alignment procedure.
| Manual transmission vehicles CAUTION:When refitting the rear roll restrictor the long center bolt should be fitted last. | | -
Remove the alignment gauge. | Automatic transmission vehicles CAUTION:When refitting the rear roll restrictor the long center bolt should be fitted last. | | -
Remove the alignment gauge. | Manual transmission vehicles CAUTION:When refitting the front roll restrictor the long center bolt should be fitted last. Automatic transmission vehicles CAUTION:When refitting the front roll restrictor the long center bolt should be fitted last. All vehicles Manual transmission vehicles All vehicles CAUTION:Before lowering the vehicle ensure that the steering is in the straight ahead position. |