| Removal and Installation Removal All vehicles | | -
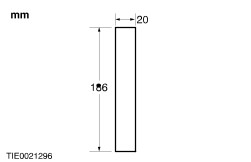
Fabricate a 20 mm wide by 186 mm long spacer. | | | -
Detach the stabilizer bar from the rear lower arm. | | | -
Remove the spring. For additional information, refer to Spring-Wagon in this section. | | | -
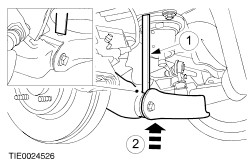
NOTE:The spacer must be positioned exactly as shown. Using a suitable transmission jack, raise the rear lower arm to the suspension design height setting. - Position the spacer.
- Raise the rear lower arm.
| Vehicles with xenon headlamps | | -
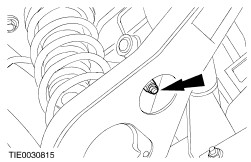
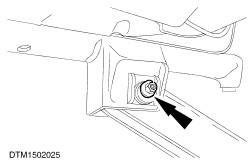
NOTE:The headlamp leveling sensor wiring harness is attached to the left-hand rear lower arm. Detach the headlamp leveling sensor wiring harness from the rear lower arm. | All vehicles | | -
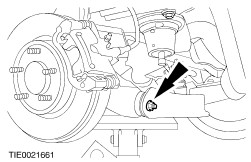
Detach the rear lower arm from the wheel knuckle. | | | -
Remove the rear lower arm. | Installation All vehicles NOTE:Final tightening of the rear suspension components should be carried out when the vehicle weight is on the road wheels. | | -
NOTE:Do not fully tighten the rear lower arm adjustment cam nut at this stage. Attach the rear lower arm to the crossmember. | | | -
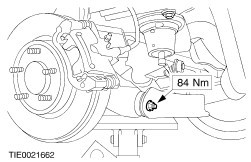
NOTE:Do not fully tighten the rear lower arm to wheel knuckle retaining bolt at this stage. Install the rear lower arm. | Vehicles with xenon headlamps | | -
NOTE:The headlamp leveling sensor wiring harness is attached to the left-hand rear lower arm. Attach the headlamp leveling sensor wiring harness to the rear lower arm. | All vehicles | | -
Lower the suspension from the design height setting. | | | -
Install the spring. For additional information, refer to Spring-Wagon in this section. | | | -
Attach the stabilizer bar to the rear lower arm. | | | -
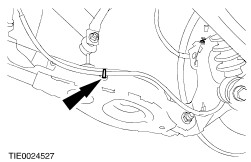
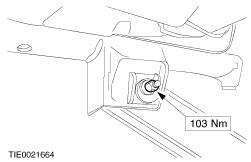
Tighten the rear lower arm to wheel knuckle retaining bolt (wheel and tire shown removed for clarity). | | | -
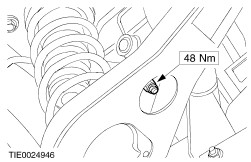
Tighten the rear lower arm adjustment cam nut. | |