
Mustang V6-3.9L VIN 6 (2004)
9.
Reinstall the pushpin fasteners in the fender splash shield.
10.
Proceed to the INSTALLATION OF THE CATALYST HANGER.
INSTALLATION OF THE CATALYST HANGER TO THE TRANSMISSION
1.
For vehicles equipped with a manual transmission, remove the damper on the tailshaft housing of the transmission. Vehicles with an automatic
transmission proceed to Step # 2.
2.
Install the catalyst assembly.
3.
Support the rear of the assembly with a jack stand.
4.
Loosely tighten to the exhaust manifold.
5.
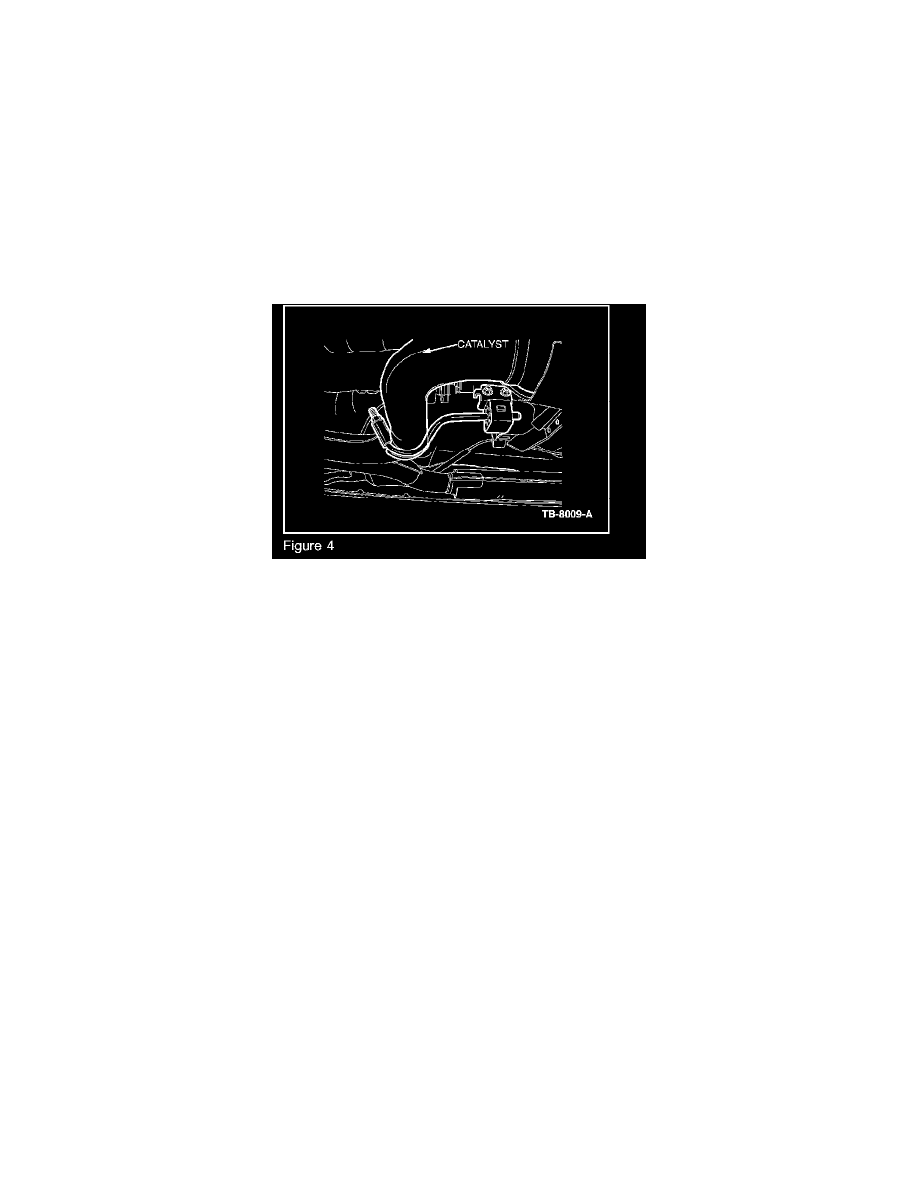
Loosely install the hanger rod and U-clamp around the exhaust pipe near the "Y" of the catalyst (Figure 4).
6.
Slide the rubber isolator and bracket onto the rod with the bracket nuts facing the passenger side of the vehicle (Figure 4).
7.
Adjust the catalyst height and U-clamp so that the rubber isolator bracket will attach to the transmission extension housing (using the rearward
holes - Figure 4).
8.
Install the two (2) bolts provided in the Kit and tighten to 18 lb-ft (25 N.m).
9.
Adjust the jack stand so the hanger rod is in the center of the isolator.
10.
Tighten the U-clamp fasteners to 29 lb-ft (40 N.m).
11.
Remove the jack stand.
12.
Tighten the catalyst to the exhaust manifold fasteners to 30 lb-ft (41 N.m).
13.
Attach the muffler inlet pipe and tighten to 26 lb-ft (35 N.m).
14.
Check the system for grounding.
15.
Lower the vehicle.
16.
Reconnect the battery.
17.
Start the engine and check for exhaust leaks.
PIPE MISALIGNED OR DAMAGED
NOTE
IF THE INLET PIPE IS NOT IN DIRECT ALIGNMENT OR WAS DAMAGED, INSTALL THE INLET PIPE PROVIDED IN THE KIT.
1.
Remove the catalyst assembly from the vehicle, refer to Workshop Manual Section 309-00.