
Mustang V8-4.6L DOHC (1996)
^
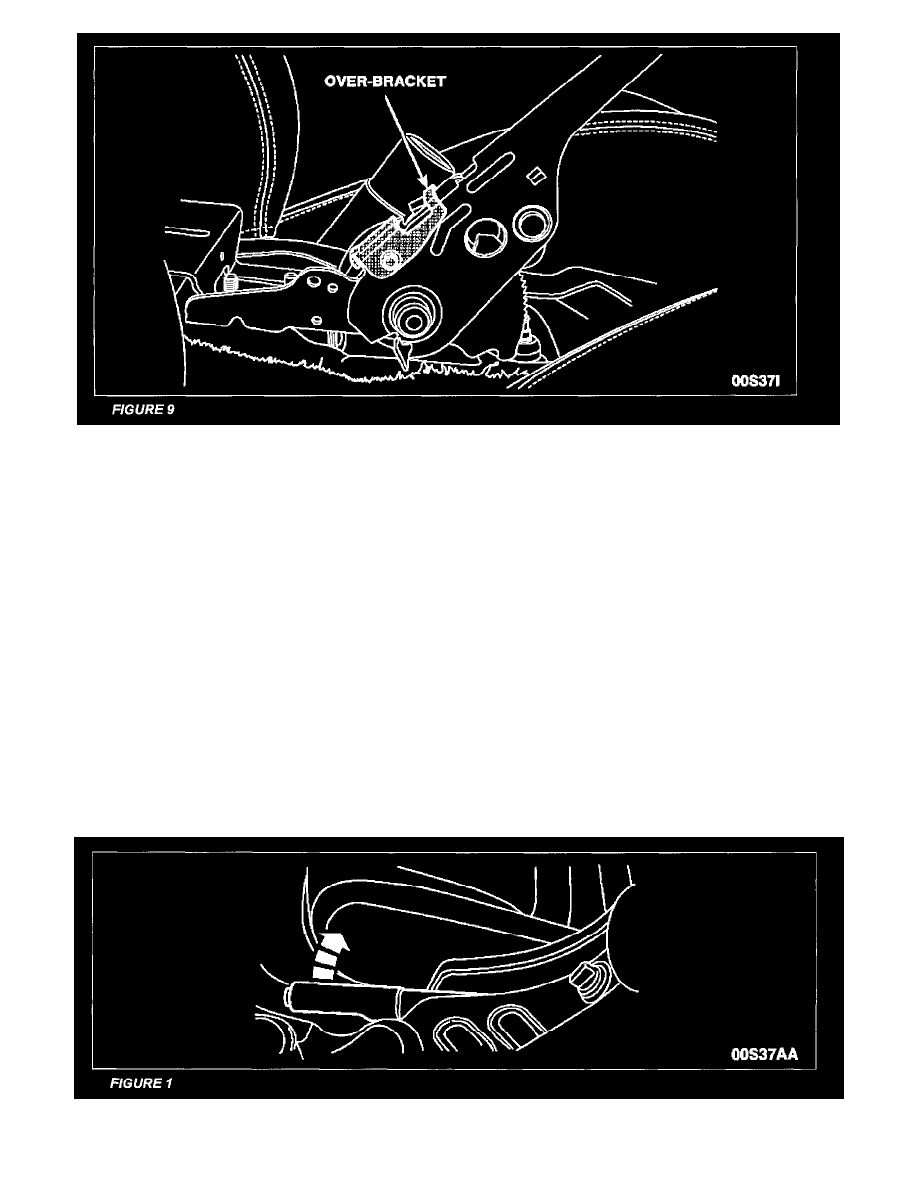
On 1994-2000 model year vehicles, position the over-bracket on the control assembly as shown in the illustration. Make sure the over-bracket
mounting hole is aligned with the lockpin hole on the control assembly. Install the self-tapping screw and tighten to 3.0 Nm (27 in-lb). See
Figure 9.
6.
Install and connect the parking brake indicator lamp switch.
7.
Install the console and install the retainer screws. On 1994-1998 model year vehicles, connect the main console harness connector.
8.
On 1994-2000 model year vehicles, install the bin and bin retainer screws, then install the rubber plugs. Close the console compartment door.
9.
On 1999-2001 model year vehicles, connect the main console harness connector.
10.
Connect the electrical connectors, if equipped, then snap the forward bezel into position. Install the shifter knob.
11.
Connect the battery ground cable and remove the memory saver.
12.
Apply and release the parking brake control several times. Make sure the parking brakes apply and release, the BRAKE indicator lamp on the
instrument panel comes on when the parking brakes are applied when the key is on, and the lamp goes off when the parking brakes are released.
Attachment IV - Example Mustang Owner Guide
The following information is from the 2000 Mustang Owner Guide
Parking brake (P)
Apply the parking brake whenever the vehicle is parked. To set the parking brake, apply the brake pedal and pull the parking brake handle up as far as
possible. See Figure 1