
Mustang V8-5.4L SC (2008)
Steering Column Multifunction Switch (Part 2)
Removal and Installation
Turn signal/headlamp switch and windshield wiper/washer switch
1. NOTE: The instrument cluster finish panel is held in place with retaining clips that are attached to the bezel.
Remove the instrument cluster finish panel.
2. Remove the floor console finish panel.
3. Remove the LH A-pillar lower trim panel.
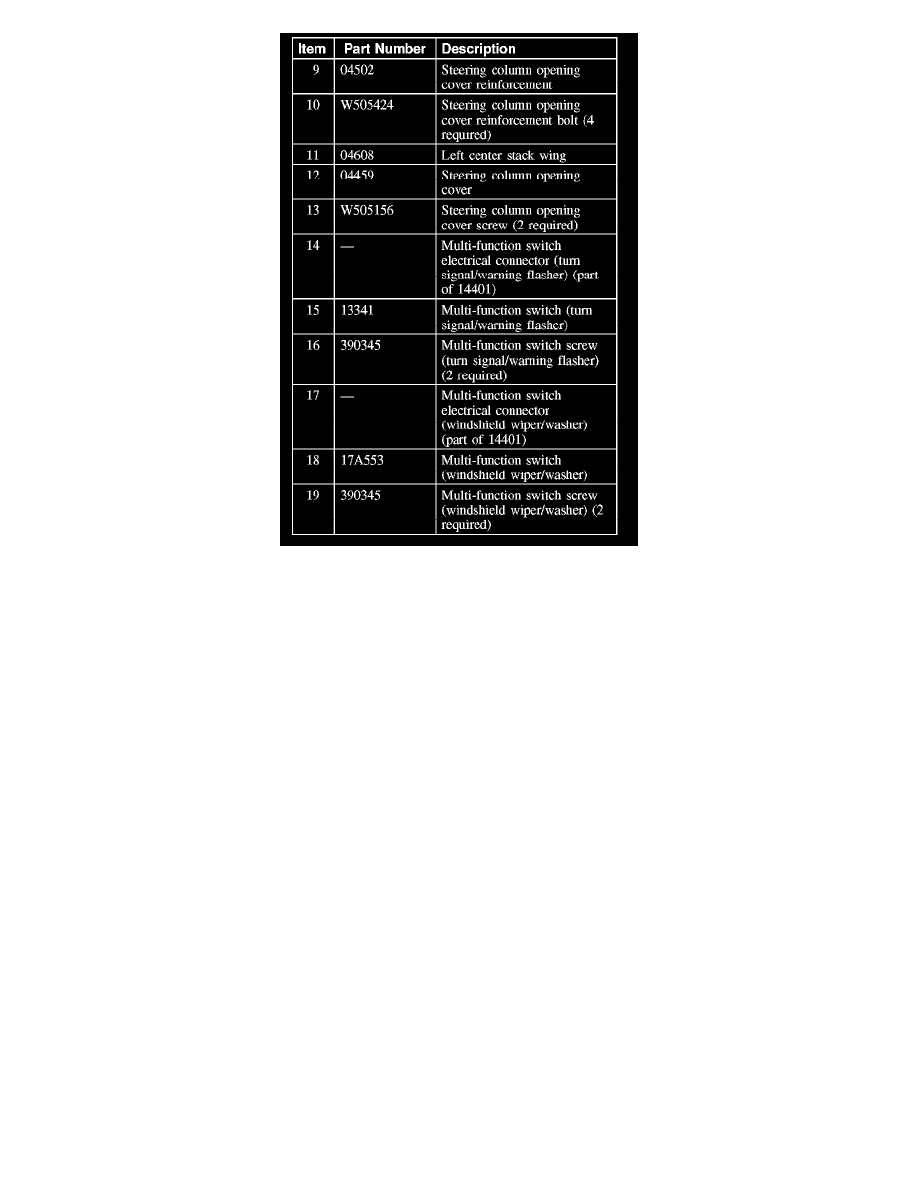
4. Remove the left center stack wing.
5. Remove the 2 screws and the steering column opening cover.
^
Disconnect the headlamp and courtesy light switch electrical connectors.
6. Remove the 4 bolts and the steering column opening cover reinforcement.
^
To install, tighten to 9 Nm (80 lb-in).
7. Remove the upper steering column shroud by carefully pressing the sides inward.
8. Remove the 3 lower steering column shroud screws and the shroud.
Turn signal/headlamp switch
9. Disconnect the turn signal/headlamp switch electrical connector.
10. Remove the 2 screws and the turn signal/headlamp switch.
Turn signal/headlamp switch
11. Disconnect the windshield wiper/washer switch electrical connector.
12. Remove the 2 screws and the windshield wiper/washer switch.
Turn signal/headlamp switch and windshield wiper/washer switch
13. To install, reverse the removal procedure.