
Mustang Cobra V8-281 4.6L DOHC VIN V MFI (1997)
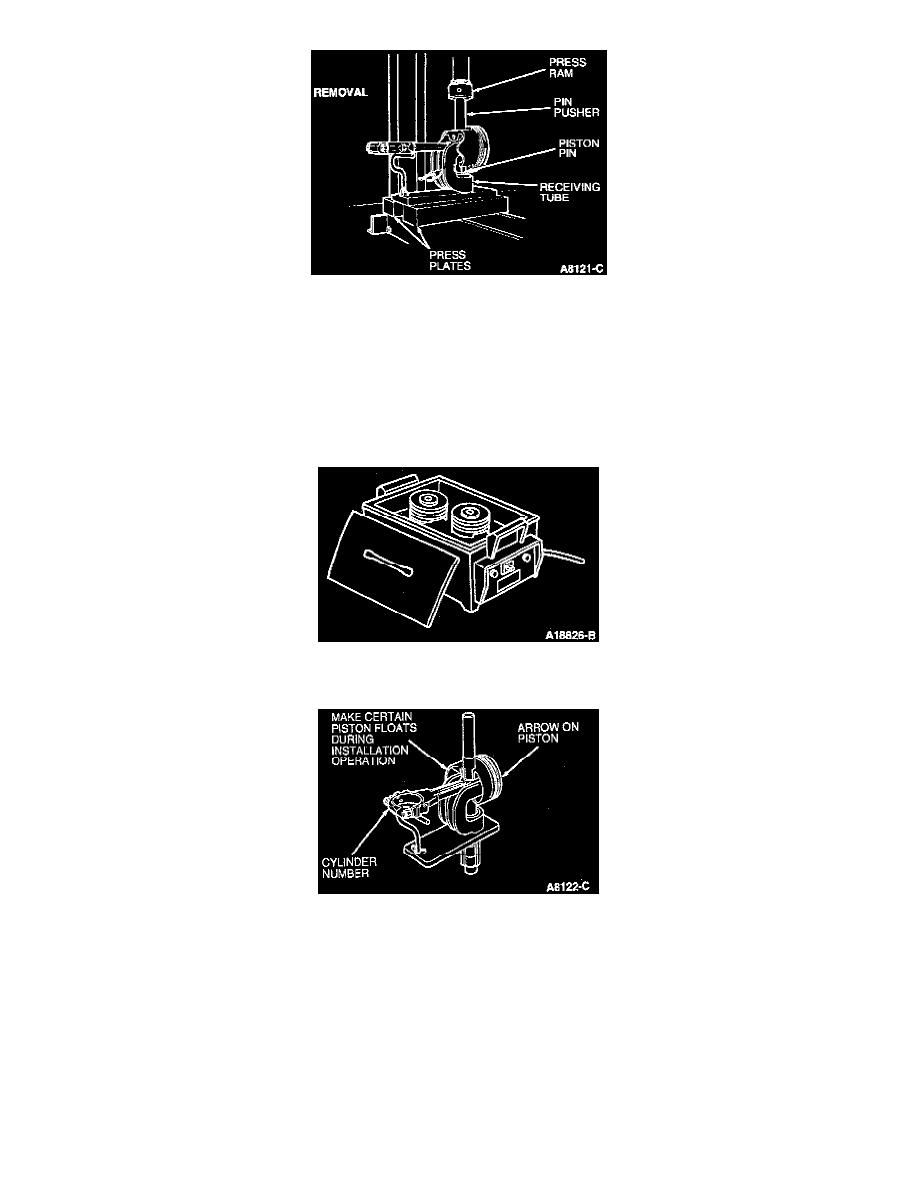
62. Using Piston Pin Tool D81L-6135-A or equivalent, press piston pin from piston and connecting rod.
Installation
NOTE: Prior to service re-installation or replacement of fasteners, all threads and contact surfaces must be lubricated with clean engine oil
meeting Ford specification WSS-M2C153-F.
1. Coat piston bores, piston and rings, crankshaft journal and bearing surfaces with clean engine oil meeting Ford specification WSS-M2C153-F.
2. Verify that all parts to be assembled are for same cylinder. Assemble piston to connecting rod.
3. Install a new retainer ring on one side of the piston pin bore.
4. Gradually heat piston to approximately 100°C (212°F).
5. Start piston pin in piston and connecting rod immediately after heating piston. This may require a very light tap with a mallet.
6. Using Piston Pin Remover and Replacer D81L-6135-A or equivalent press piston pin through piston until piston pin bottoms on retainer ring.
7. Install a new retainer ring on other side of the piston pin bore.
8. After assembly, make sure connecting rod swings smoothly.
NOTE: Make sure piston ring gaps are rotated 30° apart.
NOTE: Install piston and piston rings with notch on piston pointing to the front of engine.