
Mustang Cobra V8-281 4.6L DOHC VIN V MFI (1997)
3. Remove cowl weatherstrip and cowl vent screen.
4. Remove inside rear view mirror.
5. Remove sun visors and visor retainers.
6. Drop headliner down near windshield opening to avoid cutting headliner during windshield removal. Place a small block of suitable material
between headliner and roof to act as spacer.
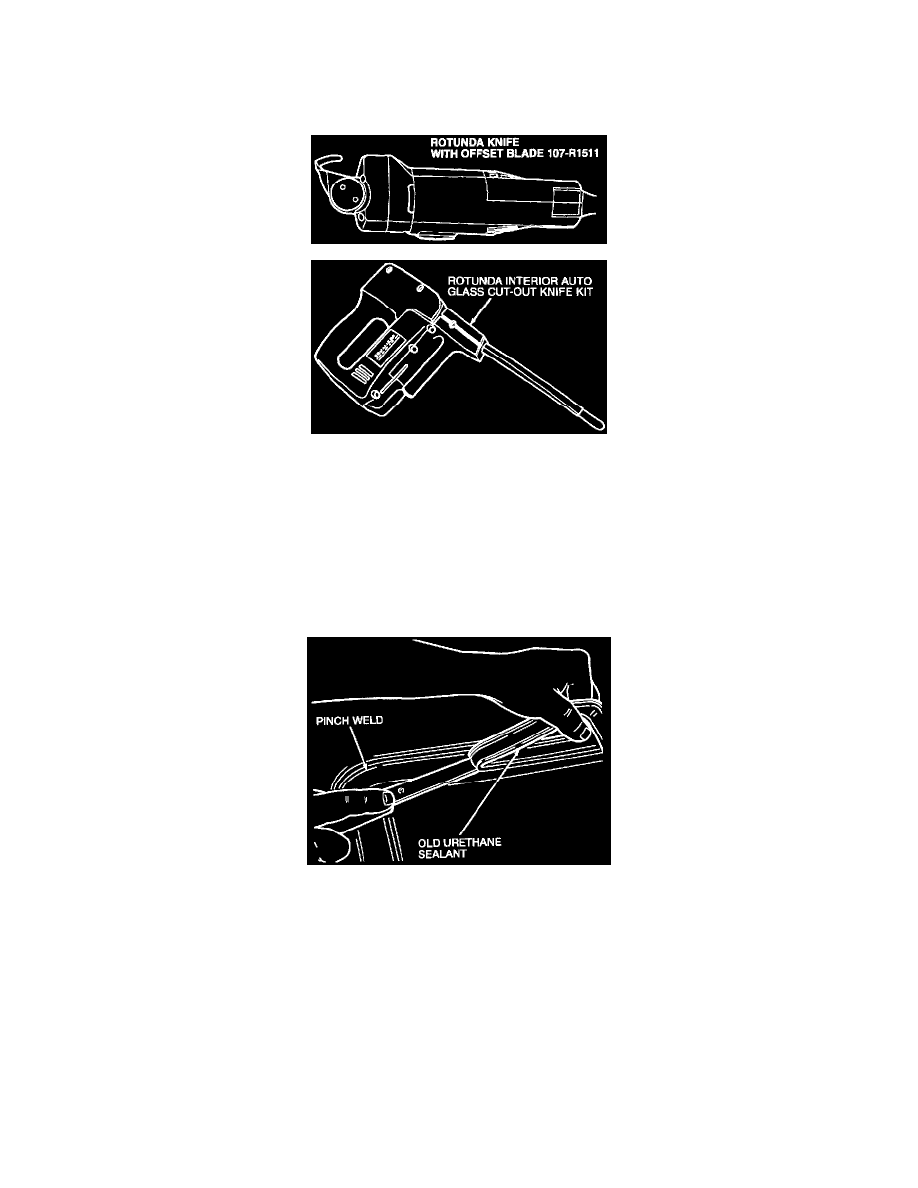
Rotunda Interior Auto Glass Cut-Out Knife Kit
7. Use Rotunda Knife With Offset Blade 107-R1511, Rotunda Interior Auto Glass Cut-Out Knife Kit 164-R2450 or equivalents to cut adhesive.
Refer to manufacturer's instructions when using tool.
CAUTION: Use care to avoid damage to the instrument panel.
NOTE: Spray area to be cut with water to make cutting operation cooler and easier.
8. Remove windshield and moulding assemblies from vehicle using suitable suction tool.
9. Trim remaining urethane on pinch weld to within 1 and 1.5 mm (0.04 and 0.06 inch) thickness with utility knife or razor blade. Clean and dry
urethane. When completed, surface should be smooth and free of cuts and contamination.
10. Check pinch weld sealing area for damaged sheet metal, rust or foreign objects which may have caused, or may cause, glass breakage. Service
metal if necessary.
INSTALLATION
1. If painted sheet metal has been exposed anywhere along the flange, use the supplied wool applicator and apply Urethane Metal Primer or
equivalent meeting Ford specification WSB-M2G234-C to windshield pinch weld.
NOTE: A minimum of 10 minutes is required for primer surface to dry.
2. Place windshield and moulding assembly on a low, stable work surface, inside up.
3. Clean windshield with non-alcohol-based glass cleaner.