
Probe L4-133 2.2L SOHC Turbo (1989)
Throttle Body: Service and Repair
Non-Turbo
REMOVAL
1.
Disconnect the negative battery cable.
2.
Remove the accelerator cables from the throttle body.
3.
Remove the air duct from the throttle body.
4.
Remove the hoses from the throttle body.
NOTE: Marking all the vacuum and coolant hoses may make it easier to install.
5.
Disconnect the Throttle Position Sensor connectors, idle switch connector, and bypass air control valve connector.
6.
Remove the engine lifting bracket mounting bolt from the throttle body.
7.
Remove the coolant line/EGR hose retaining bracket from the throttle body.
8.
Remove the attaching nuts from the throttle body at the intake plenum.
9.
Remove the throttle body and gasket.
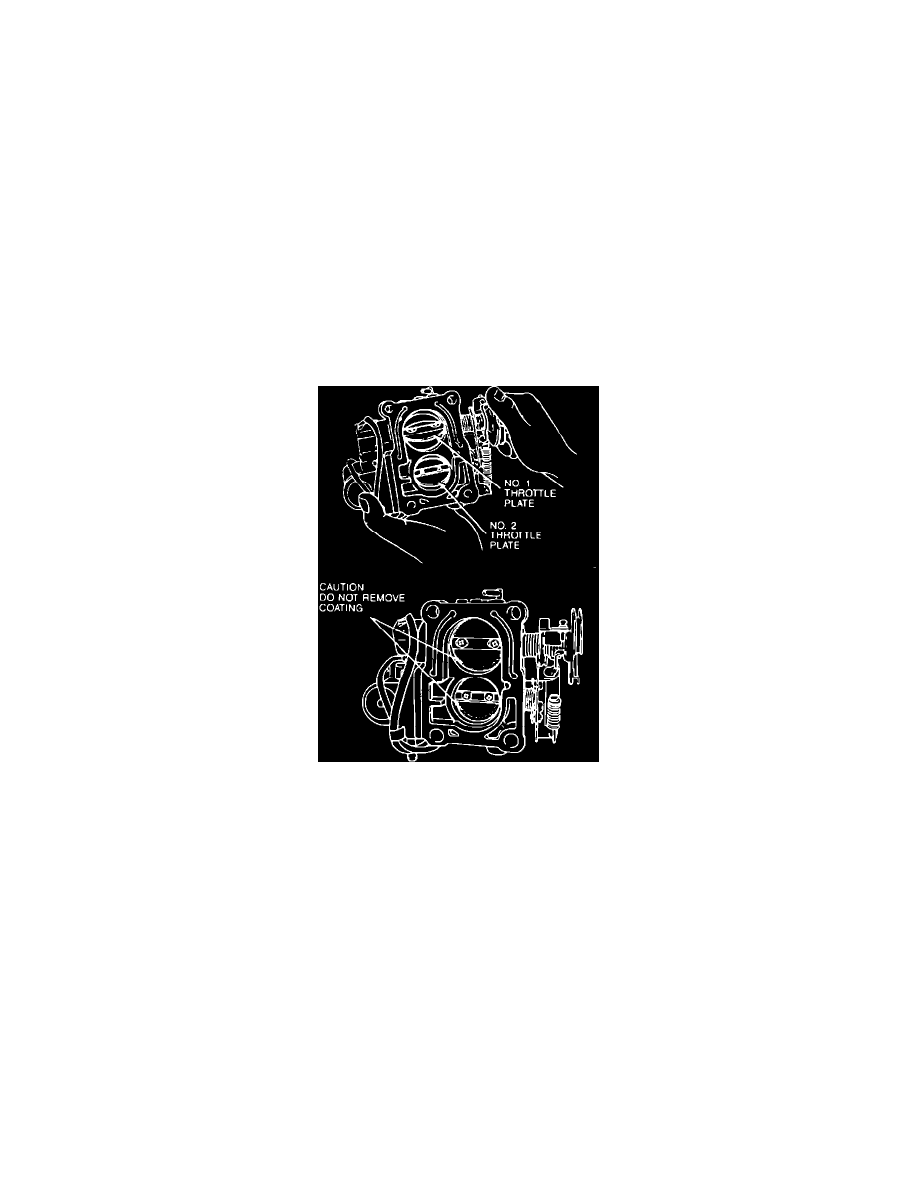
NOTE: The No. 2 throttle plate is preset at the factory to begin opening after the NO. 1 throttle plate opens approximately 25 degrees (MTX) or
10 degrees (ATX).
^
Check that the No. 1 and No. 2 throttle plates move smoothly when the throttle lever is moved from fully closed to fully open.
^
Replace is necessary.
CAUTION: Do not remove the thin sealing coating form the throttle plates or bore.
Throttle Plate
INSTALLATION
1.
Install the new gasket and position the throttle body onto the intake plenum.
2.
Install the attaching nuts to 14-19 lb. ft. (19-25 N-m).
3.
Install the coolant line/EGR hose retaining bracket and the engine lifting bracket.
4.
Connect the Throttle Position Sensor connector, idle switch connector and bypass air control valve connector.
5.
Install all vacuum and coolant hoses to the throttle body in their proper location as noted during removal.