
Ranger 2WD V6-182 3.0L (1995)
Air Bag Diagnostic Monitor: Service and Repair
Removal
WARNING: THE ELECTRICAL CIRCUIT NECESSARY FOR SYSTEM DEPLOYMENT IS POWERED DIRECTLY FROM THE
BATTERY. TO AVOID ACCIDENTAL DEPLOYMENT AND POSSIBLE PERSONAL INJURY, THE POSITIVE BATTERY CABLE
MUST BE DISCONNECTED PRIOR TO SERVICING OR REPLACING ANY SYSTEM COMPONENTS.
1. Disconnect battery ground cable.
2. Disconnect positive battery cable.
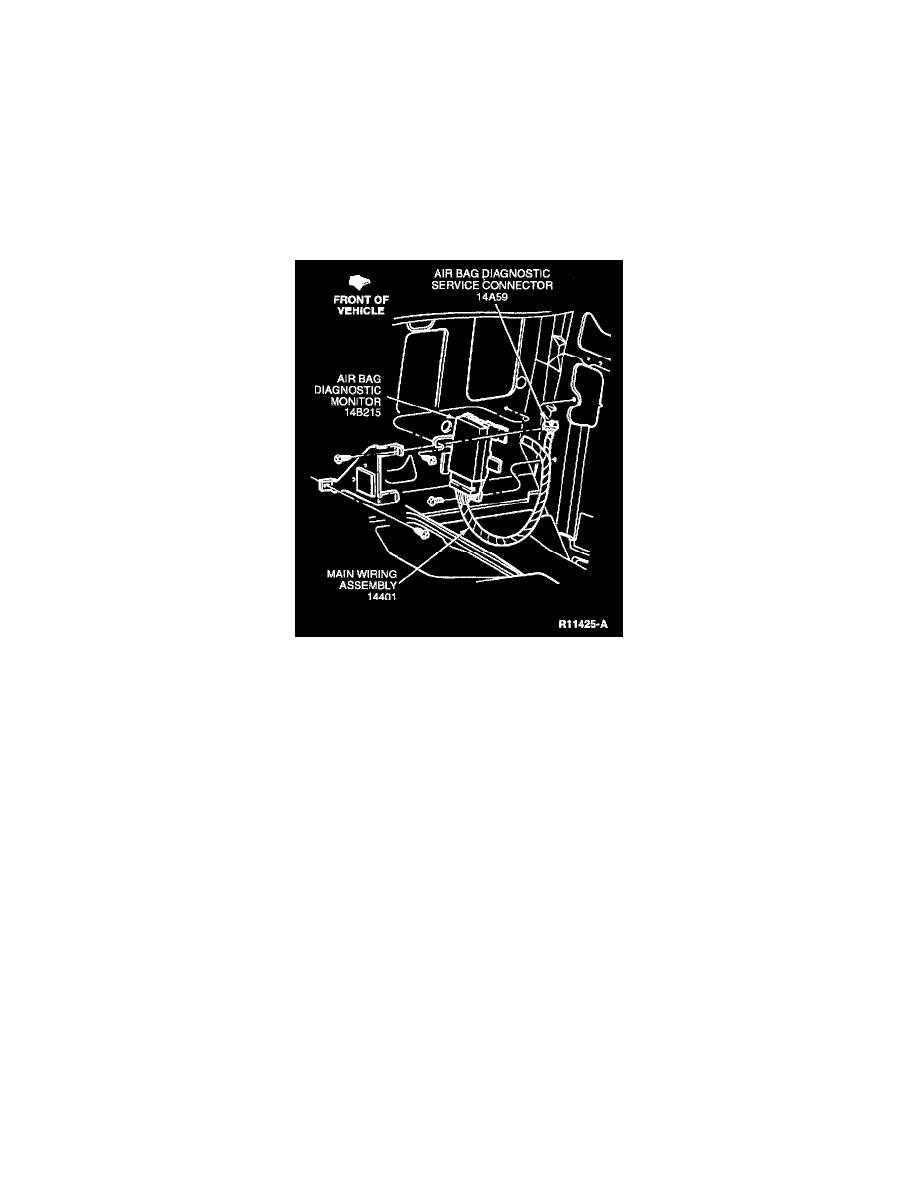
3. Remove RH kick panel. Air bag diagnostic monitor is the blue box with two connectors mounted below the climate control head.
4. Disconnect air bag diagnostic monitor electrical wiring connectors.
5. Remove screws retaining air bag diagnostic monitor and bracket to instrument panel brace and remove air bag diagnostic monitor and bracket.
Installation
1. Position air bag diagnostic monitor and bracket on RH kick panel and install retaining screws. Tighten to 10.2-13.8 N.m (8-10 lb-ft).
2. Connect electrical wiring connectors to air bag diagnostic monitor.
3. Install kick panel trim.
4. Reconnect positive battery cable.
5. Reconnect battery ground cable.
6. Prove out air bag system.