
Ranger 2WD V6-4.0L (2010)
Stabilizer Link: Service and Repair
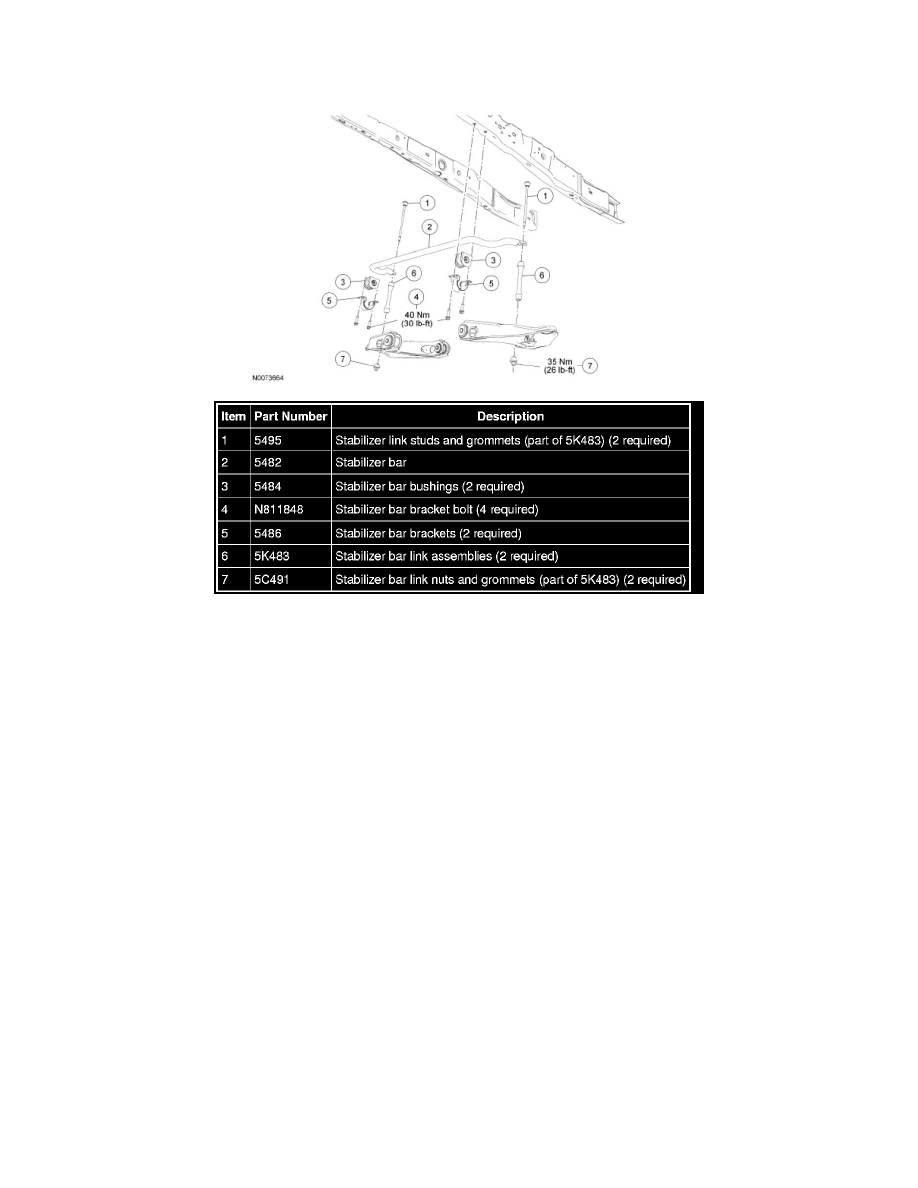
Stabilizer Bar and Link
Removal and Installation
NOTICE: Suspension fasteners are critical parts because they affect performance of vital components and systems and their failure may result
in major service expense. New parts must be installed with the same part number or an equivalent part if replacement is necessary. Do not use
a replacement part of lesser quality or substitute design. Torque values must be used as specified during reassembly to make sure of correct
retention of these parts.
1. With the vehicle in NEUTRAL, position it on a hoist. For additional information, refer to Vehicle Jacking and Lifting.
2. Remove and discard the front stabilizer bar link nuts and grommets.
-
To install, tighten the new nuts to 35 Nm (26 lb-ft).
3. Remove the front stabilizer bar link studs and the front stabilizer bar links.
4. Remove the 4 stabilizer bar bracket bolts, stabilizer bar, brackets and bushings.
-
Discard the stabilizer bar bracket bolts.
-
To install, tighten the new bolts to 40 Nm (30 lb-ft).
5. NOTE: Inspect and clean the mating surfaces and the internal threads. Make sure all mating surfaces are free of foreign material and remove any
thread locking compound from the internal threads.
NOTE: In the event the stabilizer bar bracket bolts cannot be installed in the frame, remove the weld nut and replace with a flagnut
(N807634-S441).
To install, reverse the removal procedure.