
Ranger 4WD V6-177 2.9L (1988)
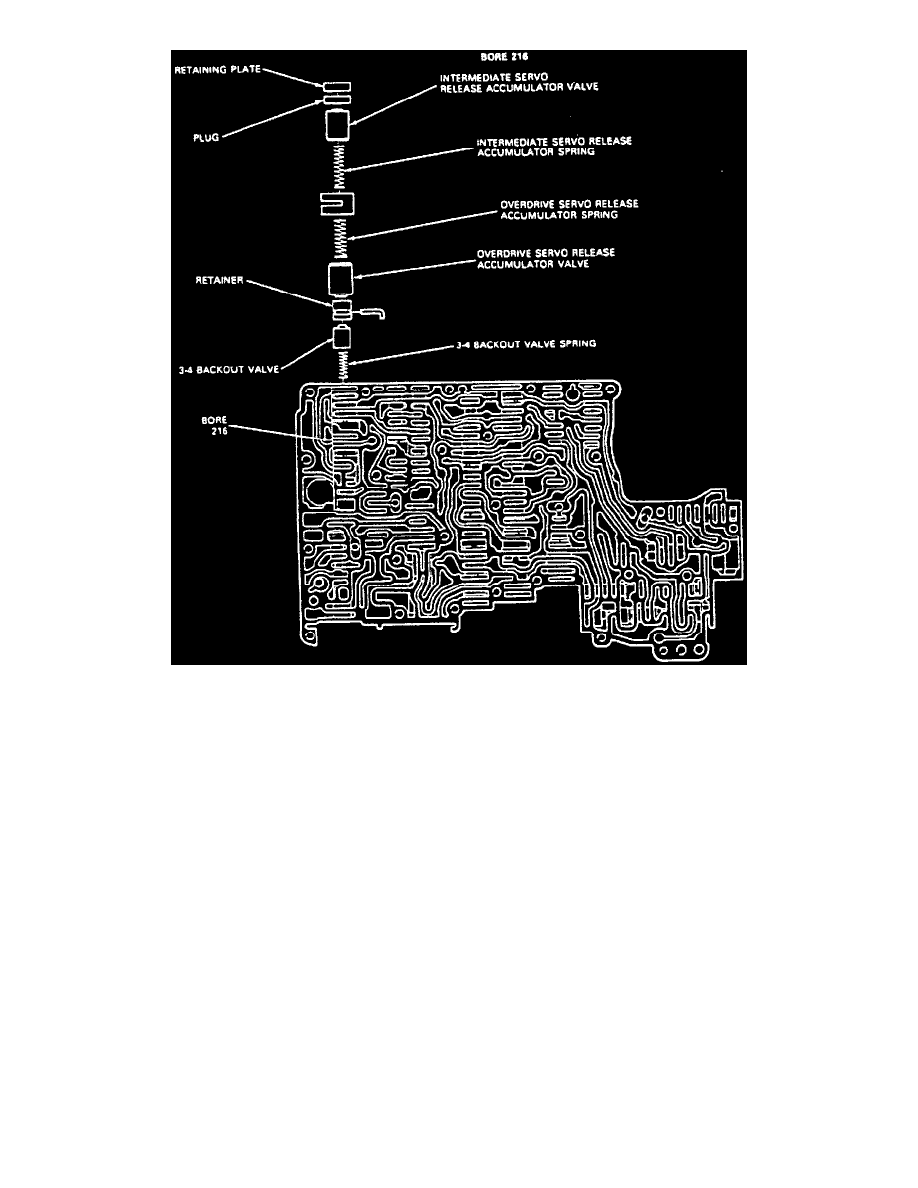
Control Valve Body Bore 216 Valve And Spring Locations
4. Disassemble and assemble valves, springs, and solenoids from control valve body bores using illustrations in the Control Valve Body Bore And
Spring Locations images.
5. Clean all parts thoroughly in clean solvent and blow dry with moisture-free compressed air.
6. Inspect all valve and plug bores for scores, fluid passages for obstructions, check valve for free movement, mating surfaces for burrs or distortion,
plugs and valves for burrs or scores.
7. Use a suitable crocus cloth to polish valves and plugs, if necessary.
NOTE: Avoid rounding sharp edges of valves and plugs with cloth.
ASSEMBLY
1. Assembly in reverse order of disassembly.
2. Replace control valve body if bores or valves are scored beyond point of being cleaned up.
3. Inspect all springs for distortion, valves and plugs for free movement in their respective bores.
NOTE: Valves and plugs, when clean and dry, must fall into their respective bores of their own weight.
4. Roll manual valve on a flat surface to check for a bent condition.