
Ranger 4WD V6-245 4.0L (1991)
Wheel Bearing: Adjustments
With Automatic Locking Hubs
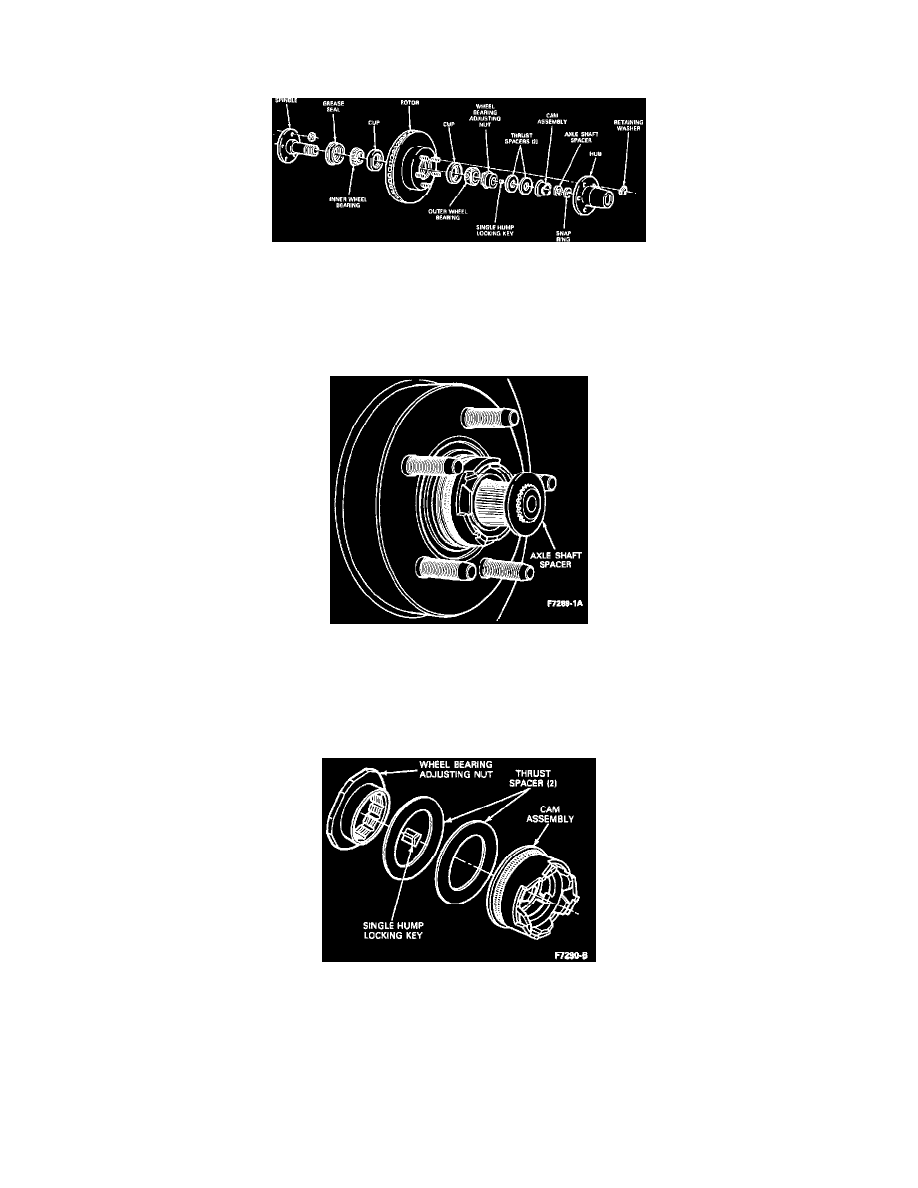
Fig. 6 Automatic Locking Hub
1. Raise the vehicle and install safety stands.
2. Remove the wheel lugnuts and the wheel and tire assembly.
3. Remove the retainer washers from the lugnut studs. Remove the automatic locking hub assembly from the spindle.
4. Remove the snap ring from the end of the spindle shaft.
Axle Shaft Spacer
5. Remove the axle shaft spacer.
6. Pull cam assembly off the wheel bearing adjusting nut and remove the two plastic thrust spacers from the adjusting nut.
CAUTION: Do not pry on the plastic cam or thrust spacers during removal. Prying may damage the cam or spacers.
Cam Assembly And Locking Key
7. Using a magnet, remove the locking key.
NOTICE: If required, rotate the adjusting nut slightly to relieve pressure against the locking key, before the key can be removed.
CAUTION: To prevent damage to the spindle threads, look into the spindle keyway under the adjusting nut and remove the separate locking key
before removing the adjusting nut.
8. Loosen the wheel bearing adjusting nut from the spindle using a 2-3/8 inch hex locknut wrench.