
Taurus L4-153 2.5L HSC (1986)
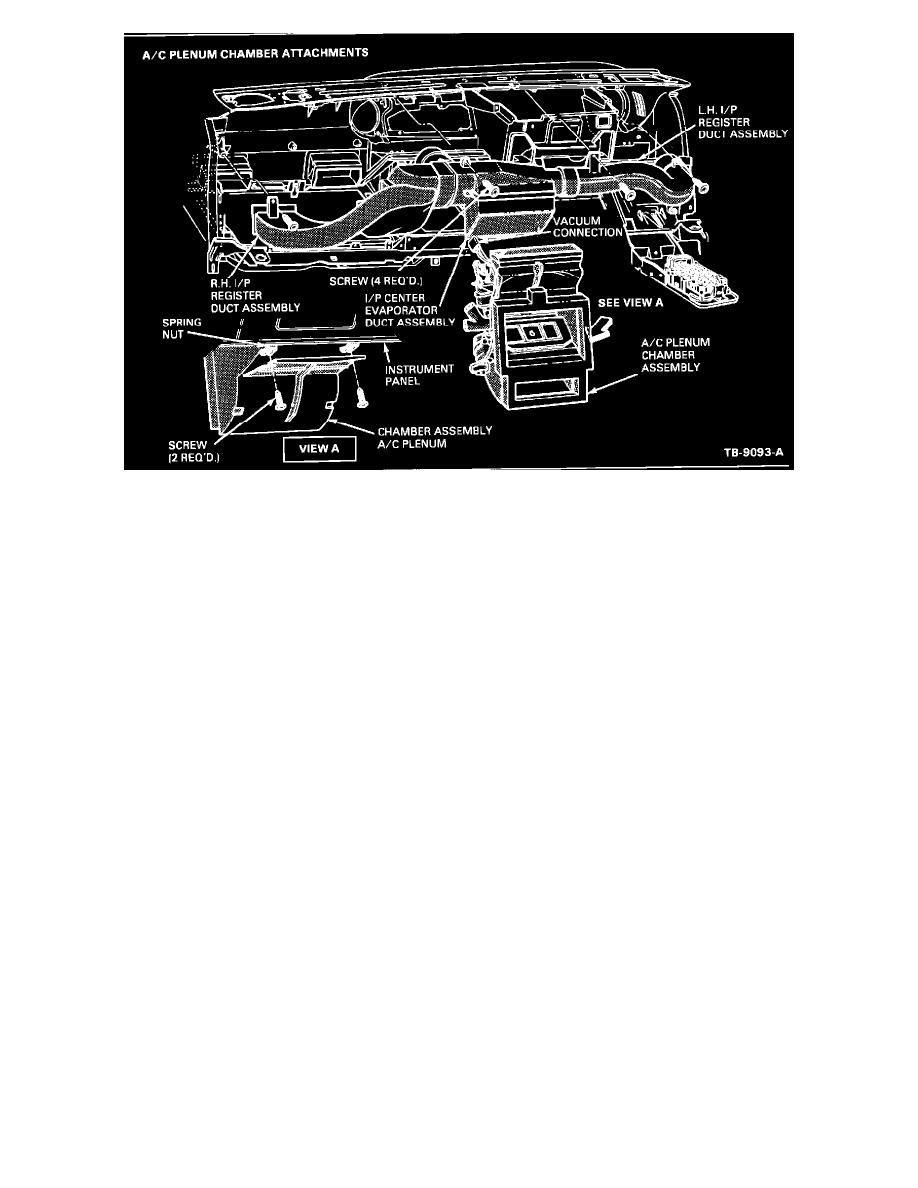
Figure 1
19.
Position plenum to instrument panel and install the two (2) attaching bolts and one (1) screw, Figure 1.
20.
Position plenum to instrument panel to the cowl and install the top center attaching bolt.
21.
Install the right and left bolts to attach the instrument panel to the cowl sides.
22.
Install the bolt to attach the instrument panel lower center brace to the lower edge of the instrument panel.
23.
On ATC vehicles, connect the blower motor wires and the other two (2) harness connectors to the evaporator case and reconnect the aspirator
hose.
a.
On non-ATC vehicles, connect the blower motor and resistor wires.
24.
Install the remaining instrument panel to cowl top upper attaching screws.
25.
Install the speaker grilles and defroster opening trim cover.
26.
Reconnect the wire harness connectors located in the right side cowl and door sill area.
27.
Install the right side cowl trim panel and the right side "A" pillar moulding.
28.
Install two (2) steering column to support retaining bolts.
29.
Install the steering column opening cover.
30.
Install the left side cowl trim panel.
31.
Install the radio and the radio trim.
32.
Install the ashtray and connect the wire to the lighter.
33.
Connect the ground cable to the battery and check the A/C system and all instrument panel components for proper operation.
PART NUMBER
PART NAME
CLASS
E7DZ-19A999-A
Baffle Assembly
B