
Taurus V6-182 3.0L DOHC SHO (1992)
Shift Interlock Cable: Service and Repair
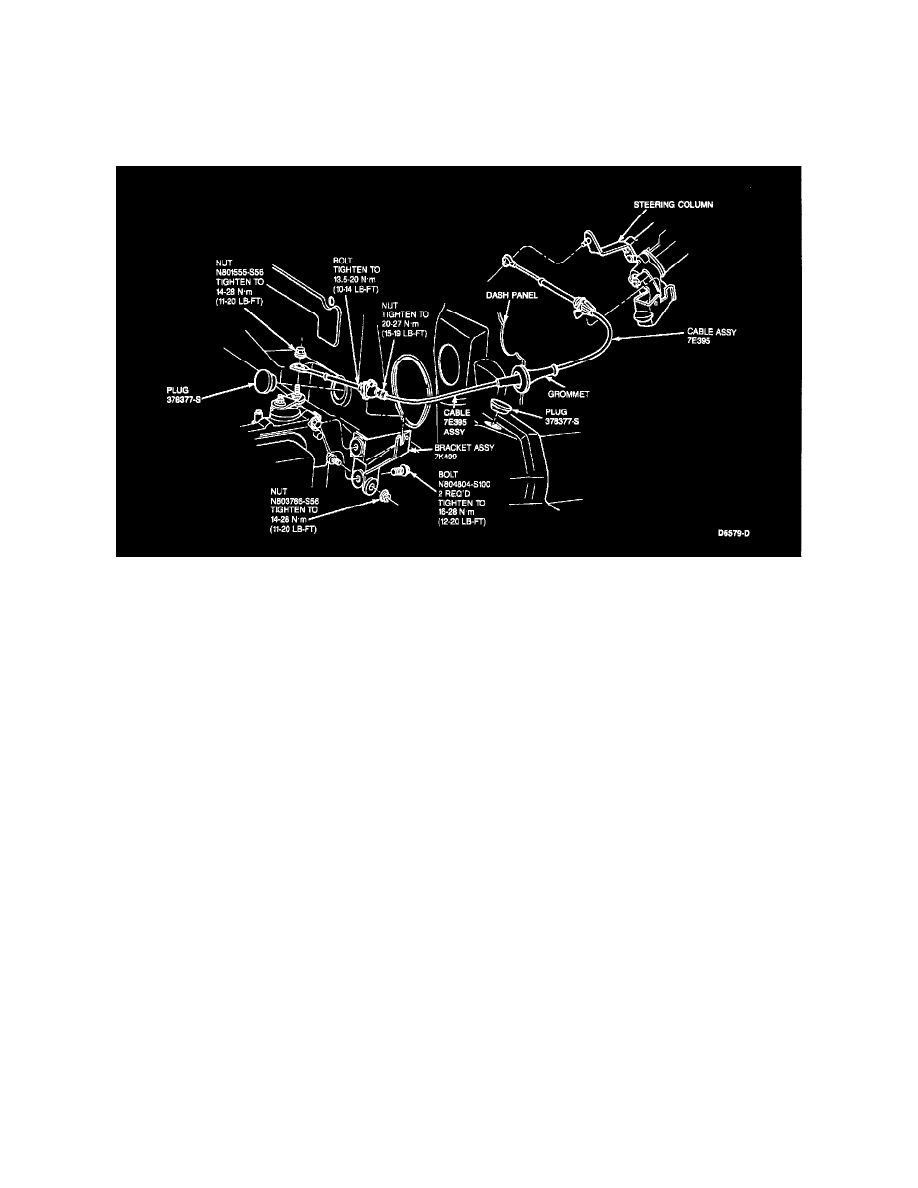
With Column Shift
Interlock Cable Assembly
Column Shift
NOTE: Whenever the cable is removed from the cable retaining brackets for any reason, the cable must be replaced.
NOTE: Whenever a steering column, engine or transaxle removal is required, do not remove shift control cable from the retaining brackets. The
bracket must be removed with the cable attached.
Removal
1. From under the instrument panel, remove shift control cable and retaining bracket from steering column.
2. Remove cable plastic terminal from column selector lever pivot ball, using a screwdriver, by prying between the cable plastic terminal and selector
lever.
3. Remove cable retaining clip and remove cable from retaining bracket by carefully lifting the locking tab while pulling up on fitting.
4. From engine compartment, pry cable grommet from dash panel.
5. Remove nut from transaxle manual shift lever stud.
6. Remove cable locking tab and carefully remove cable from retaining bracket.
7. Remove shift cable from cable retaining bracket on transaxle and, from the engine compartment, pull cable through dash panel opening.
Installation
1. From the engine compartment, feed plastic terminal end of cable through opening in dash panel.
2. Press rubber boot on shift control cable into dash panel.
3. From engine compartment, install cable into cable retaining bracket on transaxle and make sure locking tab is in proper location.
4. Place cable on transaxle manual shift lever stud. Install cable retaining nut loosely.
5. From the passenger compartment, install cable-to-steering column retaining bracket onto cable and make sure locking tab is in proper location.
6. Install cable and bracket to steering column with two retaining screws. Tighten to 8 - 13 Nm (6 - 9 lb-ft).
7. Snap cable plastic terminal to selector lever pivot ball on steering column.
8. Adjust cable control as outlined.