
Taurus V6-182 3.0L DOHC SHO (1992)
Constant Velocity Joint: Service and Repair
Outboard
Disassembly
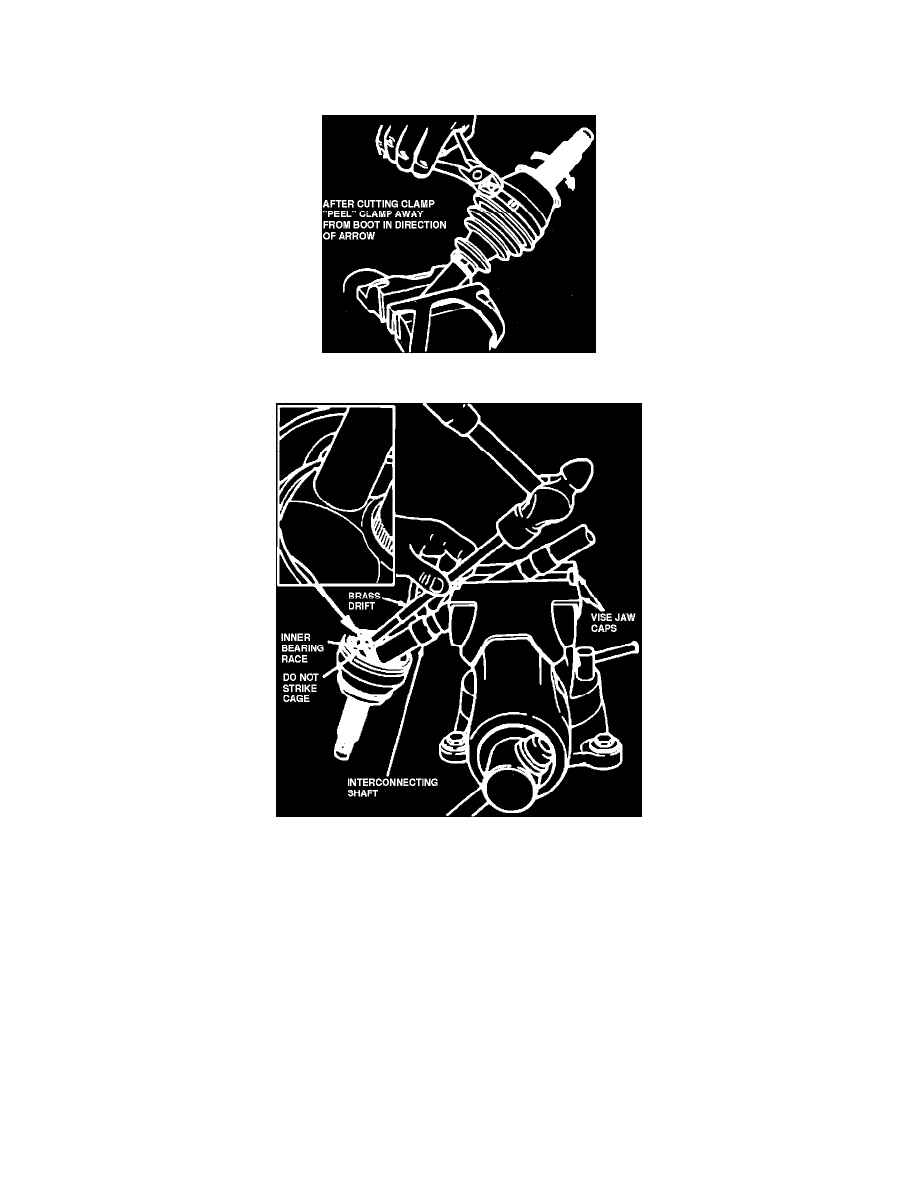
Fig. 3 Boot Clamp Removal
Fig. 6 Separating Constant Velocity Joint From Shaft
During manufacture, CV joints components are matched and cannot be interchanged with components of other CV joint. If a CV joint component is
defective, the entire CV joint should be replaced.
1.
Install soft vise jaw caps in vise to prevent damage to halfshaft, then position halfshaft in vise. Do not allow the vise to contact the CV joint boot
or clamps.
2.
Using suitable side cutting pliers, cut large boot clamp and peel away from boot. Roll boot back over halfshaft, Fig. 3.
3.
Turn halfshaft over in vise, then angle CV joint so that inner bearing race is exposed, Fig. 4. Using suitable brass drift and hammer, give a sharp
rap to inner bearing race to dislodge internal snap ring. Separate CV joint from halfshaft. Take care not to drop the CV joint. Remove CV boot
from shaft.
4.
Inspect CV joint grease for contamination. If grease is contaminated, proceed with disassembly. If grease is not contaminated and joint was
operating satisfactorily, add grease and replace boot.
5.
Remove and discard circlip from end of shaft. Inspect stop ring located below circlip, if it is worn or damaged, replace it.
6.
Clamp CV joint stub axle in vise with soft vise jaw caps. Be careful not to damage dust seal.