Taurus V6-182 3.0L VIN 1 FI Flex Fuel (1997)

Wiper Motor Linkage: Service and Repair
REMOVAL
1. Disconnect battery ground cable.
NOTE: Windshield wiper assembly is mounted below cowl vent screen. Windshield wiper mounting arm and pivot shafts are connected together
with non-removable plastic ball joints. Windshield wiper assembly is non-serviceable except for the windshield wiper motor.
2. Remove retaining nut and RH windshield wiper pivot arm and LH windshield wiper pivot arm from windshield wiper pivot shafts.
3. Turn windshield wiper switch to LO and allow wipers to move to a straight up-and-down position. Turn ignition switch OFF to leave windshield
wiper pivot arms in this position, and remove windshield wiper pivot arms from the pivot shafts.
4. Remove eight plastic retainers (1/4 turn counterclockwise) retaining cowl vent screens to inner panels.
5. Remove six clips retaining cowl vent screens to inner panels.
6. Disconnect electrical connector from windshield wiper motor.
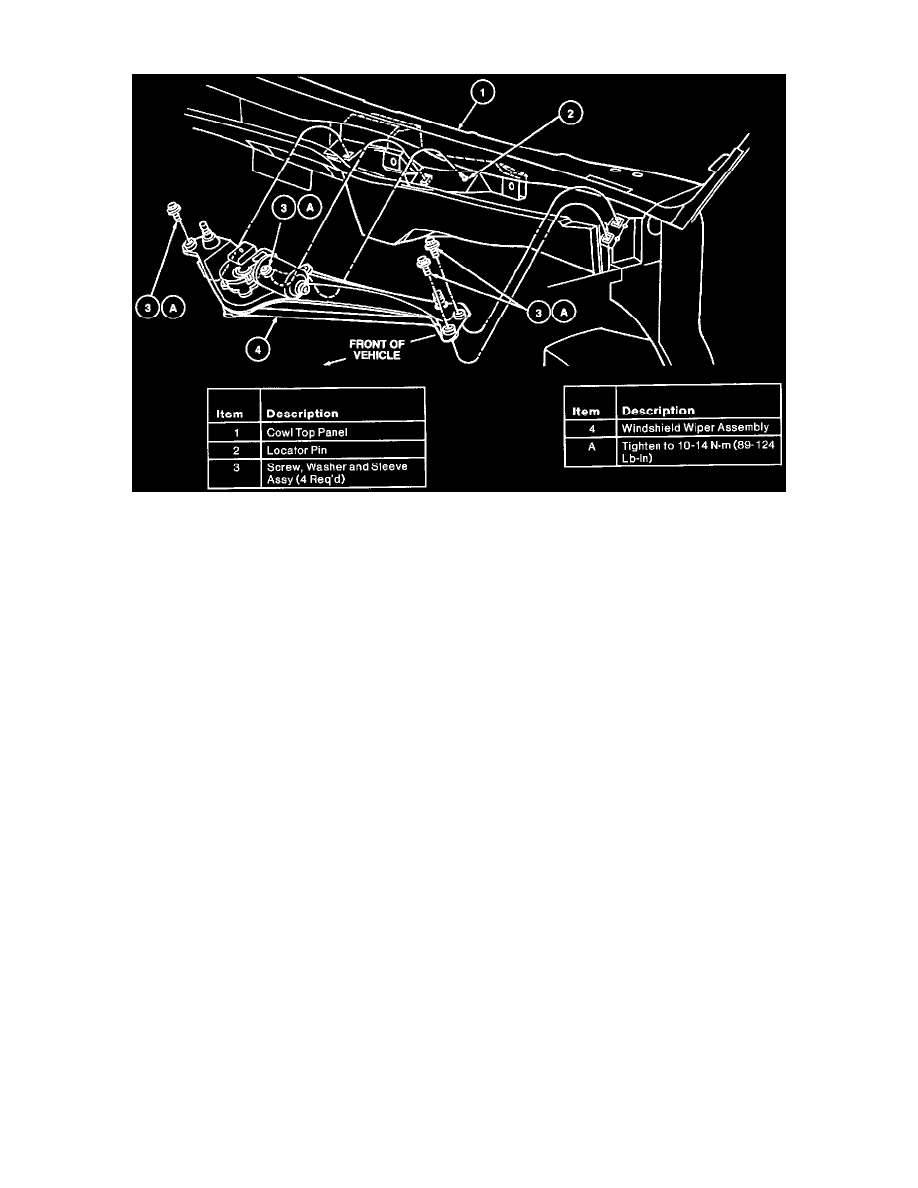
7. Remove four screws retaining windshield wiper assembly to cowl.
8. Remove windshield wiper assembly from vehicle.
INSTALLATION
1. Follow removal procedure in reverse order.
CAUTION: Before reinstalling windshield wiper blade and arm assemblies, turn ignition switch to RUN, turn wiper switch to LO or HI, and then
turn wiper switch OFF to cycle the wipers and allow them to park. Failure to cycle the wipers may result in incorrect wiper arm positioning
causing the wipers to travel past their intended wipe area and possibly damage the vehicle.
2. Tighten screws retaining windshield wiper assembly to 10-14 Nm (89-124 Lb-In).
3. Install windshield wiper pivot arms to park position alignment marks.
4. Tighten windshield wiper pivot arm retaining nut to 30-40 Nm (22-29 Lb-Ft).
