
Thunderbird V8-302 5.0L HO (1992)
Clutch: Service and Repair
Reverse Clutch
DISASSEMBLY
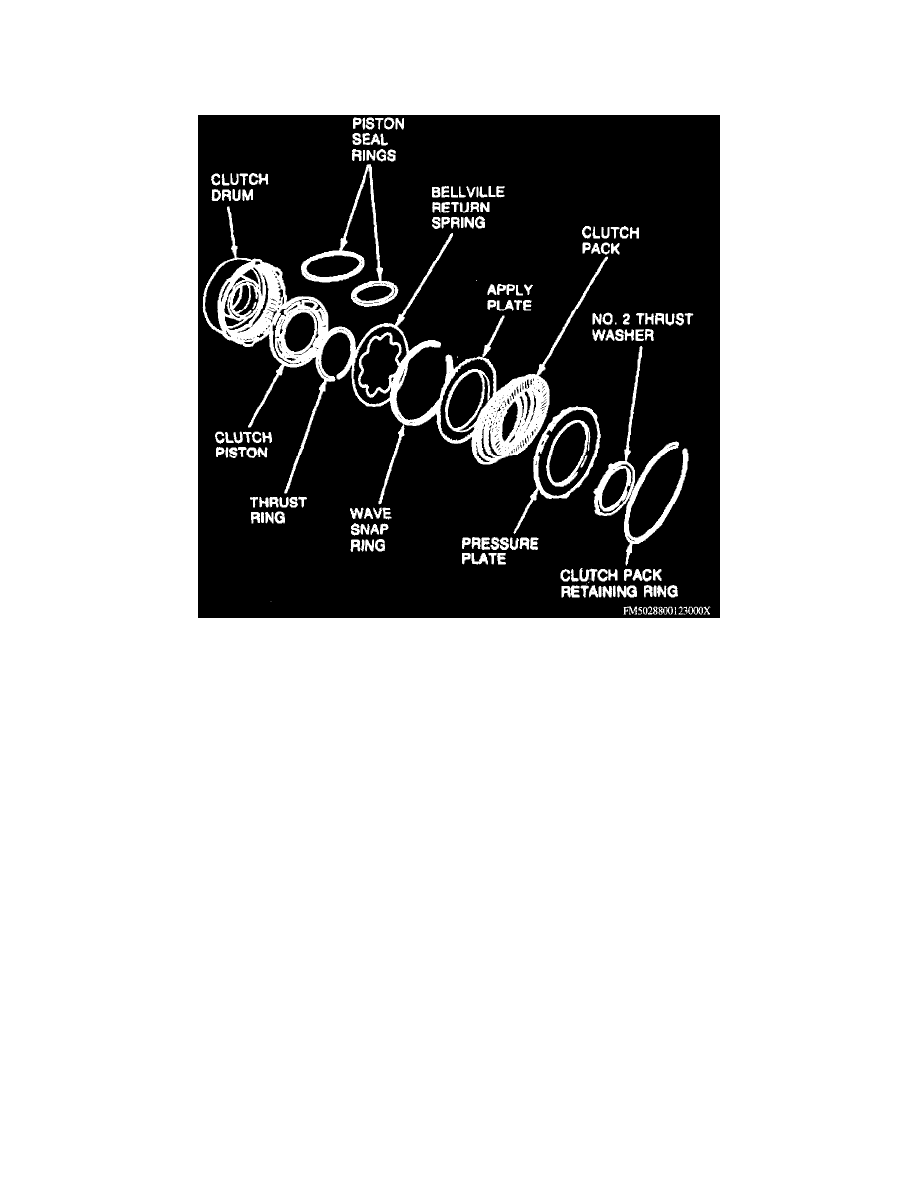
Exploded View Of Reverse Clutch
1. Remove No. 2 thrust washer or needle bearing. Passenger car and four-wheel drive truck applications use thrust washer while two-wheel drive
truck applications use a needle bearing.
2. Remove clutch pack retaining ring.
3. Remove clutch pack.
4. Using suitable tools, remove wave snap ring.
5. Remove piston return spring and thrust ring.
6. Remove clutch piston, applying air pressure, if necessary, while blocking opposite hole with finger.
ASSEMBLY
1. Install new seals on clutch piston and ensure check ball moves freely.
2. Install clutch piston as follows:
a. Coat piston seals and clutch drum seating area with petroleum jelly.
b. Install reverse clutch inner seal protector T80L-77403-B and reverse clutch outer seal protector T80L-77403-A, or equivalents, in clutch drum.
c. Coat piston seals, clutch drum sealing area, and seal protector with petroleum jelly.
d. Position piston and push it to bottom of drum using even thumb pressure.
3. Install piston thrust ring and piston return spring.
4. Using suitable tools, install wave snap ring.
NOTE: Wave snap ring points down.
5. Install clutch pack, installing apply plate first with dished side facing piston.
6. Install clutch pack retaining ring and check clearance between ring and pressure plate, holding pressure plate downward while checking clearance.