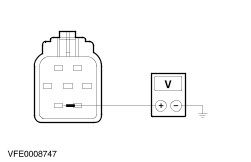
| Diagnosis and Testing Refer to Wiring Diagrams Section 417-01, for schematic and connector information. Special Tool(s) | | Terminal probe kit 29-011A | Inspection and Verification - Verify the customer concern.
- Visually inspect for obvious signs of mechanical or electrical damage.
Visual Inspection Chart | Electrical | - Fuse(s)
- Bulb(s)
- Electrical connector(s)
- Wiring harness
| - If an obvious cause for an observed or reported concern is found, correct the cause (if possible) before proceeding to the next step.
- If the cause is not visually evident, verify the symptom and refer to the Symptom Chart.
Symptom Chart Symptom Chart | Symptom | Possible Sources | Action | | Both headlamps (low and high beam) are inoperative | * Fuse(s) * Circuit(s) * Multifunction switch * Central junction box (CJB) | * | | The low beams are inoperative | * Fuse(s) * Circuit(s) * Low beam relay * Multifunction switch * Central junction box (CJB) * Light switch | * | | The high beams are inoperative | * Fuse(s) * Circuit(s) * High beam relay * Multifunction switch * Central junction box (CJB) * Light switch | * | | One low beam is inoperative | * Fuse(s) * Circuit(s) * Multifunction switch * Central junction box (CJB) * Headlamp | * | | One high beam is inoperative | * Fuse(s) * Circuit(s) * Low beam relay * Multifunction switch * Central junction box (CJB) * Headlamp | * | | The headlamps (low or high beam) are on continuously | * Fuse * Circuit(s) * Multifunction switch * Instrument cluster * High beam relay * Low beam relay * Central junction box (CJB) | * | | The flash-to-pass feature is inoperative | * Fuse(s) * Circuit(s) * Headlamp left/right-hand side * Central junction box (CJB) * Multifunction switch | * | Pinpoint Tests | PINPOINT TEST A : BOTH HEADLAMPS (LOW AND HIGH BEAM) ARE INOPERATIVE | | TEST CONDITIONS | DETAILS/RESULTS/ACTIONS | | A1: CHECK FUSE F2.5 (CJB) | | | 1 Ignition switch in position 0. | | | 2 Disconnect Fuse F2.5 (CJB). | | | 3 CHECK Fuse F2.5 (15 A) (CJB). | | | Is the fuse OK? Yes No INSTALL a new fuse F2.5 (CJB) and TEST the system for normal operation. If the fuse blows again, LOCATE and REPAIR the short circuit by using the wiring diagrams. TEST the system for normal operation. | | A2: CHECK THE VOLTAGE AT FUSE F2.5 (CJB) | | | 1 Ignition switch in position II. | | | 2 Connect Fuse F2.5 (CJB). | | | 3 Measure the voltage between fuse F2.5 (CJB) and ground. | | | Is battery voltage indicated? Yes REPAIR the open circuit 15-DA34 (GN/BK), between fuse F2.5 and splice S217 by using the wiring diagrams. TEST the system for normal operation. No CHECK the CJB, if necessary INSTALL a new one. TEST the system for normal operation. | | PINPOINT TEST B : THE LOW BEAMS ARE INOPERATIVE | | TEST CONDITIONS | DETAILS/RESULTS/ACTIONS | | B1: CHECK FUSE F1.3 (BJB) | | | 1 Ignition switch in position 0. | | | 2 Disconnect Fuse F1.3 (BJB). | | | 3 CHECK Fuse F1.3 (20 A) (BJB). | | | Is the fuse OK? Yes No INSTALL a new fuse F1.3 (BJB) and TEST the system for normal operation. If the fuse blows again, LOCATE and REPAIR the short circuit by using the wiring diagrams. TEST the system for normal operation. | | B2: CHECK THE VOLTAGE AT FUSE F1.3 (BJB) | | | 1 Connect Fuse F1.3 (20 A). | | | 2 Measure the voltage between fuse F1.3 (BJB) and ground. | | | Is battery voltage indicated? Yes No REPAIR the power supply of fuse F1.3 by using the wiring diagrams. If necessary INSTALL a new BJB. TEST the system for normal operation. | | B3: CHECK THE LIGHT SWITCH | | | 1 Ignition switch in position 0. | | | 2 Disconnect Light switch from connector C205. | | | 3 Connect a fused jumper wire (15 A) at the light switch, connector C205, between pin 8, circuit 15-DD1 (GN/YE) and pin 6, circuit 29S-LE14 (OG), harness side. | | | 4 Ignition switch in position II. | | | 5 Turn the multifunction switch to the NEUTRAL position. | | | 6 Check the low beams. | | | Do the low beams illuminate? Yes INSTALL a new light switch. TEST the system for normal operation. No | | B4: CHECK THE MULTIFUNCTION SWITCH | | | 1 Ignition switch in position 0. | | | 2 Disconnect Multifunction switch from connector C202a. | | | 3 Connect Light switch with connector C205. | | | 4 Connect a fused jumper wire (15 A) at the multifunction switch, connector C202a, between pin 8, circuit 29S-LE14 (OG) and pin 9, circuit 15S-LE19 (GN/BU), harness side. | | | 5 Ignition switch in position II. | | | 6 Turn on the LOW BEAM. | | | 7 Check the low beams. | | | Do the low beams illuminate? Yes INSTALL a new multifunction switch. TEST the system for normal operation. No | | B5: CHECK THE LOW BEAM RELAY | | | 1 Ignition switch in position 0. | | | 2 Disconnect Low beam relay from connector C1049. | | | 3 Check the low beam relay according to Component Testing attached to the wiring diagrams. | | | Is the relay OK? Yes No INSTALL a new low beam relay. TEST the system for normal operation. | | B6: CHECK THE CIRCUIT 31-LE19 (BK) FOR OPEN | | | 1 Measure the resistance between low beam relay, socket C1049, pin 2, circuit 31-LE19 (BK), BJB-side and ground. | | | Is the resistance less than 2 ohms? Yes No REPAIR the open circuit 31-LE19 (BK), between low beam relay and splice S108 by using the wiring diagrams. TEST the system for normal operation. | | B7: CHECK CIRCUIT 30-LE20 (RD) FOR OPEN | | | 1 Ignition switch in position II. | | | 2 Measure the voltage between low beam relay, socket C1049, pin 3, circuit 30-LE20 (RD), BJB-side and ground. | | | Is battery voltage indicated? Yes No REPAIR the circuit 30-LE20 (RD), between fuse F1.3 and low beam relay by using the wiring diagrams. TEST the system for normal operation. | | B8: CHECK THE CIRCUIT 30S-LE20 (RD/OG) FOR OPEN | | | 1 Ignition switch in position 0. | | | 2 Connect a fused jumper wire (20 A) at the low beam relay, socket C1049, between pin 3, circuit 30-LE20 (RD) and pin 5 circuit 30S-LE20 (RD/OG), BJB-side. | | | 3 Ignition switch in position II. | | | 4 Check the low beams. | | | Do the low beams illuminate? Yes No REPAIR the open circuit 30S-LE20 (RD/OG), between low beam relay and splice S104 by using the wiring diagrams. TEST the system for normal operation. | | B9: CHECK CIRCUIT 15-DD1 (GN/YE) FOR OPEN | | | 1 Ignition switch in position 0. | | | 2 Disconnect Light switch from connector C205. | | | 3 Ignition switch in position II. | | | 4 Measure the voltage between light switch, connector C205, pin 8, circuit 15-DD1 (GN/YE), harness side and ground. | | | Is battery voltage indicated? Yes No REPAIR the open circuit 15-DD1 (GN/YE), between splice S217 and light switch by using the wiring diagrams. TEST the system for normal operation. | | B10: CHECK THE CIRCUIT 29S-LE14 (OG) FOR OPEN | | | 1 Ignition switch in position 0. | | | 2 Disconnect Multifunction switch from connector C202a. | | | 3 Measure the resistance between light switch, connector C205, pin 6, circuit 29S-LE14 (OG), harness side and multifunction switch, connector C202a, pin 8, circuit 29S-LE14 (OG), harness side. | | | Is the resistance less than 2 ohm? Yes REPAIR the open circuit 15S-LE19 (GN/BU), between multifunction switch and low beam relay by using the wiring diagrams. TEST the system for normal operation. No REPAIR the open circuit 29S-LE14 (OG), between light switch and multifunction switch by using the wiring diagrams. TEST the system for normal operation. | | PINPOINT TEST C : THE HIGH BEAMS ARE INOPERATIVE | | TEST CONDITIONS | DETAILS/RESULTS/ACTIONS | | C1: CHECK THE FUSE F1.9 (BJB) | | | 1 Ignition switch in position 0. | | | 2 Disconnect Fuse F1.9 (BJB). | | | 3 CHECK Fuse F1.9 (20A) (BJB). | | | Is the fuse OK? Yes No INSTALL a new fuse F1.9 (BJB) and TEST the system for normal operation. If the fuse blows again, LOCATE and REPAIR the short circuit by using the wiring diagrams. TEST the system for normal operation. | | C2: CHECK THE VOLTAGE AT FUSE F1.9 (BJB) | | | 1 Connect Fuse F1.9 (20 A). | | | 2 Measure the voltage between fuse F1.9 (BJB) and ground. | | | Is battery voltage indicated? Yes No REPAIR the power supply of fuse F1.9 by using the wiring diagrams. If necessary INSTALL a new BJB. TEST the system for normal operation. | | C3: CHECK THE MULTIFUNCTION SWITCH | | | 1 Ignition switch in position 0. | | | 2 Disconnect Multifunction switch from connector C202a. | | | 3 Ignition switch in position II. | | | 4 Connect a fused jumper wire (20 A) at the multifunction switch, connector C202a, between pin 6, circuit 15-LE14 (GN/RD) and pin 7, circuit 15S-DC4 (GN/BK), harness side. | | | 5 Check the high beams. | | | Do the high beams illuminate? Yes INSTALL a new multifunction switch. TEST the system for normal operation. No | | C4: CHECK CIRCUIT 15-LE14 (GN/RD) FOR OPEN | | | 1 Measure the voltage between multifunction switch, connector C202a, pin 6, circuit 15-LE14 (GN/RD), harness side and ground. | | | Is battery voltage indicated? Yes No REPAIR the open circuit 15-LE14 (GN/RD), between splice S217 and multifunction switch by using the wiring diagrams. TEST the system for normal operation. | | C5: CHECK THE HIGH BEAM RELAY | | | 1 Ignition switch in position 0. | | | 2 Disconnect High beam relay from connector C1050. | | | 3 Check the high beam relay according to Component Testing attached to the wiring diagrams. | | | Is the high beam relay OK? Yes No INSTALL a new high beam relay. TEST the system for normal operation. | | C6: CHECK CIRCUIT 30-LE13 (RD) FOR OPEN | | | 1 Ignition switch in position II. | | | 2 Measure the voltage between high beam relay, connector C1050, pin 3, circuit 30-LE13 (RD), BJB-side and ground. | | | Is battery voltage indicated? Yes No REPAIR the open circuit 30-LE13 (RD), between fuse F1.9 and high beam relay by using the wiring diagrams. TEST the system for normal operation. | | C7: CHECK CIRCUIT 31-LE12 (BK) FOR OPEN | | | 1 Measure the resistance between high beam relay, connector C1050, pin 2, circuit 31-LE12 (BK), BJB-side and ground. | | | Is the resistance less than 2 ohm? Yes No REPAIR the open circuit 31-LE12 (BK), between high beam relay and splice S108 by using the wiring diagrams. TEST the system for normal operation. | | C8: CHECK CIRCUIT 15S-DC4 (GN/BK), 20S-LE12 (PK/YE) AND 15S-LE12 (GN/YE) FOR OPEN | | | 1 Ignition switch in position 0. | | | 2 Connect Multifunction switch with connector C202a. | | | 3 Ignition switch in position II. | | | 4 Turn on the HIGH BEAM. | | | 5 Measure the voltage between high beam relay, socket C1050, pin 1, circuit 15S-LE12 (GN/YE), BJB-side and ground. | | | Is battery voltage indicated? Yes REPAIR the open circuit 30S-LE13 (RD/BU), between high beam relay and splice S116 by using the wiring diagrams. TEST the system for normal operation. No REPAIR the open circuit 15S-DC4 (GN/BK), 20S-LE12 (PK/YE) or 15S-LE12 (GN/YE), between multifunction switch and high beam relay by using the wiring diagrams. TEST the system for normal operation. | | PINPOINT TEST D : ONE LOW BEAM IS INOPERATIVE | | TEST CONDITIONS | DETAILS/RESULTS/ACTIONS | | D1: DETERMINE THE INOPERATIVE LOW BEAM | | | 1 Ignition switch in position II. | | | 2 Turn on the LOW BEAM. | | | 3 Check the low beams. | | | Is the low beam, left-hand side inoperative? Yes No The low beam, right-hand side is inoperative: GO to D6. | | D2: CHECK THE FUSE F1.24 (BJB) | | | 1 Ignition switch in position 0. | | | 2 Disconnect Fuse F1.24 (BJB). | | | 3 CHECK Fuse F1.24 (10A) (BJB). | | | Is the fuse OK? Yes No INSTALL a new fuse F1.24 (BJB) and TEST the system for normal operation. If the fuse blows again, LOCATE and REPAIR the short circuit by using the wiring diagrams. TEST the system for normal operation. | | D3: CHECK THE VOLTAGE AT FUSE F1.24 (BJB) | | | 1 Connect Fuse F1.24 (10 A) (BJB). | | | 2 Turn on the LOW BEAM. | | | 3 Measure the voltage between fuse F1.24 (BJB) and ground. | | | Is battery voltage indicated? Yes No REPAIR the open circuit 30S-DA9 (RD/OG), between splice S104 and fuse F1.24 by using the wiring diagrams. If necessary INSTALL a new BJB. TEST the system for normal operation. | | D4: CHECK CIRCUIT 30S-DA9 AND 30S-LE16 FOR OPEN | | | 1 Ignition switch in position 0. | | | 2 Disconnect Headlamp, LH-side from connector C1021. | | | 3 Ignition switch in position II. | | | 4 Turn on the LOW BEAM. | | | 5 Measure the voltage between headlamp, LH-side, connector C1021, pin 7, circuit 30S-LE16 (RD/BK), harness side and ground. | | | Is battery voltage indicated? Yes No REPAIR the open circuit 30S-LE16 (RD/BK), between fuse F1.24 and headlamp by using the wiring diagrams. TEST the system for normal operation. | | D5: CHECK CIRCUIT 31-LE31 (BK) FOR OPEN | | | 1 Ignition switch in position 0. | | | 2 Measure the resistance between headlamp, LH-side, connector C1021, pin 4, circuit 31-LE31 (BK), harness side and ground. | | | Is the resistance less than 2 ohm? Yes CHECK the headlamp, if necessary INSTALL a new one. TEST the system for normal operation. No REPAIR the open circuit 31-LE31 (BK), between headlamp and ground G103 by using the wiring diagrams. TEST the system for normal operation. | | D6: CHECK FUSE F1.23 (BJB) | | | 1 Ignition switch in position 0. | | | 2 Disconnect Fuse F1.23 (BJB). | | | 3 CHECK Fuse F1.23 (10A) (BJB). | | | Is the fuse OK? Yes No INSTALL a new fuse F1.23 (BJB) and TEST the system for normal operation. If the fuse blows again, LOCATE and REPAIR the short circuit by using the wiring diagrams. TEST the system for normal operation. | | D7: CHECK THE VOLTAGE AT FUSE F1.23 (BJB) | | | 1 Connect Fuse F1.23 (10 A) (BJB). | | | 2 Ignition switch in position II. | | | 3 Turn on the LOW BEAM. | | | 4 Measure the voltage between fuse F1.23 (BJB) and ground. | | | Is battery voltage indicated? Yes No REPAIR the open circuit 30S-DA10 (RD/GN), between splice S104 and fuse F1.23 by using the wiring diagrams. If necessary INSTALL a new BJB. TEST the system for normal operation. | | D8: CHECK CIRCUIT 30S-LE23 (RD/WH) AND 30S-LE16 (RD/BK) (CHASSIS CAB, DOUBLE CHASSIS CAB ONLY) FOR OPEN | | | 1 Ignition switch in position 0. | | | 2 Disconnect Headlamp, RH-side from connector C1041. | | | 3 Ignition switch in position II. | | | 4 Turn on the LOW BEAM. | | | 5 Measure the voltage between headlamp, RH-side, connector C1041, pin 7, circuit 30S-LE23 (RD/WH) or 30S-LE16 (RD/BK) (chassis cab, double chassis cab only), harness side and ground. | | | Is battery voltage indicated? Yes No REPAIR the open circuit 30S-LE23 (RD/WH) or 30S-LE16 (RD/BK) (chassis cab, double chassis cab), between fuse F1.23 and headlamp by using the wiring diagrams. TEST the system for normal operation. | | D9: CHECK CIRCUIT 31-LE30 (BK) AND 31-LE31 (BK) (CHASSIS CAB, DOUBLE CHASSIS CAB) FOR OPEN | | | 1 Ignition switch in position 0. | | | 2 Measure the resistance between headlamp, RH-side, connector C1041, pin 4, circuit 31-LE30 (BK) or 31-LE31 (BK) (chassis cab, double chassis cab), harness side and ground. | | | Is the resistance less than 2 ohm? Yes CHECK the headlamp, if necessary INSTALL a new one. TEST the system for normal operation. No REPAIR the open circuit 31-LE30 (BK) or 31-LE31 (BK) (chassis cab, double chassis cab), between headlamp and ground G104 by using the wiring diagrams. TEST the system for normal operation. | | PINPOINT TEST E : ONE HIGH BEAM IS INOPERATIVE | | TEST CONDITIONS | DETAILS/RESULTS/ACTIONS | | E1: DETERMINE THE INOPERATIVE HIGH BEAM | | | 1 Ignition switch in position II. | | | 2 Turn on the HIGH BEAM. | | | 3 Check the high beams. | | | Is the high beam, left-hand side inoperative? Yes No The high beam, right-hand side is inoperative: GO to E4. | | E2: CHECK CIRCUIT 30S-LE15 (RD/GN) FOR OPEN | | | 1 Ignition switch in position 0. | | | 2 Disconnect Headlamp, LH-side from connector C1021. | | | 3 Ignition switch in position II. | | | 4 Turn on the HIGH BEAM. | | | 5 Measure the voltage between headlamp, LH-side, connector C1021, pin 6, circuit 30S-LE15 (RD/GN), harness side and ground. | | | Is battery voltage indicated? Yes No REPAIR the open circuit 30S-LE15 (RD/GN), between splice S116 and headlamp by using the wiring diagrams. TEST the system for normal operation. | | E3: CHECK CIRCUIT 31-LE31 (BK) FOR OPEN | | | 1 Ignition switch in position 0. | | | 2 Measure the resistance between headlamp, LH-side, connector C1021, pin 4, circuit 31-LE31 (BK), harness side and ground. | | | Is the resistance less than 2 ohm? Yes CHECK the headlamp, if necessary INSTALL a new one. TEST the system for normal operation. No REPAIR the open circuit 31-LE31 (BK), between headlamp and ground G103 by using the wiring diagrams. TEST the system for normal operation. | | E4: CHECK CIRCUIT 30S-LE22 (RD/BK) AND 30S-LE15 (RD/GN) (CHASSIS CAB, DOUBLE CHASSIS CAB) FOR OPEN | | | 1 Ignition switch in position 0. | | | 2 Disconnect Headlamp, RH-side from connector C1041. | | | 3 Ignition switch in position II. | | | 4 Turn on the HIGH BEAM. | | | 5 Measure the voltage between headlamp, RH-side, connector C1041, pin 6, circuit 30S-LE22 (RD/BK) or 30S-LE15 (RD/GN) (chassis cab, double chassis cab), harness side and ground. | | | Is battery voltage indicated? Yes No REPAIR the open circuit 30S-LE22 (RD/BK) or 30S-LE15 (RD/GN) (chassis cab, double chassis cab), between splice S116 and headlamp by using the wiring diagrams. TEST the system for normal operation. | | E5: CHECK CIRCUIT 31-LE30 (BK) AND 31-LE31 (BK) FOR OPEN | | | 1 Ignition switch in position 0. | | | 2 Measure the resistance between headlamp, RH-side, connector C1041, pin 4, circuit 31-LE30 (BK) or 31-LE31 (BK) (chassis cab, double chassis cab), harness side and ground. | | | Is the resistance less than 2 ohm? Yes CHECK the headlamp, if necessary INSTALL a new one. TEST the system for normal operation. No REPAIR the open circuit 31-LE30 (BK) or 31-LE31 (BK) (chassis cab, double chassis cab), between headlamp and ground G104 by using the wiring diagrams. TEST the system for normal operation. | | PINPOINT TEST F : THE HEADLAMPS (LOW OR HIGH BEAM) ARE ON CONTINUOUSLY | | TEST CONDITIONS | DETAILS/RESULTS/ACTIONS | | F1: DETERMINE THE INOPERATIVE LAMPS | | | 1 Turn OFF the headlamps. | | | 2 Turn the multifunction switch to the NEUTRAL position. | | | 3 Ignition switch in position II. | | | 4 Check the headlamps. | | | Are the low beams on continuously? Yes No | | F2: DETERMINE THE INOPERATIVE CIRCUIT | | | 1 Ignition switch in position 0. | | | 2 Disconnect Low beam relay from connector C1049. | | | 3 Ignition switch in position II. | | | 4 Check the headlamps. | | | Are the low beams on continuously? Yes No | | F3: CHECK CIRCUIT 15S-LE19 (RD) OR 15S-LE19 (GN/BU) (AS OF 2001) AND 29S-LE14 (OG) FOR SHORT TO POWER | | | 1 Measure the voltage between low beam relay, connector C1049, pin 1, circuit 15S-LE19 (RD) or 15S-LE19 (GN/BU) (as of 2001), BJB-side and ground. | | | Is battery voltage indicated? Yes No INSTALL a new low beam relay. TEST the system for normal operation. | | F4: CHECK THE LIGHT SWITCH | | | 1 Ignition switch in position 0. | | | 2 Disconnect Light switch from connector C205. | | | 3 Ignition switch in position II. | | | 4 Measure the voltage between low beam relay, socket C1049, pin 1, circuit 15S-LE19 (RD) or 15S-LE19 (GN/BU) (as of 2001), BJB-side and ground. | | | Is battery voltage indicated? Yes LOCATE and REPAIR the short to power in circuit 15S-LE19 (RD) or 15S-LE19 (GN/BU) (as of 2001) or 29S-LE14 (OG) by using the wiring diagrams. TEST the system for normal operation. No INSTALL a new light switch. TEST the system for normal operation. | | F5: CHECK CIRCUITS 30S-LE20 (RD/OG), 30S-DA9 (RD/OG) AND 30S-DA10 (RD/GN) FOR SHORT TO POWER | | | 1 Ignition switch in position 0. | | | 2 Disconnect Fuse F1.24 (10A) (BJB). | | | 3 Disconnect Fuse F1.23 (10A) (BJB). | | | 4 Ignition switch in position II. | | | 5 Check the headlamps. | | | Does one low beam illuminate? Yes -Low beam LH-side is illuminated: LOCATE and REPAIR the short to power in circuit 30S-LE16 (RD/BK) by using the wiring diagrams. TEST the system for normal operation. -Low beam RH-side is illuminated: LOCATE and REPAIR the short to power in circuit 30S-LE23 (RD/BK) or 30S-LE16 (RD/BK) (chassis cab, double chassis cab) by using the wiring diagrams. TEST the system for normal operation. No LOCATE and REPAIR the short to power in circuits connected with splice S104 by using the wiring diagrams. TEST the system for normal operation. | | F6: ISOLATE THE SHORT TO POWER CONDITION | | | 1 Ignition switch in position 0. | | | 2 Disconnect High beam relay from connector C1050. | | | 3 Ignition switch in position II. | | | 4 Check the headlamps. | | | Do the high beams illuminate? Yes LOCATE and REPAIR the short to power in circuit 30S-LE13 (RD/BU), 30S-LE15 (RD/GN) or 30S-LE22 (RD/BK) by using the wiring diagrams. TEST the system for normal operation. No | | F7: DETERMINE THE SHORT TO POWER CONDITION | | | 1 Check the high beam indicator lamp in the instrument cluster. | | | Does the indicator lamp illuminate? Yes No INSTALL a new high beam relay. TEST the system for normal operation. | | F8: CHECK THE MULTIFUNCTION SWITCH | | | 1 Ignition switch in position 0. | | | 2 Disconnect Multifunction switch from connector C202a. | | | 3 Ignition switch in position II. | | | 4 Check the high beam indicator lamp in the instrument cluster. | | | Does the indicator lamp illuminate? Yes LOCATE and REPAIR the short to power, in circuits connected with splice S220 by using the wiring diagrams. TEST the system for normal operation. If the concern is not rectified, CHECK the instrument cluster, if necessary INSTALL a new one. TEST the system for normal operation. No INSTALL a new multifunction switch. TEST the system for normal operation. | | PINPOINT TEST G : THE FLASH-TO-PASS FEATURE IS INOPERATIVE | | TEST CONDITIONS | DETAILS/RESULTS/ACTIONS | | G1: CHECK THE MULTIFUNCTION SWITCH | | | 1 Ignition switch in position II. | | | 2 Turn on the HIGH BEAM. | | | 3 Check the headlamps. | | | Do the high beams illuminate? Yes INSTALL a new multifunction switch. TEST the system for normal operation. No | |