| Removal Special Tool(s) | | Support Bar, Engine 303-290A (21-140) | | | Adapter for 303-290A 303-290-02 (21-140-02) | | | Adapter for 303-290A 303-290-03 (21-140-03) | | | Adapter for 303-290A 303-290-13 (21-140-09) | | | Remover, Halfshaft 308-192 (16-057) | General Equipment Two leg puller Transmission jack | | -
Disconnect the battery ground cable.
For additional information, refer to: Battery Disconnect and Connect (414-01 Battery, Mounting and Cables, General Procedures).
| | | -
Remove the front wheels and tires.
For additional information, refer to: Wheel and Tire (204-04 Wheels and Tires, Removal and Installation).
| | | -
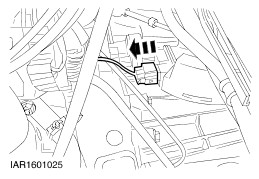
Disconnect the vehicle speed sensor (VSS) electrical connector (if equipped). | | | -
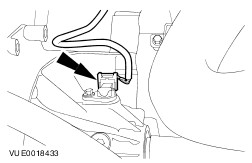
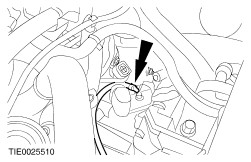
Disconnect the crankshaft position (CKP) sensor electrical connector. | | | -
Remove the engine support insulator. - Discard the engine support insulator to transaxle retaining bolt.
| | | -
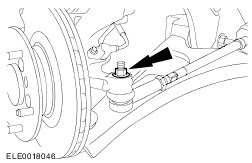
Loosen the lower ball joint retaining nuts on both sides. | | | -
CAUTION:Protect the ball joint seal using a soft cloth to prevent damage. Using a suitable two leg puller, detach the lower arms from the wheel knuckles on both sides. - Use a soft faced hammer to strike the lower arm.
- Remove and discard the retaining nut.
| | | -
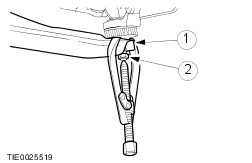
CAUTION:Leave the tie-rod end retaining nut in place to protect the ball joint stud. Loosen the left-hand tie-rod end retaining nut. | | | -
CAUTION:Protect the ball joint seal using a soft cloth to prevent damage. Using a suitable two leg puller, detach the left-hand tie-rod end from the wheel knuckle. - Release the tie-rod end.
- Remove and discard the retaining nut.
| | | -
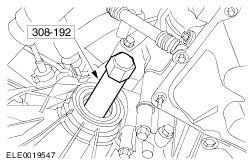
CAUTION:Support the halfshaft. The inner joint must not be bent more than 21 degrees. The outer joint must not be bent more than 45 degrees. CAUTION:Do not damage the halfshaft oil seal. NOTE:Plug the transaxle to prevent oil loss or dirt ingress. Detach the right-hand halfshaft from the transaxle and secure it to one side. - Remove and discard the center bearing cap and locknuts.
- Allow the oil to drain into a suitable container.
| | | -
CAUTION:Support the halfshaft. The inner joint must not be bent more than 21 degrees. The outer joint must not be bent more than 45 degrees. CAUTION:Do not damage the halfshaft oil seal. NOTE:Plug the transaxle to prevent oil loss or dirt ingress. Using the special tool, detach the left-hand halfshaft from the transaxle and secure it to one side. - Allow the oil to drain into a suitable container.
| | | -
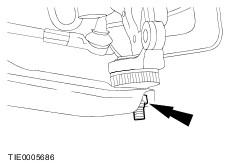
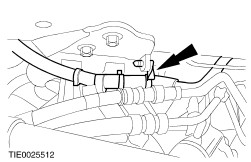
Remove the heater pipe retaining bracket from the transaxle. | | | -
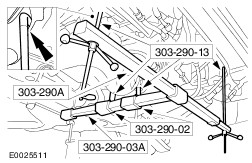
WARNING:The engine support bar must be level and the adaptor pins must be in line with the holes in the oil pan. NOTE:The engine support bar hangers must be fitted into the front holes of the side members. Install the special tools. | | | -
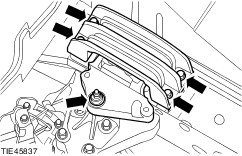
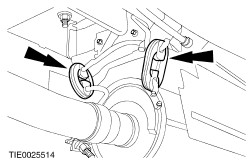
Remove the engine and transaxle rear mount retaining bolts. | | | -
Remove the engine and transaxle rear mount retaining bolts and nut. | | | -
Detach the gearshift cables from the transaxle. - Press the tabs together to release the locks.
- Pull the locking pins and detach the abutment sleeves from the bracket.
| | | -
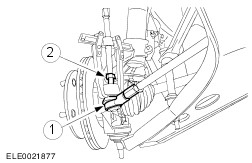
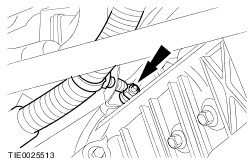
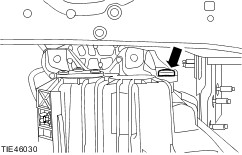
Detach the transaxle vent hose from the transaxle. | | | -
CAUTION:If brake fluid is spilt on the paintwork, the affected area must be immediately washed down with cold water. Disconnect the clutch slave cylinder supply line from the transaxle. | | | -
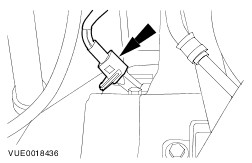
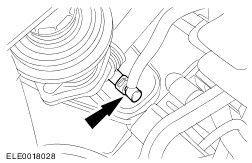
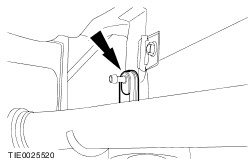
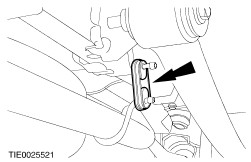
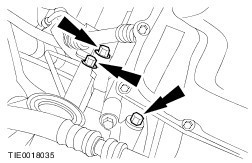
Disconnect the reversing lamp switch electrical connector. | | | -
Raise and support the vehicle.
For additional information, refer to: Jacking (100-02 Jacking and Lifting, Description and Operation) /
Lifting (100-02 Jacking and Lifting, Description and Operation).
| | | -
Detach the starter motor wiring harness retaining bracket from the transaxle. | | | -
Detach the engine wiring harness retaining pin from the bracket. | | | -
Detach the exhaust front hanger insulator from the bracket. | | | -
Detach the front muffler hanger insulators from the bracket. | | | -
Detach the rear muffler hanger insulators from the bracket. | | | -
Detach the exhaust rear hanger insulator from the bracket. | | | -
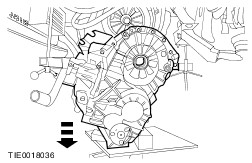
CAUTION:Do not damage the exhaust pipe while the engine and transaxle assembly is being lowered. Lower the engine and transaxle assembly. | | | -
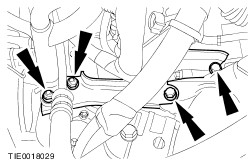
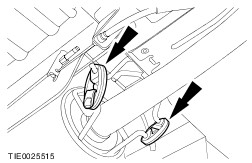
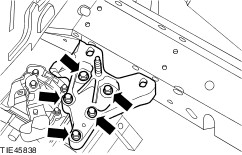
Remove the engine and transaxle rear mount bracket retaining bolt. | | | -
Remove the engine and transaxle rear mount bracket from the transaxle. | | | -
Raise and support the vehicle.
For additional information, refer to: Jacking (100-02 Jacking and Lifting, Description and Operation) /
Lifting (100-02 Jacking and Lifting, Description and Operation).
| | | -
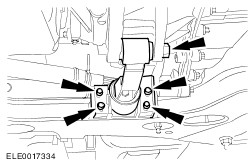
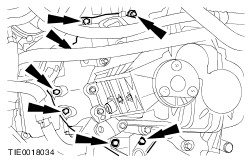
Remove the transaxle left-hand retaining bolts. | | | -
Remove the transaxle right-hand retaining bolts. | | | -
CAUTION:Do not damage the starter motor seal. With the aid of another technician, remove the transaxle. | | |