
Windstar V6-232 3.8L (1995)
Brake Rotor/Disc: Service and Repair
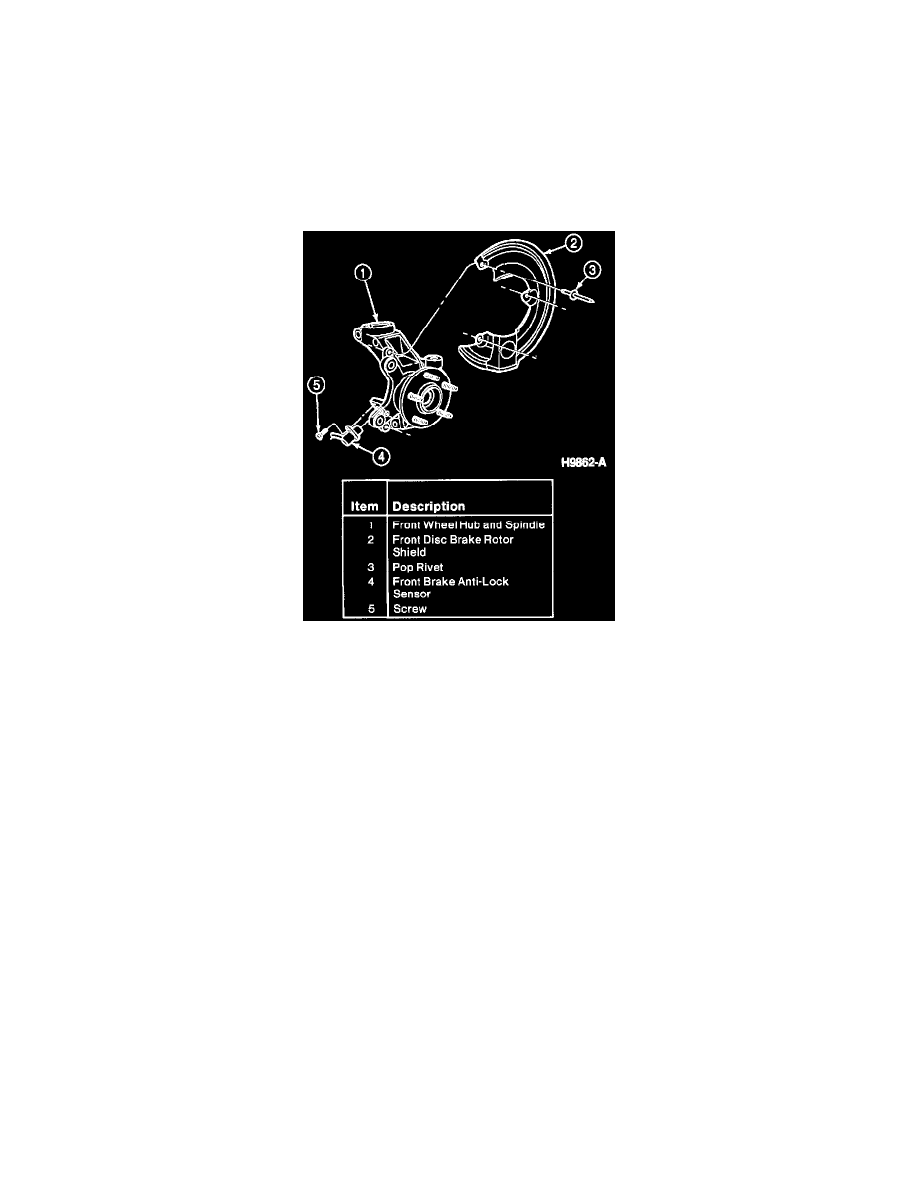
Disc Backing Plate
Front
REMOVAL
1. Raise vehicle on hoist.
2. Remove disc brake caliper and front disc brake rotor. It is not necessary to disconnect hydraulic connections.
3. Remove three rivets retaining front disc brake rotor shield to front wheel hub and spindle by punching out the mandrel located in the center of the
rivet. With a chisel, cut off rivet at front wheel hub and spindle and punch out rivet remaining in hole.
4. Remove front disc brake rotor shield by pulling it outboard.
INSTALLATION
1. Locate front disc brake rotor shield until front disc brake rotor shield attachment surfaces contact front wheel hub and spindle mounting bosses and
holes in front wheel hub and spindle bosses are aligned with mounting holes in front disc brake rotor shield.
2. Install new rivets using Heavy-Duty Riveter D80L-23200-A or equivalent (three per front disc brake rotor shield) through attaching holes in front
disc brake rotor shield and front wheel hub and spindle. The rivet body head should clamp front disc brake rotor shield attachments securely to
front wheel hub and spindle bosses.
3. Install front disc brake rotor, disc brake caliper and wheel and tire assembly.
4. Make certain front disc brake rotor shield does not contact front disc brake rotor. Rotate wheel to visually inspect for contact.
5. Lower vehicle.
6. Pump brake pedal prior to moving the vehicle to position brake linings.
7. Road test vehicle.
Rear
1. Remove the parking brake pad and lining assembly.
2. Remove the rear wheel disc brake adapter.
3. Drill out the single rivet attaching the rear disc brake shield to the rear wheel disc brake adapter.
4. Remove the rear disc brake shield from the rear wheel disc brake adapter.
5. To install, use a new rivet and reverse the removal procedure.