Windstar V6-232 3.8L (1995)

REMOVAL
1. Disconnect the stoplamp switch wiring to prevent running the battery down.
2. Support the brake master cylinder from the underside with a prop.
3. Remove the master cylinder-to-booster retaining nuts.
4. Loosen the clamp on manifold vacuum hose to the power brake booster check valve and remove the hose.
5. Pull the brake master cylinder off the power brake booster and leave it supported by the prop, far enough away to allow removal of the power
brake booster.
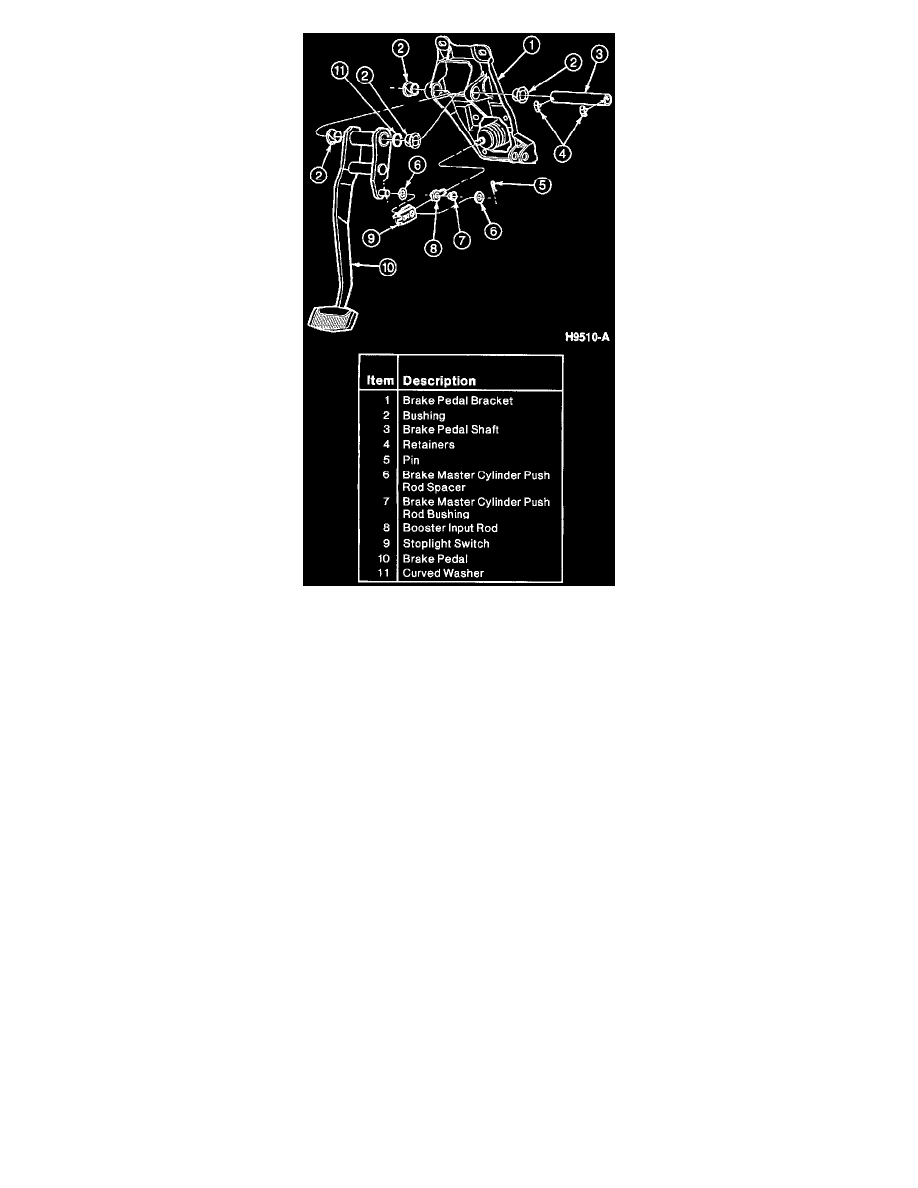
6. From inside the cab remove the hairpin retainer and slide the stoplight switch, valve rod, spacers and bushing off the brake pedal arm.
7. From inside cab, remove four booster-to-brake bracket nuts.
8. From engine compartment, remove power brake booster from dash panel.
INSTALLATION
1. Put power brake booster in place, sliding four studs through holes in dash panel.
2. From inside the cab, install the booster-to-dash panel retaining nuts. Tighten to 21-29 Nm (15-20 ft lb).
3. Position the brake master cylinder on the power brake booster, and install the retaining nuts. Tighten to 25-35 Nm (18-26 ft lb) and remove the
prop from underneath the brake master cylinder.
4. Connect the manifold vacuum hose to the power brake booster check valve and secure with the clamp.
5. From inside the cab install the bushing and position the stoplight switch on the end of the valve rod.
CAUTION: When performing the next step, do not substitute other types of pin retainers. Use only factory supplied hairpin retainers.
6. Install the stoplight switch and rod on the pedal arm, along with brake master cylinder push rod spacers on each side, and secure with the hairpin
retainer.
7. Connect the stoplamp switch wiring.
8. Start the engine and check brake operation.
