
Storm L4-1600cc 1.6L SOHC (1990)
Camshaft: Service and Repair
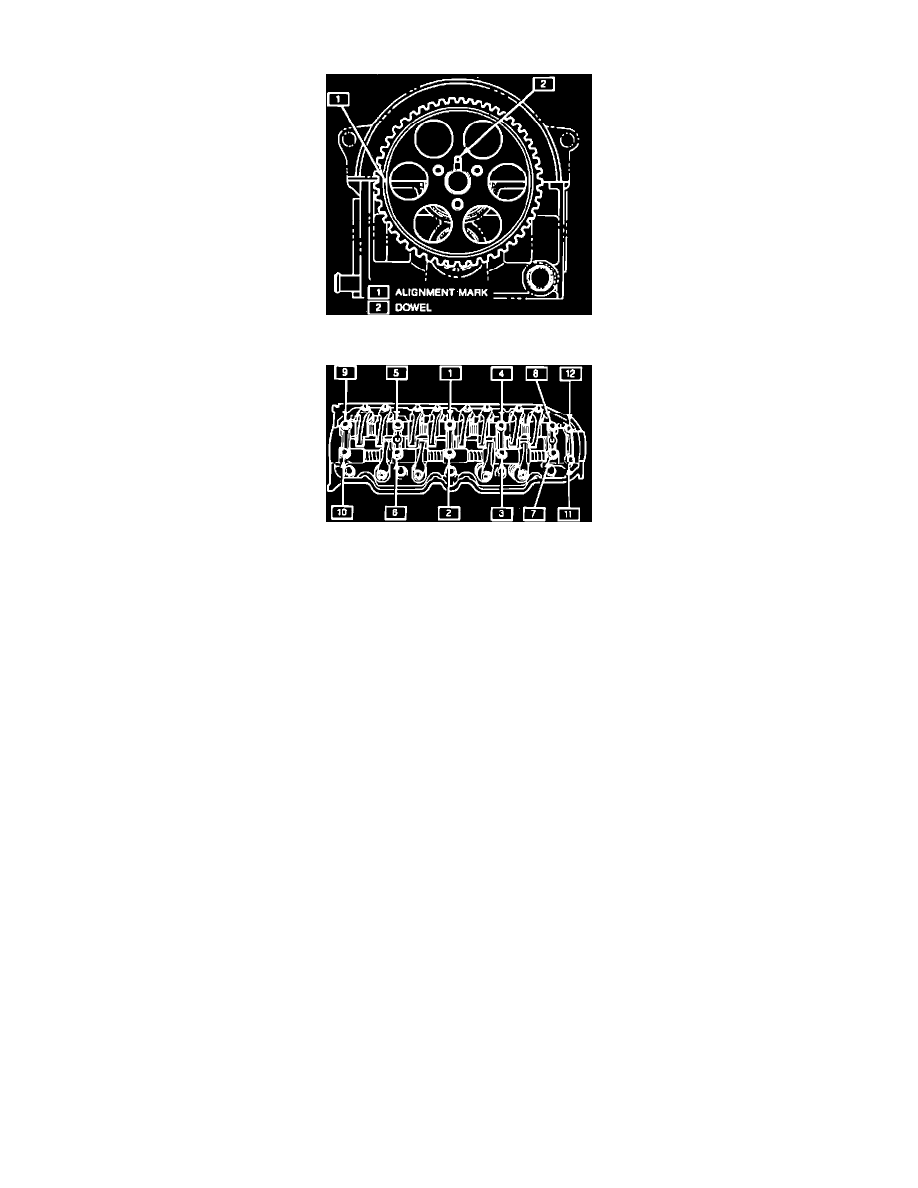
Cam Pulley Timing Mark
Fig. 19 Tightening Sequence. SOHC
REMOVAL
1.
Disconnect battery ground cable.
2.
Remove PCV hoses and spark plug wires from the clip.
3.
Remove two bolts from the timing belt cover, then loosen lower timing belt cover bolts.
4.
Remove cylinder head cover bolts, then cylinder head cover.
5.
Rotate crankshaft to TDC on compression stroke by aligning the camshaft pulley timing marks, Fig. 20.
6.
Loosen timing belt tensioner, then remove timing belt.
7.
Remove distributor, camshaft bearing cap retaining bolts and covers.
8.
Remove camshaft and camshaft seal.
INSTALLATION
1.
Install camshaft in cylinder head with dowel pin in the upright position.
2.
Install camshaft bearing caps, but do not tighten.
3.
Apply GM 1052942 sealant or equivalent to No. 1 and No. 5 camshaft bearing caps.
4.
Torque camshaft bearing caps to 16 ft. lbs.
5.
Install new camshaft oil seal using seal installation tool No. J 35268 or equivalent.
6.
Install distributor, camshaft timing pulley and timing belt.
7.
Install cylinder head cover, then battery ground cable.