
Tracker 4x4 L4-1590cc 1.6L (1993)
5.
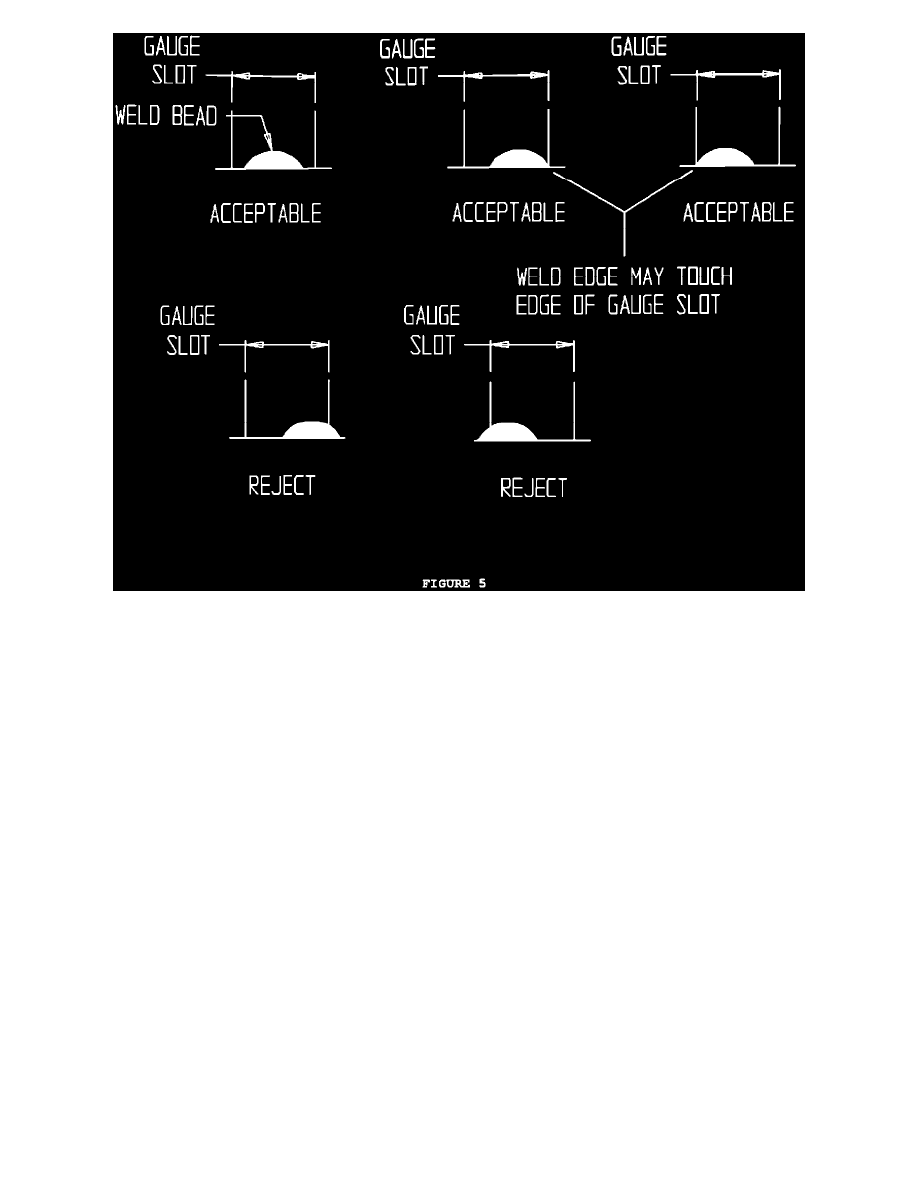
Position your line of sight with gauge slot (Figure 3) and inspect location of weld # 1 (Figure 2). The part is acceptable if the weld is located
within the slot. See Figure 5 for acceptable criteria of weld location.
6.
Place gauge tool over nuts "C" and "D" and inspect location of weld # 2 (Figures 2 & 4) The part is acceptable if weld bead is located within the
slot. See Figure 5 for acceptable criteria of weld location.
7.
If weld areas do not pass inspection procedure, it will be necessary to replace the rear axle following the repair procedure which follows. If the
weld area does pass inspection, do not make any further repair but install Campaign Identification Label.
AXLE REPLACEMENT PROCEDURE
1.
Remove two (2) screws, two (2) clips and parking brake lever cover from inside of vehicle.
2.
Remove park brake cable locknut and spacer.
3.
Remove park brake cable from equalizer.
4.
Raise and suitably support vehicle. Refer to section 0A of service manual.
5.
Remove both rear wheels.
6.
Remove bolts (8 total) from left and right park brake cable protectors on trailing rod, frame and crossmember.
7.
Remove park brake cables from openings in floor.
8.
Remove rear axle drain plug and drain fluid from rear axle into drain pan or other suitable container.
9.
Disconnect propeller shaft from rear axle. Secure shaft under vehicle.
10.
Loosen rear axle trailing rod through bolts.
11.
Position hydraulic jack under the vehicle and support rear axle housing.