C 2500 3/4 Ton Pickup 2WD V8-379 6.2L DSL VIN J FI (1984)

1.
Disconnect battery ground cable, then discharge system refrigerant.
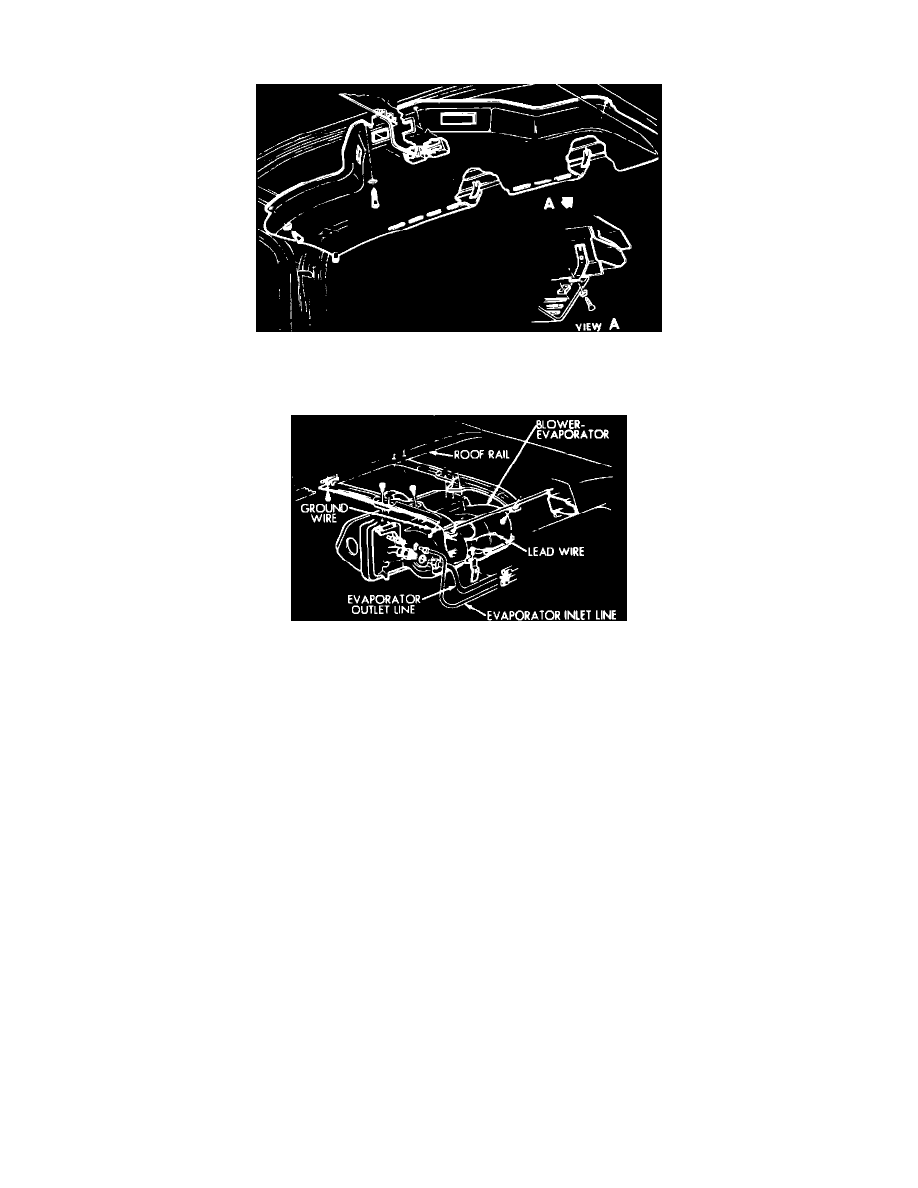
Fig. 6 Rear duct assembly. R & V Series with overhead system
2.
Remove rear duct drain tube, duct to header bracket and roof panel screws, then rear duct assembly, Fig. 6.
Fig. 7 Rear blower motor & evaporator assembly. R & V Series with overhead system
3.
Disconnect blower harness lead and ground wire, Fig. 7.
4.
Disconnect refrigerant lines at evaporator/blower assembly. Plug all open connections.
5.
While supporting unit, remove blower/evaporator assembly support screws at roof rail. Place unit upside down on bench, then remove upper to
lower case retaining screws. Remove lower case half.
6.
Remove upper case to support screws and case from evaporator core.
7.
Remove inlet and outlet lines at expansion valve. Plug all open connections.
8.
Remove expansion valve capillary bulb from outlet line, then the valve.
9.
Remove plastic screen retaining pins at core and screen.
10.
Reverse procedure to install, using new O-rings coated with clean refrigerant at connections. When installing a new evaporator core, add 3 fluid
ounces of fresh refrigerant oil to unit prior to installation.
