
C 3500 Truck 2WD V8-454 7.4L VIN J SFI (1999)
Notice: Refer to Fastener Notice in Service Precautions.
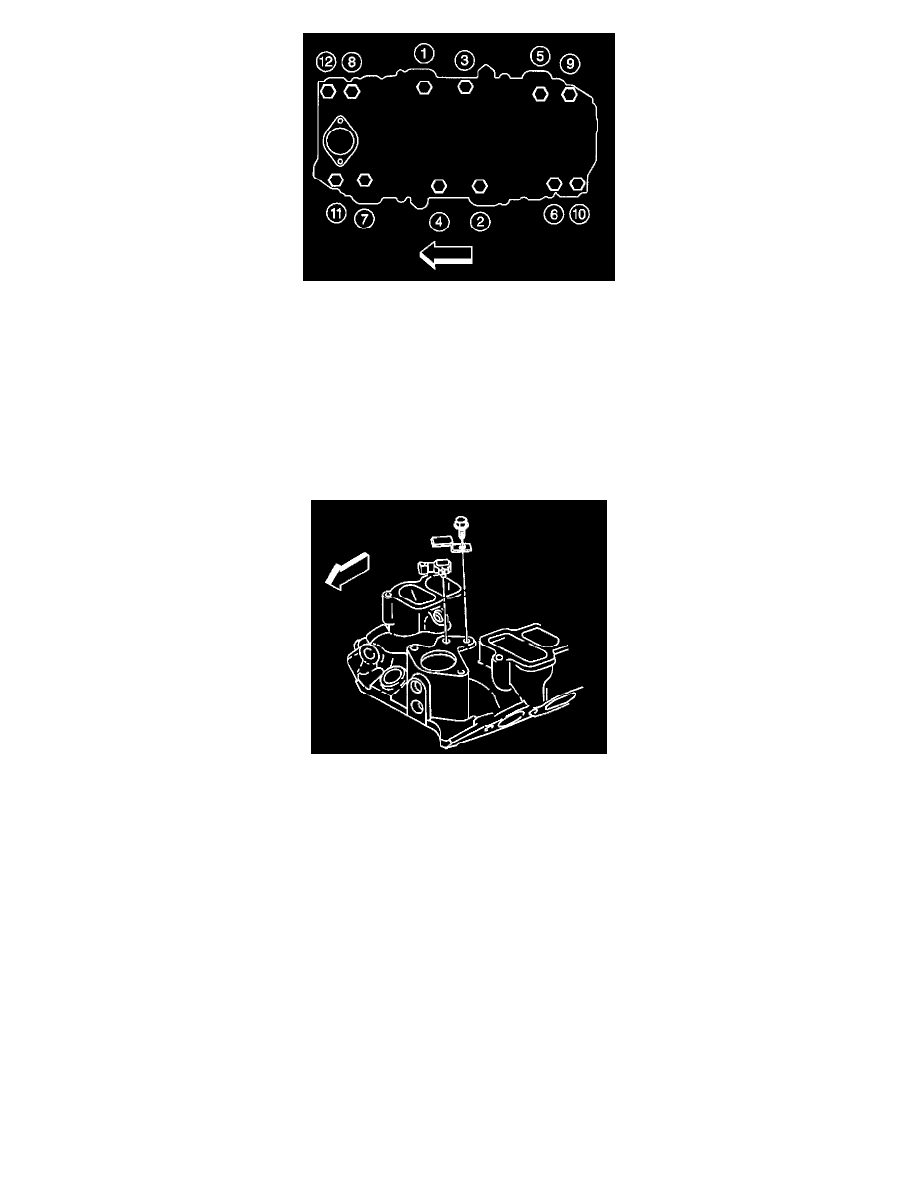
4. Install the lower intake manifold bolts to the engine head.
^
Tighten the bolts in sequence to 30 Nm (22 ft. lbs.).
^
Re-tighten the bolts in sequence to 40 Nm (30 ft. lbs.).
5. Install the fuel rail to the lower intake manifold. Refer to Fuel Rail Assembly Replacement.
6. Install the fuel rail retaining bolts. Refer to Fuel Rail Assembly Replacement.
7. Install the coolant bypass hose to the water pump.
8. Install the heater hoses to the lower intake manifold. Refer to Heater Hoses Replacement (Inlet Hose) and Heater Hoses Replacement (Outlet
Hose) in Cooling System.
9. Install the thermostat housing to the lower intake manifold from the engine block. Refer to Thermostat Replacement in Cooling System.
10. Install the MAP sensor to the lower intake manifold. Refer to MAP Sensor Replacement.
11. Install the radiator hose to the thermostat housing. Refer to Heater Hoses Replacement (Inlet Hose) or Heater Hoses Replacement (Outlet Hose) in
Cooling System.
12. Install the distributor to the engine block. Refer to Distributor Replacement.
13. Install the suction hose to the A/C compressor. Refer to Heater Hoses Replacement (Inlet Hose) in Heating and Air Conditioning.
14. Install the upper intake manifold to the lower intake manifold. Refer to Intake Manifold Installation.
15. Install the discharge line to the A/C compressor. Refer to Compressor Hose Assembly Replacement in Heating and Air Conditioning.
16. Refill the cooling system. Refer to Draining and Filling Cooling System in Cooling System.
17. Connect the battery negative cable to the battery. Refer to Battery Cable.