
C 3500 Truck 2WD V8-454 7.4L VIN J SFI (1999)
1. If the tie rod end was removed, lubricate the tie rod threads with chassis lubricant.
2. Install the tie rod end to the adjuster tube.
3. The number of threads on both the inner and the outer rod ends must be equal within three threads.
4. Install the inner tie rod ball studs to the relay rod. The seal must be on the stud.
-
Tighten the inner tie rod ball stud to 54 Nm (40 ft. lbs.) in order to seat the tapers.
Use the J29193 in order to install the inner tie rod ball stud.
Notice: Refer to Fastener Notice in Service Precautions.
5. Install the new prevailing torque nut to the inner tie rod ball stud.
-
Tighten the new prevailing torque nut to 62 Nm (46 ft. lbs.).
6. Install the outer tie rod ball studs to the steering knuckle (15).
-
Tighten the outer tie rod ball stud to 54 Nm (40 ft. lbs.) in order to seat the tapers.
Use the J 29193 in order to install the outer tie rod ball stud.
7. Install the new prevailing torque nut to the outer rod ball studs.
-
Tighten the new prevailing torque nut to 62 Nm (46 ft. lbs.).
8. Adjust the front toe.
C 3500 HD, Only
REMOVAL PROCEDURE
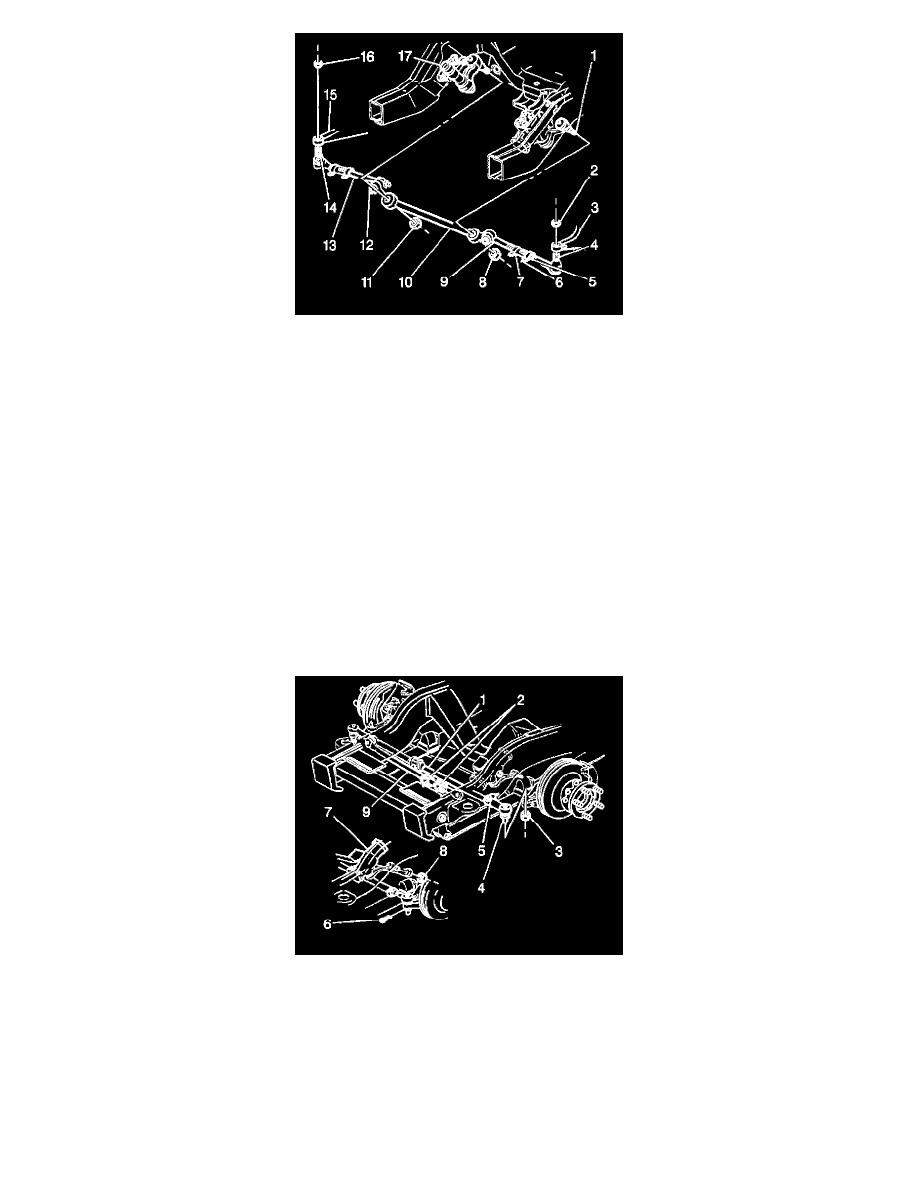
1. The heavy duty suspension uses only one adjustable tie rod end, connected to the left steering knuckle spindle.
1.1. A ball socket is found at the end of the tie rod assembly rod and attaches to the steering knuckle spindle.
1.2. The tie rod assembly rod attaches to the steering gear (7) by means of a drag link (9) and ball socket with an adjuster sleeve near the Pitman
arm stud hole.
2. Remove the cotter pin (6) at the ball stud (4).
3. Remove the nut (8) from the ball stud.
4. Loosen the nut.
5. Remove the adjuster clamp (5).
6. Remove the ball stud and tie rod end from the tie rod assembly (1).
7. Inspect the following parts: