
K 1500 Truck 4WD V8-350 5.7L (1986)
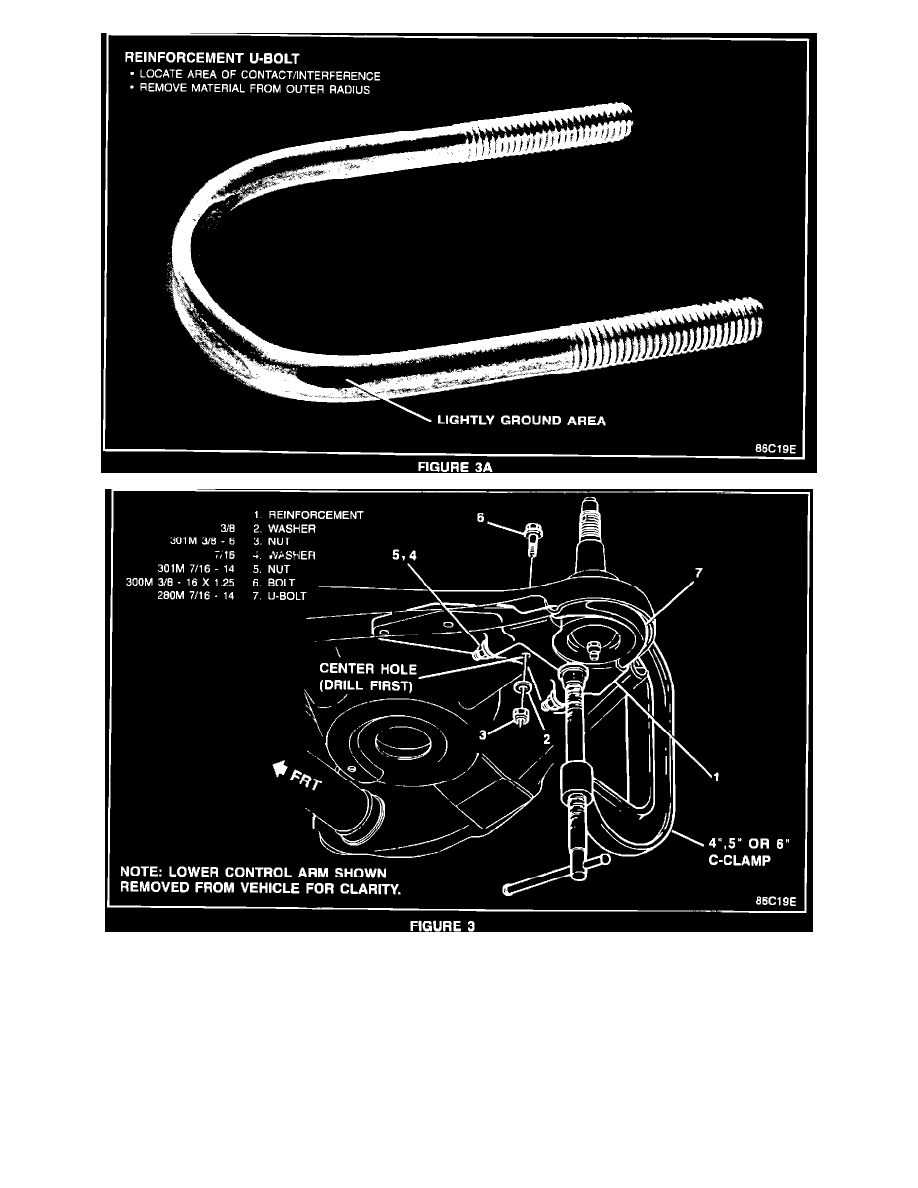
When correctly installed, the U-bolt, will be about even with bottom of the ball joint. The U-bolt is NOT designed to fit into the galley of the control arm
. On some vehicles the U-bolt may contact the flange edge of the control arm and interfere with the correct installation. In these cases you may remove
only enough material (LIGHTLY grind) (Figure 3A) from the outer radius of the U-bolt to allow clearance between the U-bolt and the control arm
(Figure 3, "7") .
4.
Drill a center hole with a 3/8 inch (9.5 mm) drill. The reinforcement (Figure 3, "1") has been designed to be used as a drill guide. When drilling,
keep the drill as perpendicular as possible.
5.
Install a 3/8-16 bolt (Figure 3, "6"), nut (Figure 3, "3") and washer (Figure 3, "2") in the center hole and torque them to approximately 18 N-m (13
lbs.ft).