
K 2500 Truck 4WD V8-379 6.2L DSL VIN C FI (1989)
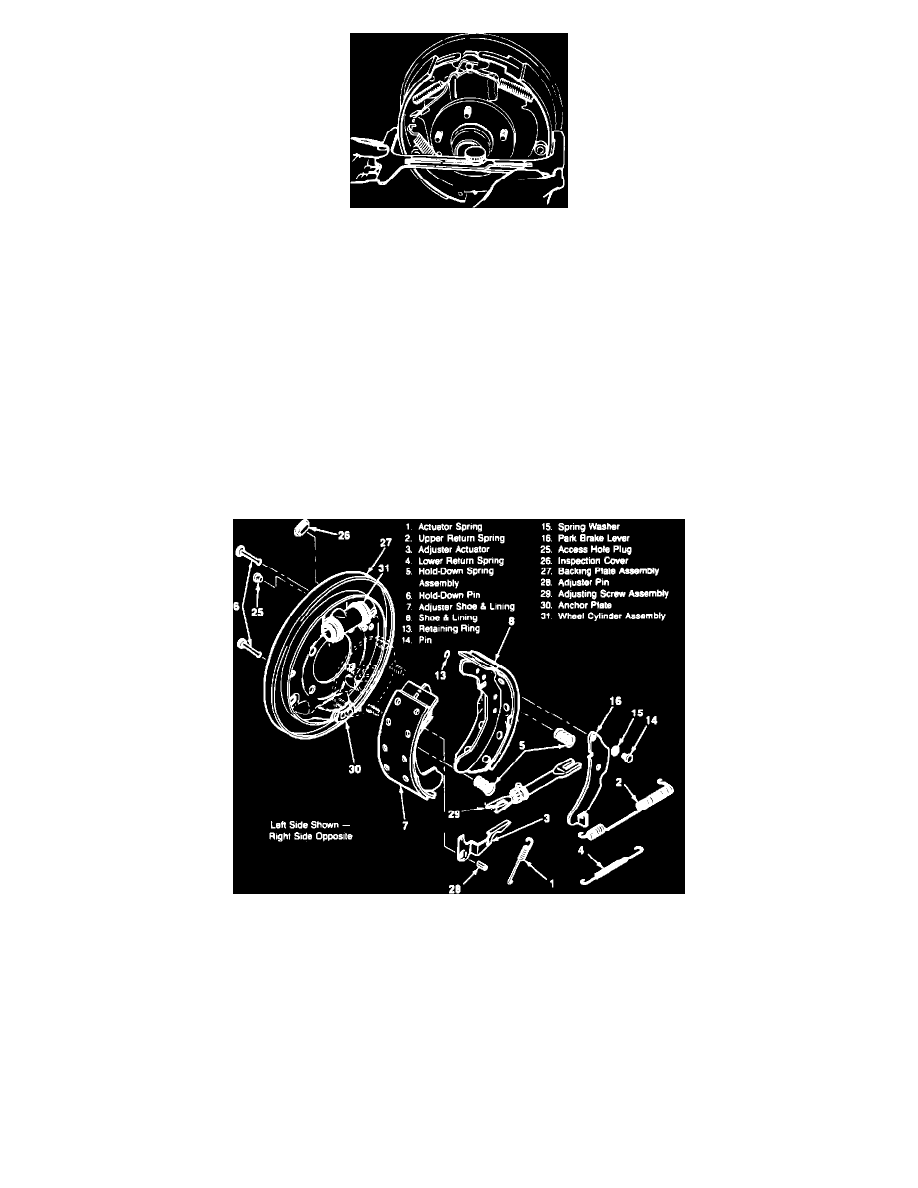
Fig. 8 Adjusting Brake Shoes To Brake Drum Inside Diameter
8.
Using suitable brake drum to shoe gauge, Fig. 7, measure brake drum inside diameter. Adjust brake shoes to dimension obtained on outside
portion of gauge, Fig. 8.
9.
Install brake drum, wheel and tire assembly.
10.
If any hydraulic connections have been opened, bleed brake system.
11.
Adjust parking brake. See Brake Shoe / Adjustments. See: Parking Brake System/Adjustments
12.
Inspect all hydraulic lines and connections for leakage, and repair as necessary.
13.
Check master cylinder fluid level and replenish as necessary.
14.
Check brake pedal for proper feel and return.
15.
Lower vehicle and road test.
CAUTION: Do not severely apply brakes immediately after installation of new brake linings or permanent damage may occur to linings. Brakes
must be applied moderately during first several hundred miles of operation to ensure proper burnishing of linings.
With Leading/Training Brakes
For additional information see Notes, Warnings, and Hints. See: Fundamentals and Basics
Exploded View Of Drum Brake Assembly.
1.
Install parking brake lever to shoe with spring washer, pin and retaining ring. Ensure concave side of washer faces parking brake lever.
2.
Install adjuster pin into shoe.
NOTICE: Pin must project 6.8-7.0 mm (0.268-.276 inch) from side of shoe where adjuster actuator is installed.
3.
Apply suitable lubricant to threads of adjuster screw, inside diameter of socket and socket face.
4.
Position brake shoes on a clean, flat surface, then install upper return spring to shoes.
CAUTION: The spring must not be stretched to a length exceeding 8.04 inches.
NOTE: For additional information see Brake Spring Removal and Installation Notes. See: Fundamentals and Basics