
K 2500 Truck 4WD V8-379 6.2L DSL VIN C FI (1989)
J 6435 Snap Ring Pliers
1. Clutch plate and hub assembly (2).
2. Pulley (6).
^
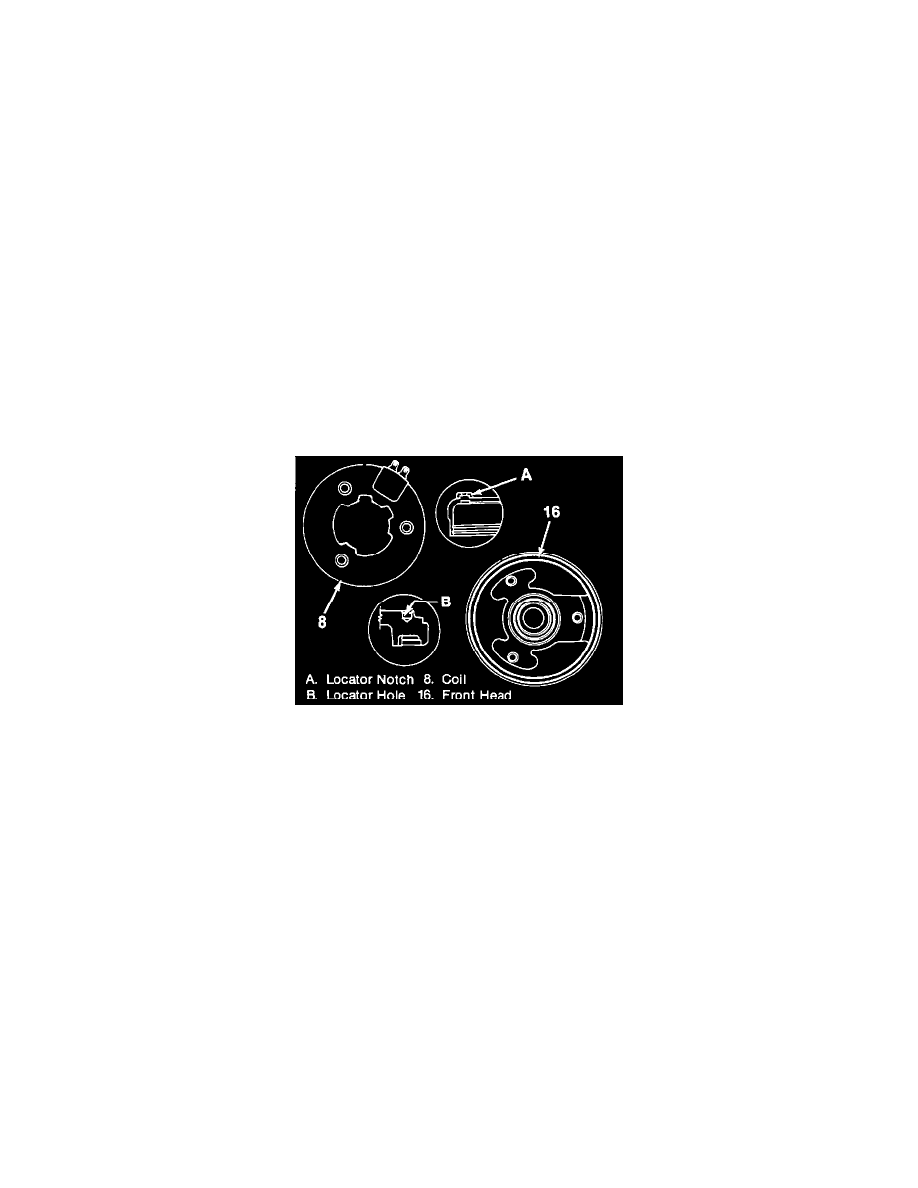
Mark or scribe the location of the clutch coil (8) to terminal on the compressor front head (16).
3. Clutch coil assembly (8).
^
Coil housing retaining ring (7) with J 6435.
^
Using a large screwdriver or small pry bar, pry the clutch coil away from the front head. If necessary, hand impact a blow to the screwdriver
handle or pry bar to break the adhesive bond of the clutch coil to the front head.
Clean
^
Adhesive from the coil by scraping with a putty knife.
^
Remove any adhesive around the three locator hole areas of the front head and around the three clutch coil locator protrusions at the rear of the
clutch coil housing.
^
Use a suitable solvent to clean the coil.
Important
^
After applying Loctite Depend, Loctite Trim and Detail Adhesive or equivalent to the coil, install all the clutch parts to the compressor Allow
30 minutes for the adhesive to set.
Install or Connect
Tool Required:
J 6435 Snap Ring Pliers
Adhesive Fill Guide
1. Adhesive to the clutch coil (8).
^
Place the clutch coil "face down" and apply the adhesive in a circular bead around the three coil locator protrusions.