
K 2500 Truck 4WD V8-379 6.2L DSL VIN C FI (1989)
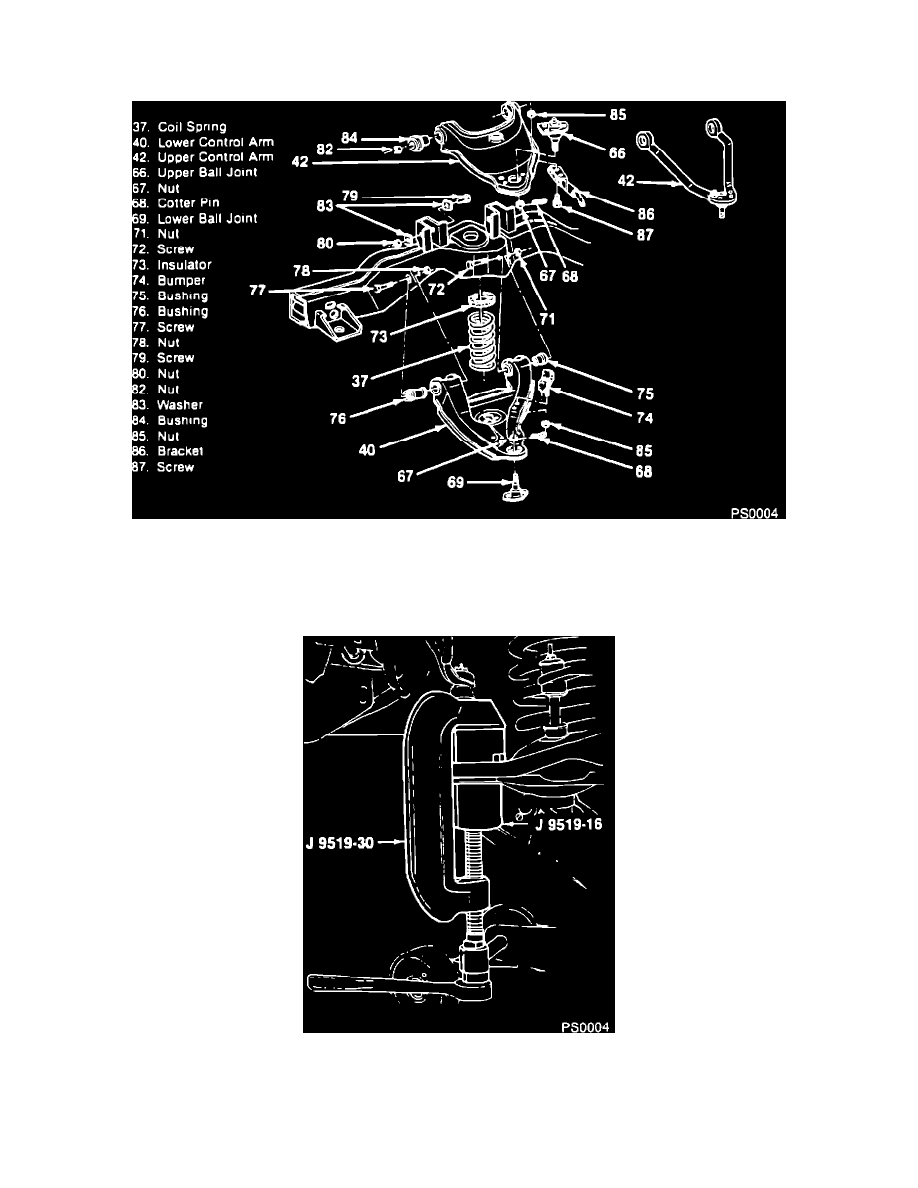
Figure 8 - Removing the Lower Ball Joint
-
Use tools as shown in figure 8.
Figure 2 - Control Arms and Components
Install (figure 2)
1.
New lower ball joint (69) to the lower control arm (40).
Figure 9 - Installing the Lower Ball Joint
- Press in the ball joint using tools in figure
9. The ball joint will bottom on the control arm.
2.
New lower ball joint (69) to the knuckle.