
K 2500 Truck 4WD V8-379 6.2L DSL VIN C FI (1989)
12.
Install the foam fillers (P/N 15686089 (Front on RH or Rear on LH) and 15686090 (Rear on RH or Front on LH) to the front and the back of the
glass area on the door panel with the small tail folded in between the inner and the outer door panel (Figure 4).
13.
For C/K Pickups and Utilities, remove the front door outer belt seal by prying the clips from the door frame.
For C/K Suburbans and Crew Cabs, remove the front and rear door outer belt seals by prying the clips from the door frame.
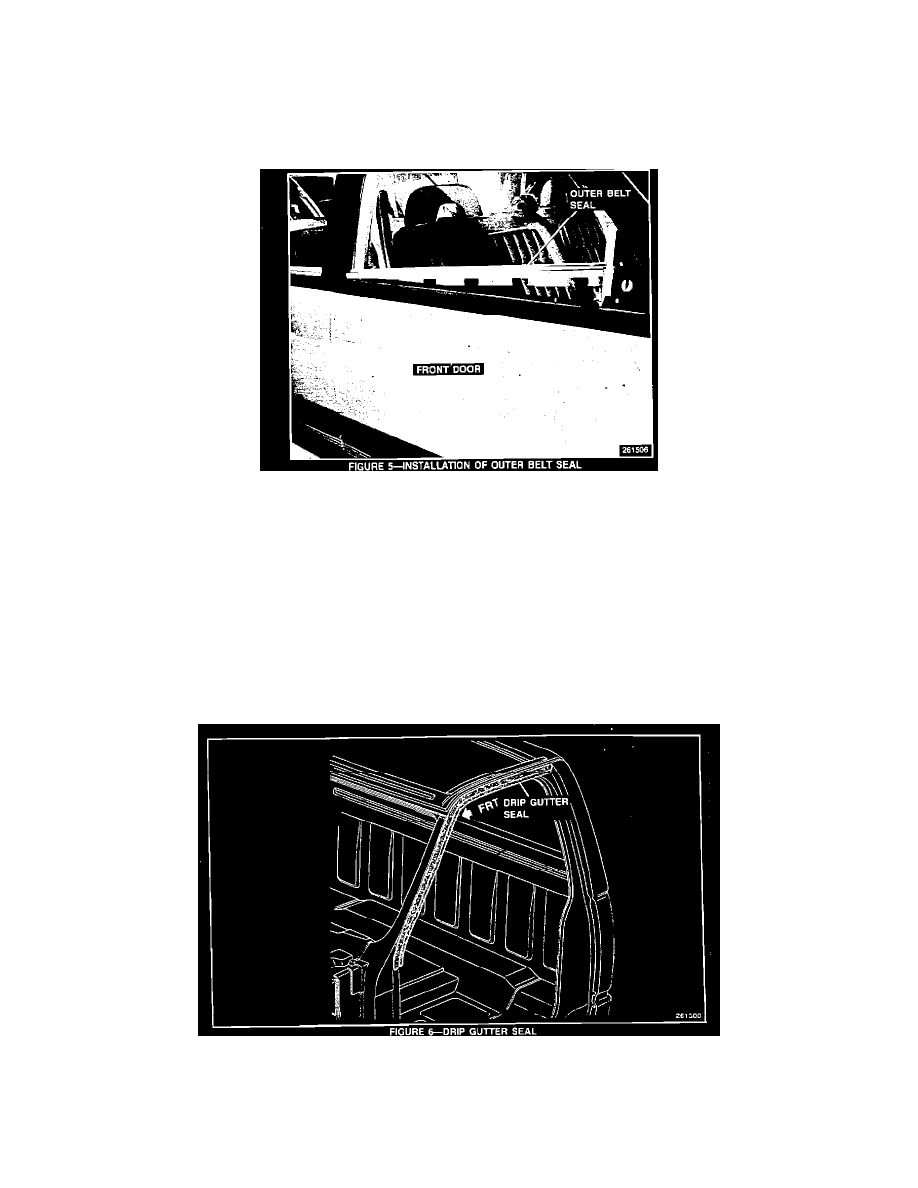
14.
Install a redesigned front door outer belt seal (P/N 15697276 (RH) or 15697277 (LH)) by sliding the back end of the seal on an angle towards the
back corner of the door glass and then securing the seal into place (Figure 5).
For C/K Suburbans and Crew Cabs, install the redesigned rear door outer belt seal (P/N 15697008) by securing the outer belt seal to the outer door
panel.
NOTE:
For C/K Suburbans and Crew Cabs: If a redesigned outer belt seal is installed on the front door, a new seal must also be installed on the rear door since
there is a slight appearance change between the old and the new parts.
15.
Install the door trim panel (refer to the appropriate Service Manual section 10A1 "Door Trim Panel Replacement" for installation instructions.
A-PILLAR SEALING:
1.
Remove the drip gutter seal (secondary door weatherstrip) by pulling the weatherstrip from its flange (Figure 6).
2.
Install a redesigned drip gutter seal (For C/K pickups and C/K utilities: P/N 15694749 (LH) or 15694750 (RH) and for C/K Suburbans and Crew
Cabs P/N 15959423 (LH) or 15959422 (RH).