
K 2500 Truck 4WD V8-379 6.2L DSL VIN C FI (1989)
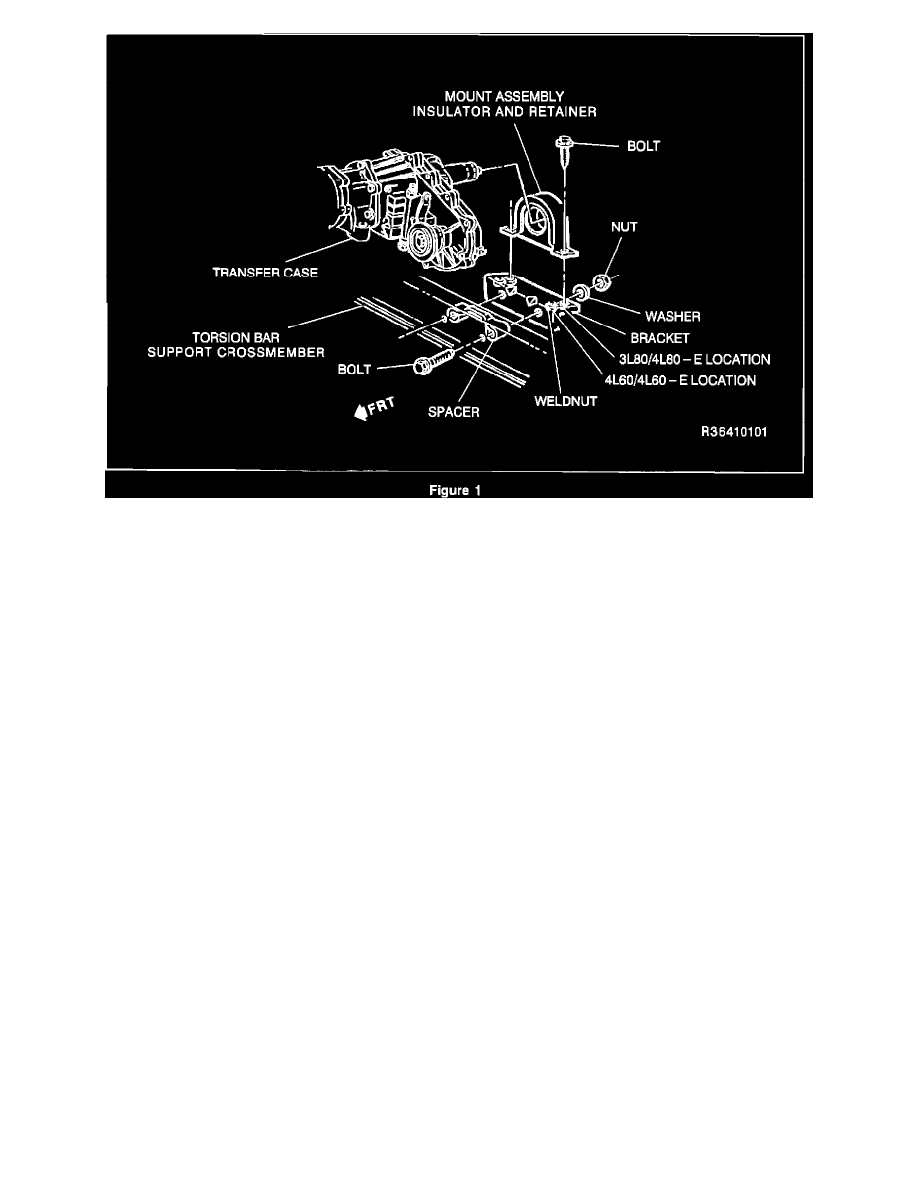
SERVICE PROCEDURE: (Figure 1)
1.
Raise vehicle on hoist.
2.
Install the rubber insulator around the transfer case extension and slide the retainer over the rubber insulator.
3.
Loosely bolt the retainer to the bracket. The retainer should be bolted to the forward bracket holes for a 4L60 or 4L60-E transmission and the
rearward bracket holes for a 3L80 or 4L80-E transmission.
4.
Mark the left-to-right hole locations by aligning the bracket flat against the rear side and parallel with the bottom edge of the torsion bar support
crossmember.
5.
Drill a 13 mm (1/2") hole through both locations and both faces of the torsion bar support crossmember.
Important:
The holes through the torsion bar support crossmember must be parallel and equally spaced through both faces. If they aren't, it may be difficult to install
the spacer.
6.
Place the spacer inside the torsion bar crossmember, align the fastener holes (two places) and insert two bolts through from the front of the torsion
bar crossmember.
7.
Install the bracket to the torsion bar support crossmember using the two installed bolts. Align the bracket parallel with the crossmember and install
the washers and nuts. Torque the bracket-to-crossmember fasteners to 70 N-m (52 lbs.ft.).
8.
Torque the retainer-to-bracket fasteners to 45 N-m (33 lbs.ft.).
Important:
Be sure the metal retainer and bracket do not touch the transfer case. Metal-to-metal contact will create a ground-out condition and may cause noise or
vibration.