
K 2500 Truck 4WD V8-454 7.4L VIN J SFI (1997)
-
Pull on the cooler line and remove the connector from the fitting.
3. Clips and brackets securing the oil cooler line to the engine and transmission.
4. Two nuts securing the two oil cooler lines to the radiator.
5. Remove the oil cooler line from the vehicle.
INSTALL OR CONNECT
1. Position the cooler lines to the vehicle.
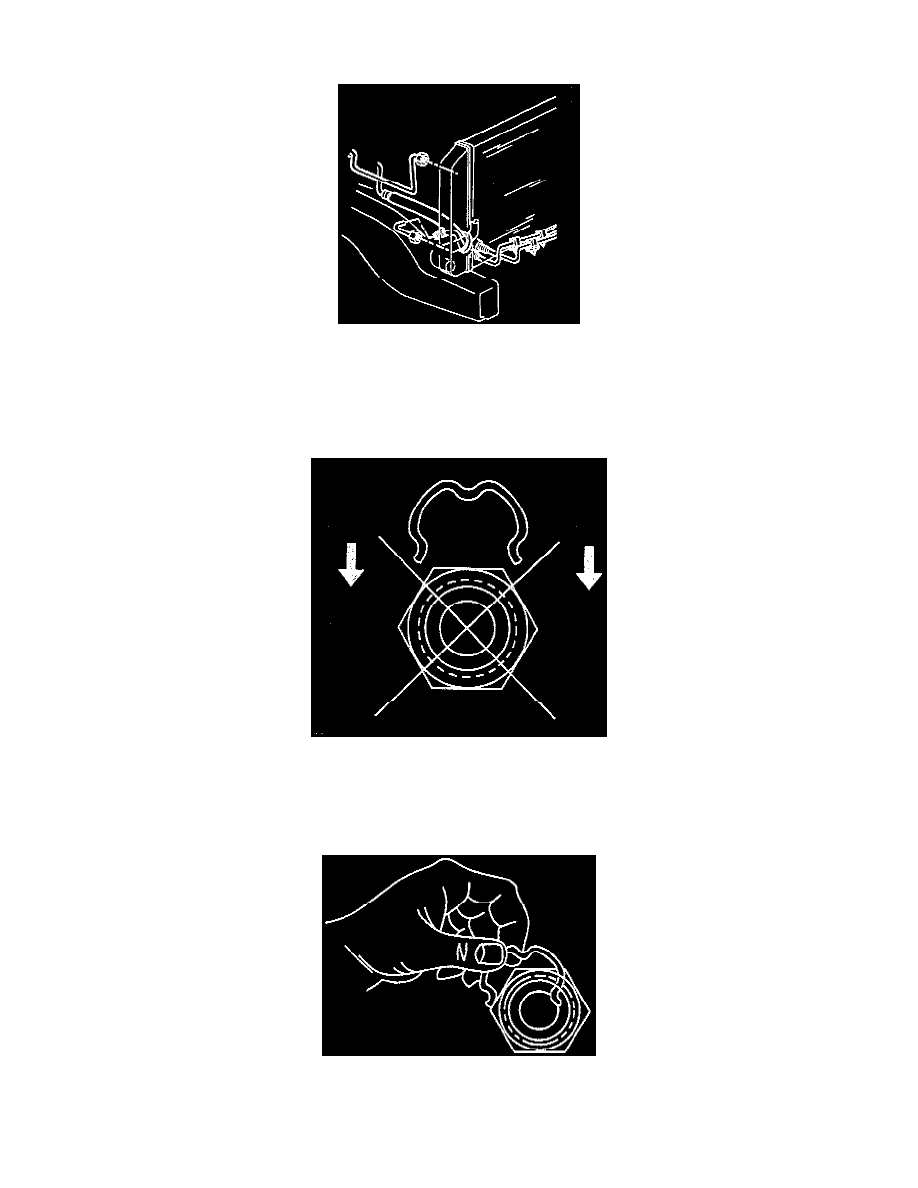
Important: The image depicts the improper installation of the retainer ring to the connector fitting. Failure to follow the proper installation
procedure could result in cooler line separation from the connector fitting.
2. Install the retaining rings (E-clips) onto the two quick connect fittings by using the following procedures:
-
Obtain a "NEW" retaining ring for assembly.
-
Hook one of the ends of the retainer spring into one of the quick connector slots.