
S15/T15 2WD Jimmy L4-151 2.5L (1985)
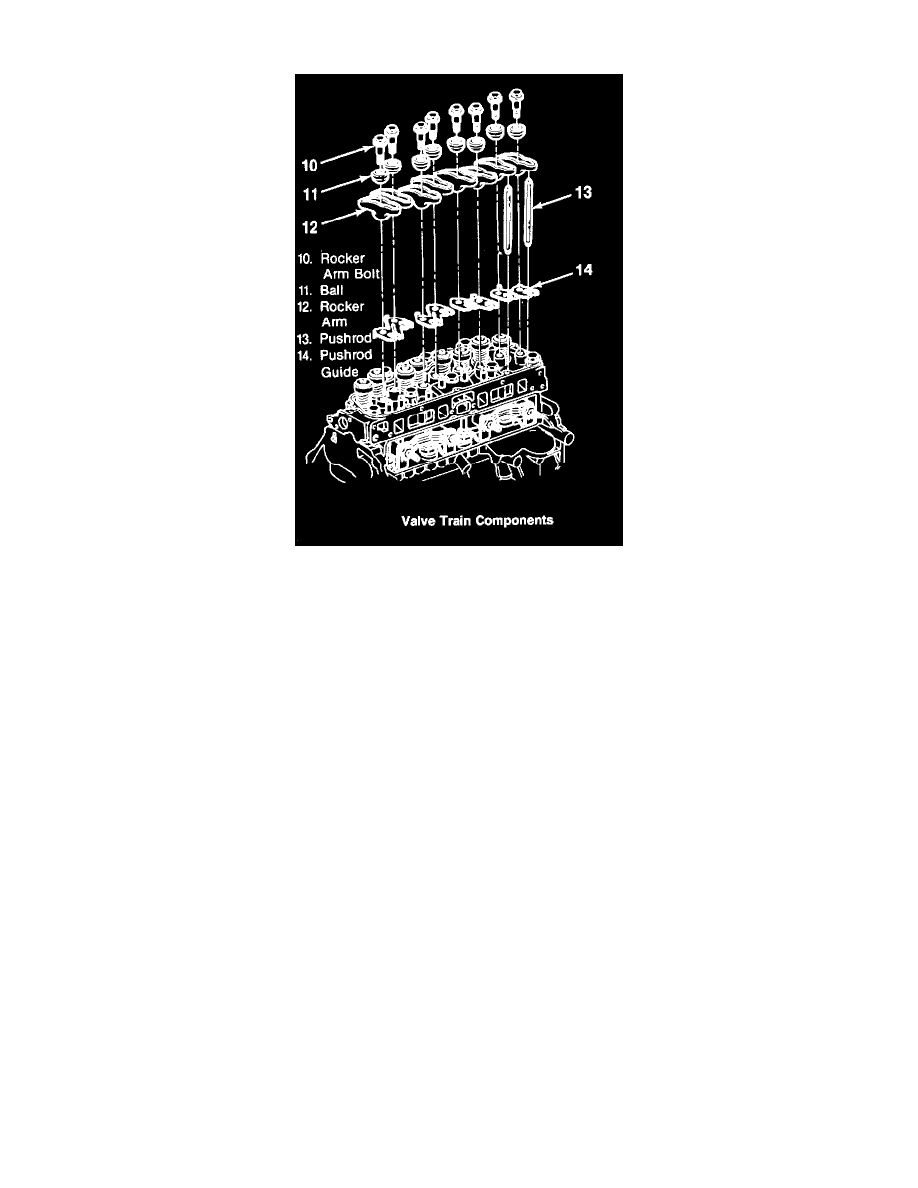
Rocker Arm Assembly: Service and Repair
Rocker Arm And Pushrod Replacement
ROCKER ARM AND PUSHROD
REPLACEMENT
1. Disconnect battery ground cable.
2. Remove glove box assembly, if necessary, then the engine cover.
3. Remove air cleaner assembly, then disconnect spark plug wires from valve cover.
4. Remove PCV hose and EGR valve.
5. Remove engine oil filler tube, then disconnect vacuum pipe rail from intake manifold and thermostat housing.
6. Remove valve cover attaching bolts and the valve cover.
Note: Do not pry on the rocker arm cover. Damage to sealing surface may result.
7. Remove rocker arm bolt and ball, then the rocker arm(s) and pushrod(s).
NOTE: If only pushrods are being replaced, loosen rocker bolt and swing arm away from pushrod, then remove pushrod through hole in cylinder
head.
3. Rocker arm with ball.
4. Pushrod.
5. Pushrod guide (if required).
Caution: Store used components in order so they can be reassembled in the same location.
- Pushrod guides are different and must be reassembled in original location.
Inspect
- Rocker arms and balls at their mating surfaces. These surfaces should be smooth and free from scoring or other damage.
- Rocker arm areas which contact the valve stems and the sockets which contact the pushrods. These areas should be smooth and free of
damage and wear.
- Pushrods for bending. Roll the pushrod on a flat surface to determine if it is bent. Replace if necessary.
- Ends of the pushrods for scoring or roughness.
- Rocker arm bolts for thread damage.