
S15/T15 4WD Jimmy L4-151 2.5L (1985)
Intake Manifold: Service and Repair
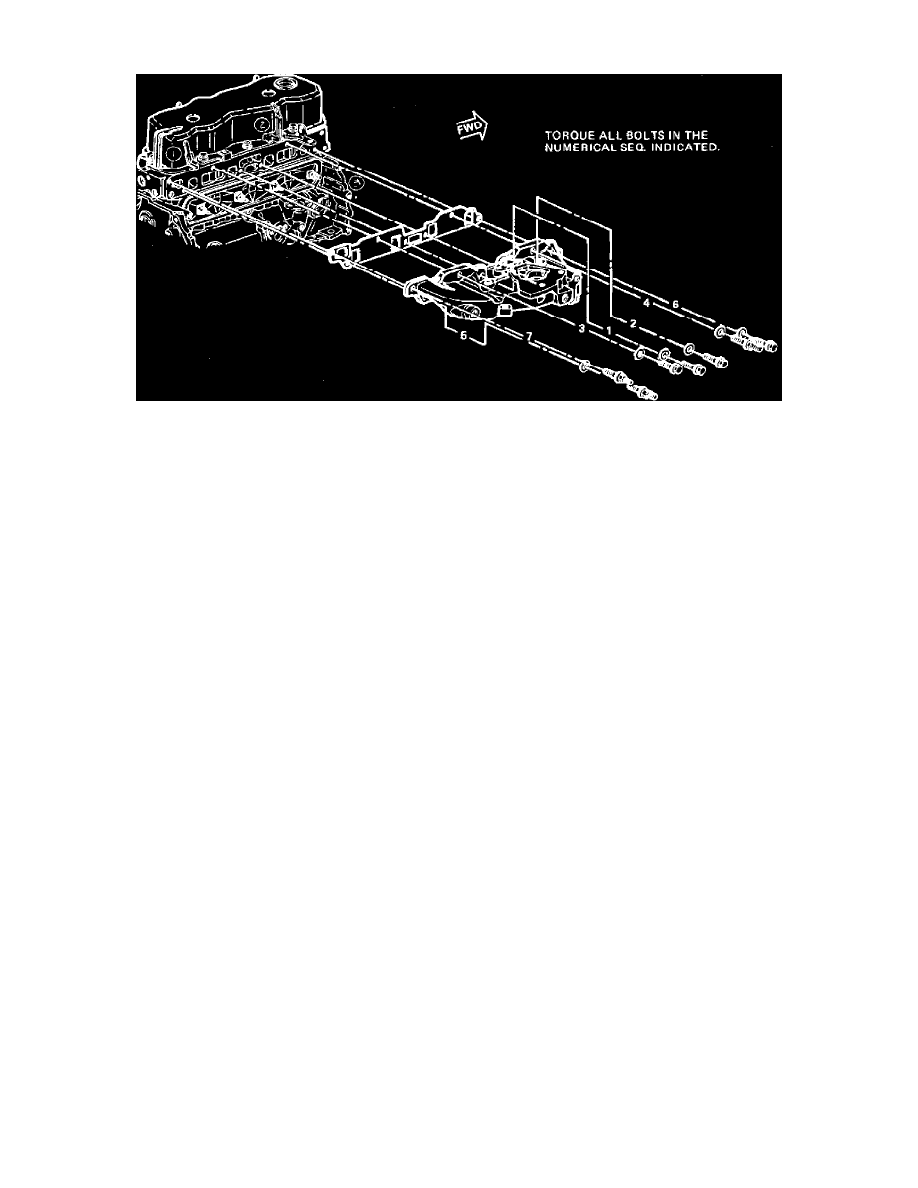
Fig. 3 Intake manifold installation & bolt torque sequence
1.
Disconnect battery ground cable, drain cooling system and remove air cleaner.
2.
Disconnect necessary electrical connectors from injector assembly, sensors and solenoids.
3.
Disconnect accelerator, TV and cruise control cables, as equipped.
4.
Disconnect fuel and vacuum pipes at injector and manifold. To prevent possibility of fire or injury, allow fuel system pressure to bleed off
before servicing fuel system components.
5.
Disconnect bypass and heater hoses from manifold.
6.
Remove alternator rear adjusting bracket, then disconnect alternator brace and position aside.
7.
Disconnect necessary vacuum hoses and remove vacuum pipe from brace at thermostat housing.
8.
Disconnect coil from manifold.
9.
Remove manifold retaining bolts then the manifold and gasket.
10.
Ensure manifold and cylinder head mating surfaces are clean, position new gasket and manifold on head, then install retaining bolts hand tight.
11.
Torque intake manifold bolts to specifications in sequence shown in Fig. 3.
12.
Reverse remaining procedure to complete installation.