S15/T15 4WD Jimmy L4-151 2.5L (1985)

Alignment: Service and Repair
Front Caster and Camber Adjustment
Before checking or adjusting caster and camber angles, jounce vehicle at least 3 times to prevent false geometric readings.
4 X 2 MODELS
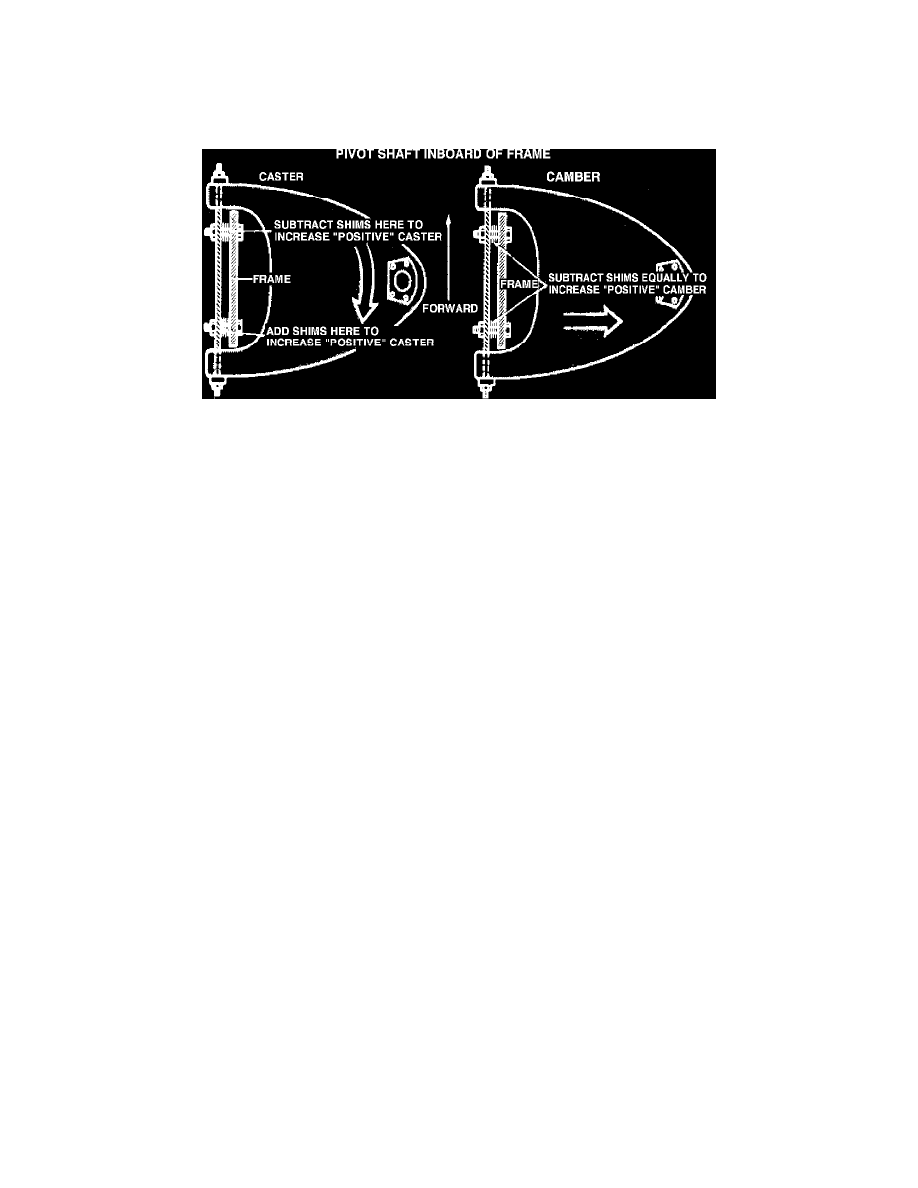
(Figure 1) Caster & camber adjustment. 4 x 2 models
Caster and camber adjustments are made by shims inserted between upper control arm shaft and frame bracket, Fig. 1. Add, subtract, or transfer shims
to change readings as noted below.
To adjust caster and/or camber, loosen upper control arm shaft to frame nuts, then add or subtract shims as necessary and torque upper control arm
shaft to frame nuts to 45 ft. lbs.
Caster, Adjust
Transfer shims from front to rear, or rear to front. The transfer of one shim from rear to front bolt will decrease positive caster.
Camber, Adjust
Change shims at both front and rear of shaft.. Adding an equal amount of shims at both front and rear locations will decrease positive camber.
After adjustment, the shim pack should have at least two threads of bolt exposed beyond the nut. The difference between front and rear shim packs
must not exceed 0.40 inches.
4 X 4 MODELS
Caster and camber adjustments are made by cam mounted upper control arm attaching bolts.
To adjust caster and/or camber, loosen upper control arm to frame attaching bolt nut, then rotate cam by turning bolt head.
Caster, Adjust
To increase positive caster, move front cam lobe inward and rear cam lobe outward.
Camber, Adjust
To increase positive camber, move both front and rear cam lobes inward.
When proper alignment settings are established, torque upper control arm to frame attaching bolt nut to 70 ft. lbs.
