
S15/T15 Jimmy 2WD L4-119 1.9L VIN A 2-BBL (1983)
1.
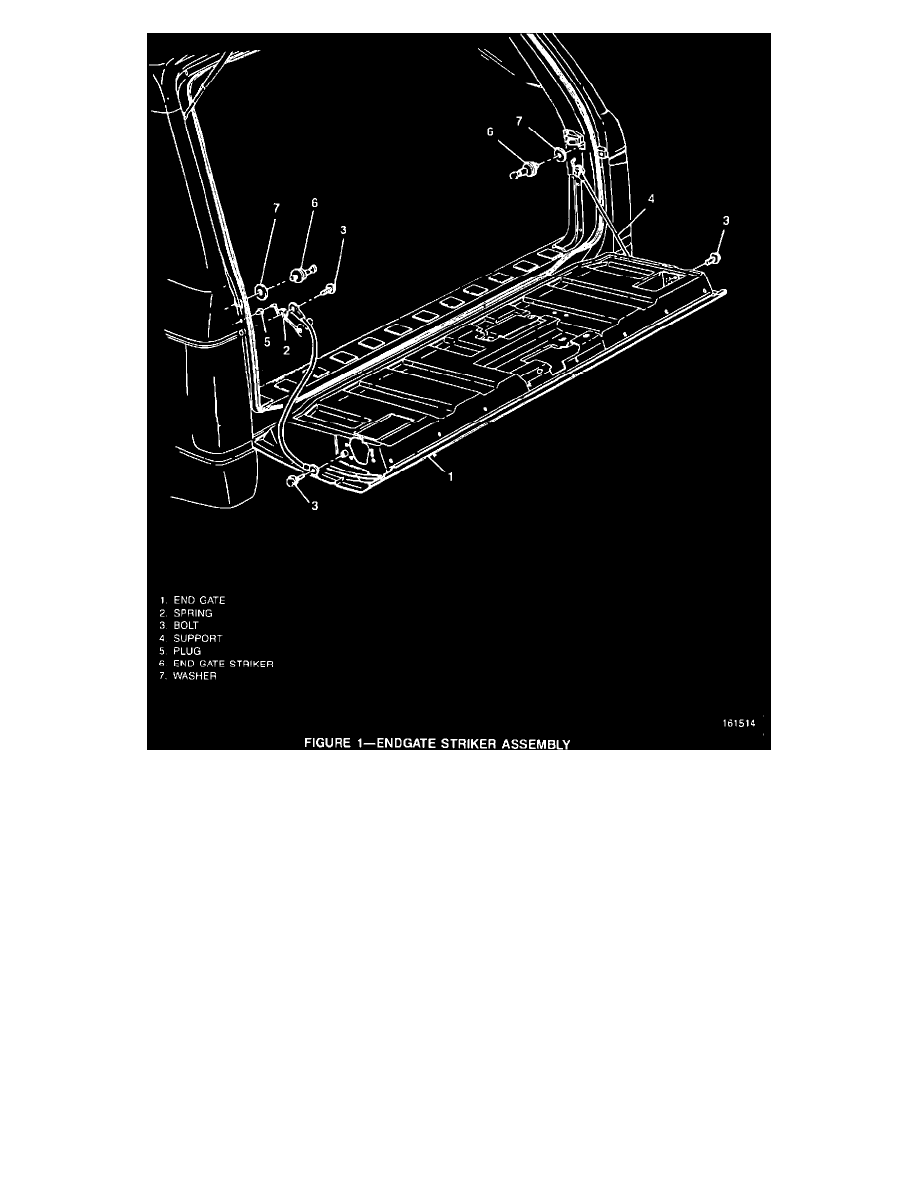
With the end gate open, use a grease pencil to mark around the circumference of each washer (Figure 1, "7") located behind the strikers.
2.
Unscrew and remove the existing striker assemblies (Figure 1, "6") from the vehicle.
3.
Loosely assemble the new striker (Figure 1, "6") (P/N 15700881) and washer (Figure 1, "7") and reinstall using the pencil marks as a guide.
4.
Install the striker assemblies (Figure 1, "6") using a T50 Torx(R). Torque to 63 N-m (47 lbs. ft.).
5.
Check for proper operation and end gate flushness. Adjust the striker assemblies if required.
The end gate lock strikers can be adjusted up or down, fore or aft, to obtain proper closure of the end gate. The end gate should seal completely
with minimum closing effort. Torque the striker bolts to 63 N-m (47 lbs.ft.).
SERVICE PARTS INFORMATION
Part Number
Description
Qty/Veh.
15700881
Striker Assy.
2
Parts are expected to be available on 4/6/92. In case of limited inventory, parts will be placed on 400 control to waive VIP surcharges. Only verifiable
emergency orders will be accepted. GMSPO will make every effort to obtain parts. However, the part will be shipped premium transportation at the
dealer's expense and all other order types will be placed on backorder until the 400 control is removed.