
S15/T15 Jimmy 2WD L4-119 1.9L VIN A 2-BBL (1983)
Brake Shoe: Service and Repair
Installation
For additional information see Notes, Warnings, and Hints. See: Fundamentals and Basics
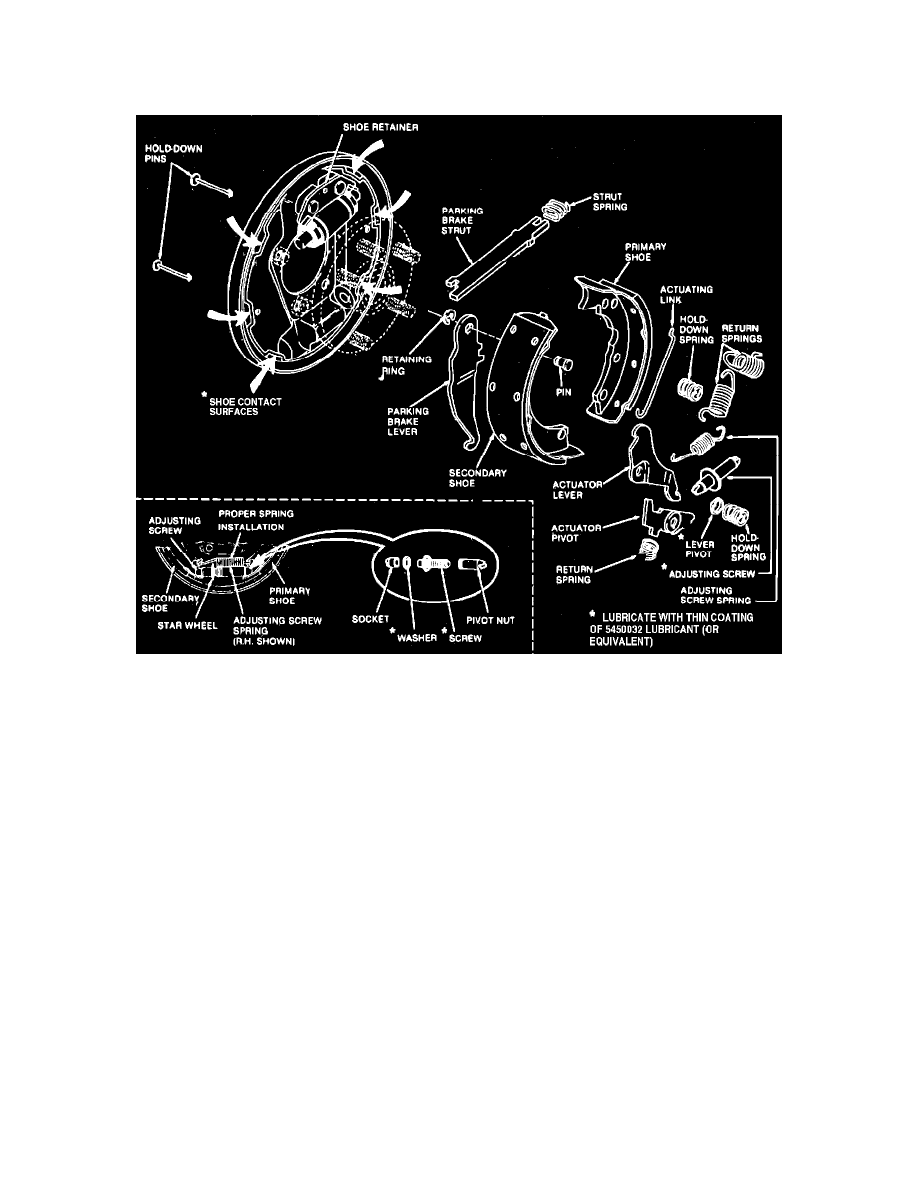
Fig. 3 Exploded view of drum brake assembly.
1.
Lightly lubricate backing plate shoe contact surfaces with suitable brake lube.
2.
Install parking brake lever on secondary shoe.
3.
Connect primary and secondary brake shoes with adjusting screw spring, then position adjusting screw in same position from which it was
removed. Ensure adjusting screw spring star wheel does not contact adjusting screw spring after installation, and also ensure righthand thread
adjusting screw is installed on left side of vehicle and lefthand thread adjusting screw is installed on right side of vehicle.
4.
Spread brake shoes apart to clear axle flange, then install parking brake cable on lever. Position brake assembly on backing plate.
5.
Spread brake shoes slightly, then install parking brake strut and spring. Spring end of strut engages the primary shoe, while the other end engages
the parking brake lever and secondary shoe.
NOTE: For additional information see Brake Spring Removal and Installation Notes. See: Fundamentals and Basics
6.
Install actuator lever, pivot and return spring, then hook actuating link in shoe retainer.
7.
Lift actuator lever and hook actuating link to lever.
8.
Install hold-down pins, lever pivot and hold-down springs.
9.
Install primary and secondary return springs using suitable brake spring pliers.