
S15/T15 Jimmy 2WD L4-119 1.9L VIN A 2-BBL (1983)
Rocker Arm Assembly: Service and Repair
REMOVAL
1.
Remove cam cover.
2.
Alternately loosen rocker arm shaft bracket nuts and remove nuts from brackets.
3.
Remove springs from rocker arm shaft, then the rocker arm brackets and arms, keeping components in order..
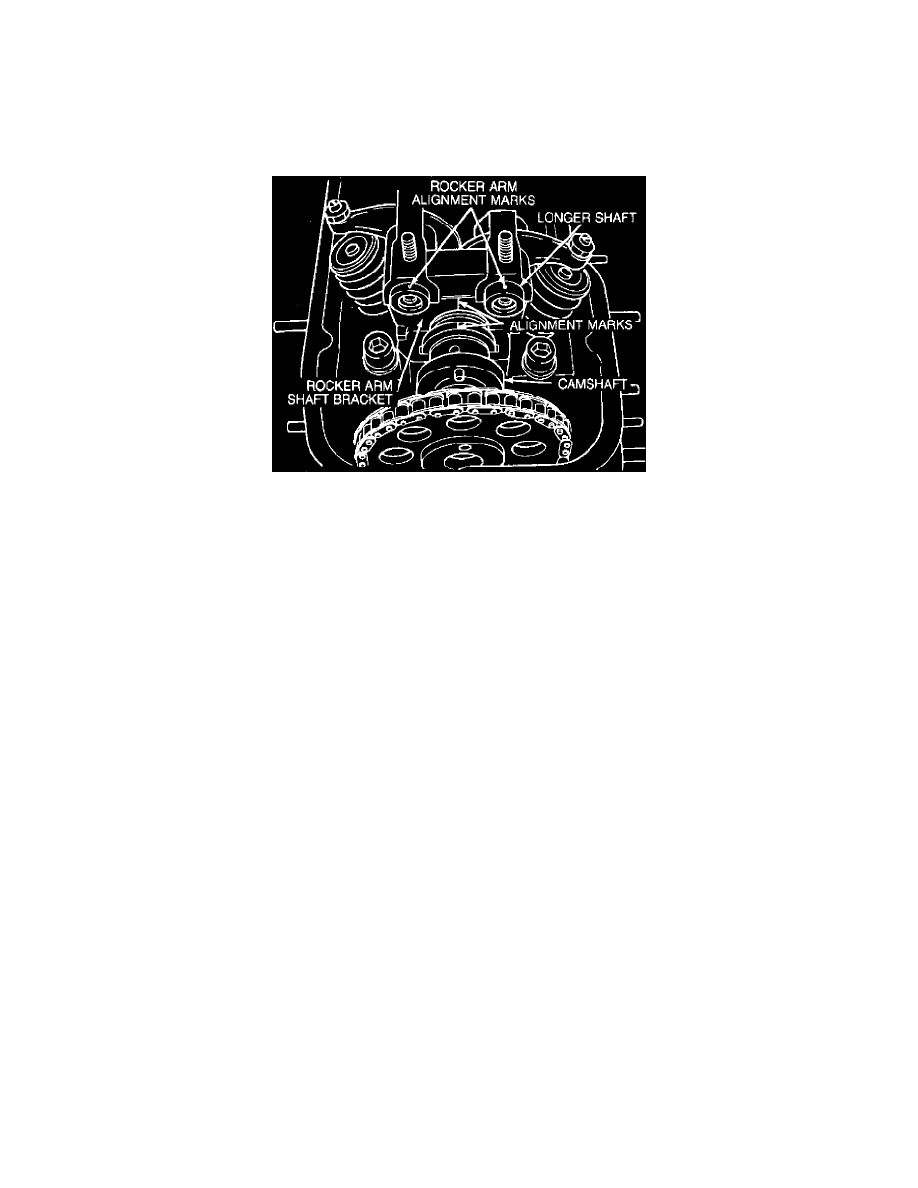
Fig. 4 Rocker arm shaft installation
INSTALLATION
1.
Lubricate rocker arms, shafts and valve stems with engine oil.
2.
Install the longer rocker shaft on the exhaust valve side and the shorter rocker shaft on the intake valve side, Fig. 4, with the aligning marks facing
front.
3.
Install rocker arm shaft brackets and rocker arms on the rocker arm shafts with the cylinder number on the upper face of the brackets facing toward
front of engine.
4.
Align the mark on the No. 1 rocker arm shaft bracket with the mark on the rocker arm shafts.
5.
The exhaust side rocker arm shaft should project a greater distance from the face of the No. 1 rocker shaft bracket outer face than the intake side
rocker arm shaft when the rocker arm shaft stud holes are aligned with the rocker arm shaft bracket stud holes.
6.
Position rocker arm shaft springs between rocker arm shaft bracket and rocker arm.
7.
Ensure punch mark on rocker arm shaft is facing upward. Install rocker arm shaft bracket assembly onto cylinder head studs. Align mark on
camshaft with mark on No. 1 rocker arm shaft bracket.
8.
Torque rocker arm shaft stud nuts to 16 ft. lbs. Hold the rocker arm springs in position while torquing the stud nuts to prevent spring
damage.
9.
Adjust valves and install cam cover.