
S15/T15 Jimmy 2WD L4-119 1.9L VIN A 2-BBL (1983)
Engine Control Module: Service and Repair
Electronic Control Module
*** THIS PROCEDURE HAS BEEN UPDATED BY TSB #88-42, DATED 09/87
Some service replacement electronic control modules (ECM's) have contained a PROM. A PROM should not have been included in a replacement ECM
as it may not be the correct PROM.
When this situation is encountered, the PROM should be removed from the replacement ECM and the PROM from the vehicle should be installed.
*** THIS PROCEDURE HAS BEEN UPDATED BY TSB #88-283-6E, DATED 7/88
To prevent possible electrostatic discharge damage to electrical components:
-Do not touch the ECM connector pins or soldered components on the circuit board.
-When handling a PROM, CAL-PAK or MEM-CAL, do not touch the component leads and do not remove integrated circuit from carrier.
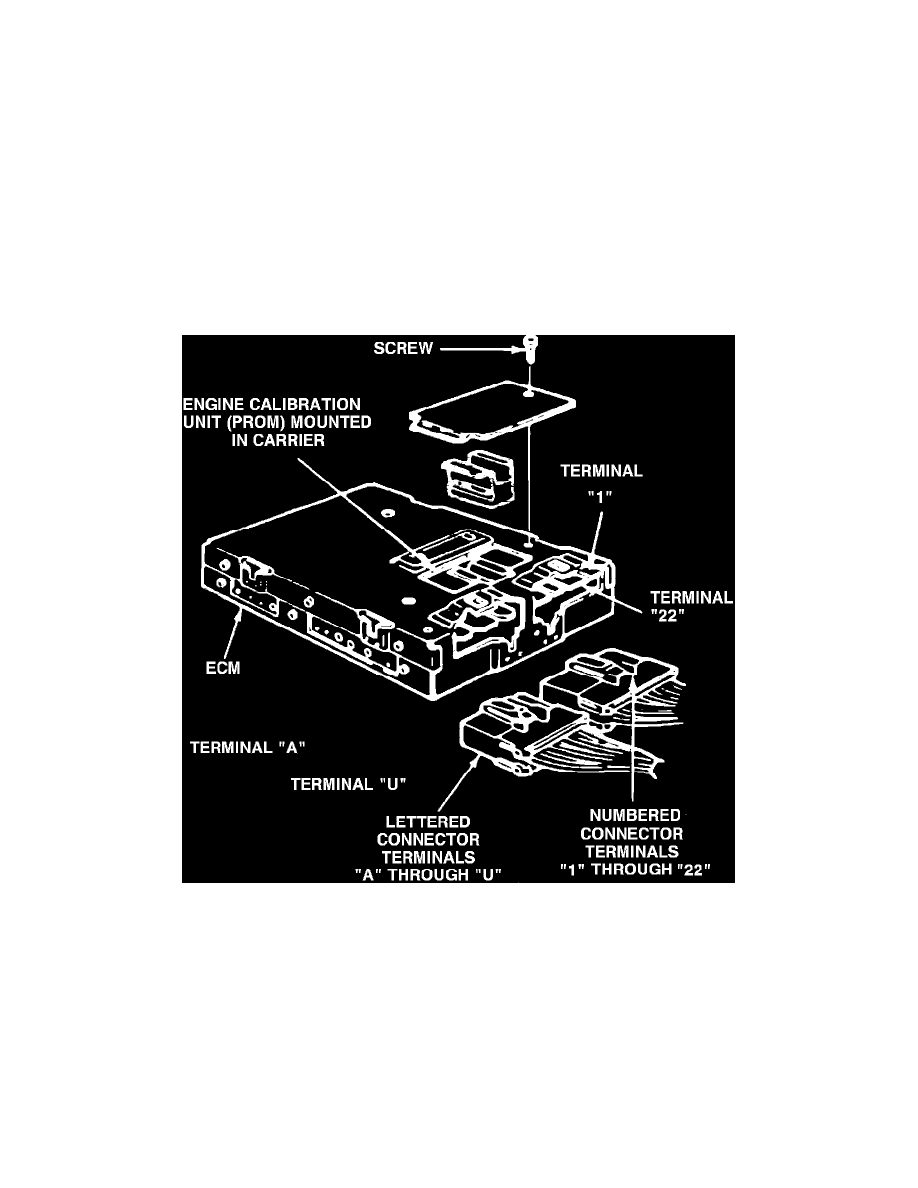
Fig. 249 Electronic Control Module (ECM)
1.
Disconnect battery ground cable.
2.
Disconnect numbered and lettered connectors from ECM, Fig. 249.
3.
Remove ECM mounting hardware, then the ECM from the passenger compartment.
4.
Reverse procedure to install. Replacement Electronic Control Modules are not equipped with engine calibration units (PROM). If PROM is to be
reused, care should be taken when removing it from defective ECM. See ``Prom, Replace'' for proper removal procedure.