
S15/T15 Jimmy 2WD L4-119 1.9L VIN A 2-BBL (1983)
Front Steering Knuckle: Service and Repair
4 X 2 MODELS
1.
Raise and support front of vehicle, then support lower control arm with suitable jack. Jack must be positioned between coil spring seat and ball
joint of lower control arm to obtain maximum leverage against coil spring pressure.
2.
Remove brake caliper, then the hub and rotor assembly.
3.
Remove splash shield to steering knuckle attaching bolts.
4.
Remove tie rod end from steering knuckle using tool J-6627, or equivalent.
5.
If steering knuckle is to be replaced, remove knuckle seal.
6.
Remove ball joint studs from steering knuckle using tool J-23742 or equivalent.
7.
Raise upper control arm to disengage upper ball joint stud from knuckle.
8.
Remove knuckle from lower ball joint stud.
9.
After removal, inspect tapered holes. If holes are out of round, or deformation or damage is observed, replace steering knuckle.
10.
Reverse procedure to install. Torque splash shield attaching bolts to 10 ft. lbs. When installing tie rod end, install tool J-29193 and torque to 15 ft.
lbs., then remove tool and torque to 40 ft. lbs.
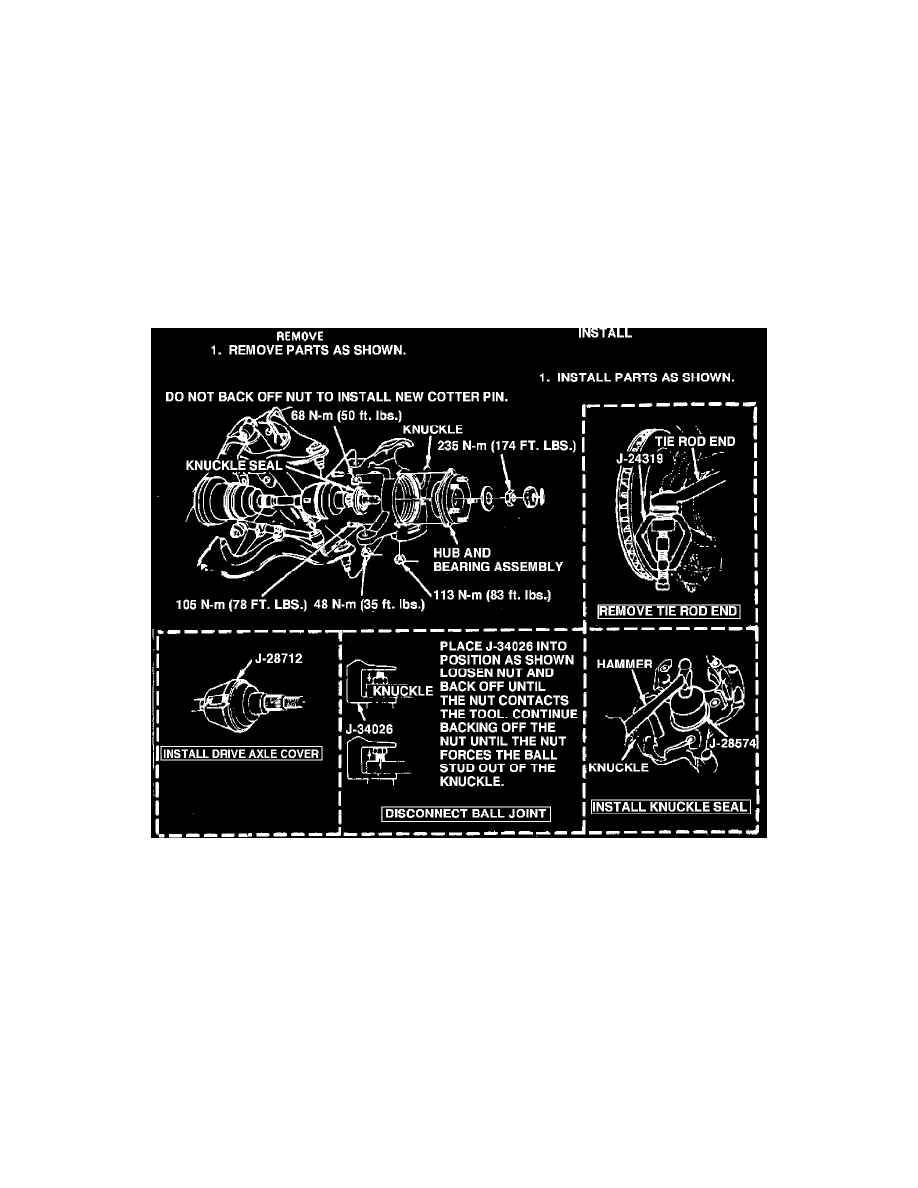
Fig. 18 Steering knuckle replacement. 4 x 4 models
4 X 4 MODELS
Refer to Fig. 18 for steering knuckle replacement procedure on 4 x 4 vehicles.